|

Pickups being mounted and installed.
|
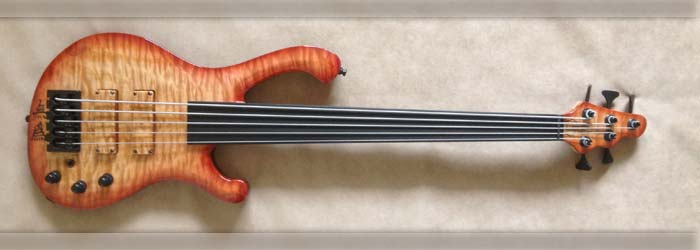
(4/22/15) Left: The control cavity is now complete. All wiring and fiber optics are in, pickups installed and I can now start work on the nut and getting strings on the instrument. Right: I have to put all the strings on in order to establish the correct locations for the nut slots for the strings. Only one chance to get this right!! |

PStrings on and working on the nut slots.
|
|

Good amount of the wiring done now - just need to install the pickups and get them connected up.
|
(4/21/15) Left: Audere in and most of the wiring cleaned up and in place. Jack socket also connected up. Just rounding everything now. Right: I am installing the pickups which means seating the adjustment screws and counter pressure padding. (surgical tubing). Just a little bit more wiring to do inside and then nut goes on. |

Pickups being mounted and installed.
|
|
Got the LEDs going and the fingerboard lights up. Now the preamp needs to be wired in.
|
(4/19/15) Left: LEDs are connected up and are working. My customer wanted a custom color configuration which i was able to do! I am now installing the Audere system and connecting it to everything else! Right: Moving along - Audere systemin and I'm getting the 3 stacked pots situated. Soon be done! |

Gpream almost done, getting the pots and situated and working on all the wiring.
|
|

Working on getting some of the internal wiring threaded through the body.
|
(4/14/15) Left: Getting battery contacts and wires set into the body. Also test-fitting the pream system to make sure there's no interference with LED light sources. Right: I have all 3 batteries wired in, jack plug fitted to the body and I'm now working with the Audere preamp to get that fitted inside the cavity. Should all fit. |

Power is now run to the control cavity and I'm starting on getting the Audere system installed.
|
|

I drilled and installed the neo-magnets which will hold on the covers.
|
(4/12/15) Left: Neodymium magnets installed for covers. More things happening - I lost a day or two due to sickness so it's all systems go here to get this wrapped up! Right: I nimbered all the fiber optic cables so that I can arrange them properly. Have all my resistors and switches and shrink tubing so going to get that done! |

Fiber Optic cables numbered so I can get the LEDs installed.
|
|

Copper shielding now added to the inside of the pickup recesses.
|
(4/9/15) Left: Pickup cavities have been cleaned out, I have also cleaned out the wire channels and added copper shielding to all internal surfaces. This will allow me to get the pickups installed! Right: I have moet of the copper shielding into the control cavity now. I think I will add the magnets before I complete this though. |

Control cavity getting copper shielding.
|
|

Cleaning out the insides of the cavities.
|
(4/7/15) I can't move ahead with fiber optics or wiring until I have the copper shielding inside the cavities, and I can't add copper shielding until I take care of the overspray that inevitably gets in these spaces during finishing. Right: fitting tuners which means cleaning overspray out off holes and aligning hardware. |

Fitting the tuners. Holes are always filled with overspray and you have to be pretty careful removing that. Tuners are hels in place by small screws at the back.
|
|

Getting the pickups pre-assembled.
|
(4/6/15) The pickup bobbins are now being fitted to the pickup covers. They look awesome when dropped into the top because the grain on the pickups was cut from the top itself so the grain is continuous across both. I will post a pic of that when I get these installed into the instrument. Right now I am working on the cavities removing excess spray material before I start adding copper shielding. Lots to do!! |
|

String ferrules have been added to the back of the body.
|
(4/5/15) I'm now in the race to the finish line with the assembly process. The first job was some cleanup in some of the cavity areas. I then had to carefully clean out the holes for the string ferrules with a dremel tool until the metal parts were able to fit in. I then glued and pressed them in and they are now the first hardware on the bass and looking pretty good. Next task will be preparation of the control and battery cavities. |
|

Front of instrument after finishing - beautiful!
|
(4/3/15) The front of the bass is just like I was hoping it would be. The Sienna Sunburst is a great color and compliments the woods on the front and back very well. It's not too dark round the edges to subtract from the inlay but it adds a beautiful accent to the shape of the bass. I have to get the fingerboard cleaned up and treated and get the pickups assembled. Lots of work to do in as short a time as possible. Can't wait though! |
|

Back of bass after Poly Resin finish
|
(4/3/15) Just got this bass back from my trusty finisher and I am very happy with the quality and the way it looks. The photo on the left shows the back of the bass with the two cavity covers in place. Colors are great and the woods look beautiful. This is where the real "handle with care" work starts as I cut, scrape, drill and glue my way to a complete assembly. I spent some time cleaning out the cavities and we're ready to start adding hardware. |
|

Case has been embroidered
|
(3/20/15) I just had the Protec case embroidered for the bass. This is a guitar case since we have a relatively short scale bass and it just fits in one of these cases. Much better than using a standard bass case for many reasons. I'm having the instrument tinted and coated with a Poly Resin gloss finish so I am really looking forward to that being done so I can do the final assembly and get the fiber optics prepped and hooked up. |
|

Pickups are ready to go in the instrument - can't wait.
|
(3/9/15) I was very careful about the specificationd of the pickups for this bass - I wanted to make sure they would do a great job on the instrument and I am fairly certain they will more than do their job when we are all set up! I can't wait to hear what they sound like. Combined with the flexibility and tolan control of the Audere system I have a lot of confidence in the sound of this instrument. Will not be long until we find out!! |
|

Audere 4 band EQ system.
|
(3/5/15) This is the Audere 18v 4-band Equalizer that I will be installing in this bass. It provides the usual volume and balance controls along with High-Mid, Low-Mid, Bass and Treble. It will be controlled with three stacked knobs so that the front face of the instrument doesn't look cluttered. I use them in almost all my basses and I find these give a great deal of control over the sound of the bass and are made of excellent quality internal components. |
|

Covers for the back of the bass being sanded.
|
(2/27/15) I have been working on the details of the bass getting it ready for finishing.I got the two covers and the truss rod cover all sanded nice and smooth. I am also busy sanding the transition area between the neck and the body which also takes a lot of time. I also spent quite a bit of time sanding the entire headstock area and I also established my logo in the truss rod cover area which I wanted to do before finishing. |
|

More sanding so get the entire instrument smooth enough to be ready for finishing..
|
(2/19/15) More sanding. As with every instrument i build, the last stages involve intensive sanding through finer and finer grades of paper until the instrument is beautifully smooth all over. This can take days and I am trying to hurry this bass through that process. The danger is that I sand the skin off my fingers and find out I have a gig the next night - so have to be careful. This thing is about half way through the sanding process. |
|

Back to final sanding in preparation for finishing.
|
(2/17/15) It's time for some pretty intensive sanding to make sure all the surfaces are where I want them prior to finishing. I'm refining the curve at the back of the neck, and working on the intersection where the neck meets the body. These are typically the big time-consuming areas especially for a neck-through instrument. All the features are machined so I'm only worried about surfaces, blends and finishes at this point |
|

Holes for string trough ferrules are now established.
|
(2/15/15) The bass is just off the CNC where I machined in the five holes which will house the string ferrules permitting a string-through-body option for the instrument. Aside from some minor detail work (a few holes to drill and some sanding) this bass is essentially ready to go to finishing and become the amazing instrument we envisioned when we started. I am really looking forward to seeing the finished product!! |
|

Drilled the string holes through the body - nice feature.
|
(2/13/15) I have drilled the 5 holes to allow for the option of stringing the bass through the body, which on a shorter scale bass can be an advantage. The bridge allows for normal string retention but Hipshot bridges also provide holes in the bridge so that the strings can be treaded through from the back of the bass. All I have to do now is counterbore these holes to suit the appropriate bushings and I'm done! |
|

Holes for controls are done and all the bridge location points have been established..
|
(2/11/15) I spent some time today establishing the locations of the holes for the Audere preamp knobs and the two-way switch which will control the LED lighting on the side of the fingerboard. Each of these holes is slightly recessed to yield a flat surface for the potentiometers. I will sand these out to a nice smooth finish. You can also see that I have marked out the screw holes and the through-body string holes below the bridge area. |
|

Laser did a great job on the body preparing it for inlay.
|
(2/9/15) Surgery went successfully and I now have a nice clean recess pattern into which I will an inlay material. It will look great combined with the black hardware and fingerboard on the bass. I will get the rest of the body rubbed down to a smooth finish and then this beauty will go to finishing where it's appearance will be further transformed by a beautiful Sienna Sunburst tint and gloss finish. End result should be awesome! |
|

Almost ready to cut the recess for the inlay.
|
(2/7/15) The body has been marked and taped off like a hospital patient for surgery. I will probably use the laser to cut the recess for the inlay in this particular case because that will impart a more accurate inlay recess than the cnc could at this smaller scale. beam of light can create smaller redii than a small end mill so my goal is to burn deep enough to drop some inlay material in the green area and we should be fine! |
|

dry running the inlay process to make sure size and position are good.
|
(2/6/15) I have to add a custom inlay to this instrument in the space behind the bridge so I wanted to be sure everything would fit correctly before I cut into the top material. I ran the inlay artwork to scale on a separate piece of wood so that I could test its size and position and see how it looked. Seems to be about right and a good fit so I will finish up the test and if all goes well I will repeat the process in the instrument itself. |
|

Machining one of the pickup covers.
|
(1/11/15) I wanted to post the /images that related to the manufacture of the two pickup covers. The Maple tops were glued onto a solid base and the edges were carefully cleaned up. I then located them in a vice on the CNC and ran a program to clean out all the inside material so that the pickup bobbins fit perfectly inside! |

Pickup covers machined and ready for adjustment screw holes.
|
|

Creating the bobbins for the pickups.
|
(1/8/15) I found some photos I forgot I had of the construction of the pickups. Worth documenting because (at least to me) it's an interesting process. I draw the pickup flatwork in a vector program and that drawing is loaded onto the system that operates the laser. The laser cuts the shapes from a material called vulcanized fiber. The magnets for the poles of the pickups are then inserted into the fiber plates to create bobbins (more pics coming) |
|

All the shaping and drilling has been done on the headstock.
|
(1/7/15) The headstock has had all of its rough shaping done and I also drilled the holes for the tuners. With all that now done, I can start sanding this area to a nice smooth and flat finish. The headstock material is in every way as beautiful as the body material and this headstock is going to bring the whole instrument together design-wise. I will post another photo of the headstock after I sand the surfaces. Moving on... |
|

Pickup cover assemblies ready for machining.
|
(1/3/15) I now have the puckups tops glued onto a coupld of pieces of material that will become the complete pickup covers. I need to dress up the sides and then machine the profile of the pickup bobbins into the underside of each pickup so that the pickup hardware fits into the machined recess. Once that's done i will add the adjustment holes and sand and prep these for the final finishing process. It's all coming together. |
|

Doing pickup cover sub assemblies.
|
(12/27/14) This is one of the operations I was doing in the background, gluing up the pickup blocks so that I can cut out the wooden pickup covers from the underside. These will be machined to accept the pickup bobbins but will not be final assembles until the finishing process (which includes the pickup covers and the back cover plates) is finished. It is important that they match the top of the instrument since they share the same wood and grain. |
|

Cutting the socket in the body for the Neutrik jack input.
|
(12/26/14) In this photo I am machining the geometry for the Neutrik locking jack socket into the side of the body below the control cavity. I need to have this feature established before I get too far into the final sanding stages. I will now be sanding this bass between other operations because we are getting close to preparing it for the grain filler, tints and Polyester resin gloss finish which will make this instrument look fabulous! |
|

Back of instrument as I start to file and sand some of the finished features.
|
(12/24/14) This is the back of the instrument just before I get started to establish a nice edge break radius around the body, sanding the outer edges of the body - finish carving and sanding the neck/body joint area and also the neck/headstock area. I want to especially get the edges finish sanded because I need to cut in the recesses for the jack socket and the holes and relief for the control knobs and related switches. |
|

Refining the contouring of the top of the body.
|
(12/22/14) I am continuing with the shaping of the top plate. The objective is to curve the top to the wxtent that there is a noticeable contour to the top of the body while maintaining a nice eveb border of maple around the edge of the instrument. It as also necessary to keep the area upon which we will be mounting the bridge nice and flat. When this is all done the top will look really mice and the instrument will feel very comfortable! |
|

Working on carving and shaping the neck.
|
(12/20/14) Moving on to working on the neck and the body joint area. My initial objective here is to get the neck portion down to just the right thickness from one end to the other. Once that is done all the other geomertry that I carve and sand is relative to that. I have the neck portion well on the way and have roughed out the other parts. The bass is well balanced and compact and feels just right. Anxious to get it all sanded down. |
|

Doing some rough carving to get closer to finished shape.
|
(12/17/14) I am busy at the moment with the rough shaping of the belly cut and the back of the neck. The objective right now is simply to remove excess material so that I am closer to the finished dimensions and shapes I want to yield. I am carving part of the neck joint, the back of the headstock, and also shaping the top plate with a slight curve which will also enhance the final appearance of the instrument. |
|

Establishing a final thickness on the headstock.
|
(12/12/14) The headstock was just a little bit too thick for the typical tuner so I flipped the instrument over, located on the front face of the headstock and removed enough material to establish a correct headstock thickness. That big bump where the headstock meets the neck will be carved down to an elegant volute which looks and feels good for the player and also significantly strengthens the transition area. |
|

Headstock has been profiled close to final shape.
|
(12/8/14) I have been working onm the profiling of the body and the headstock so that they are closer to the profile of my tem,plate. Here, I have just sanded the headstock close to its finished dimensions. I will flip it over to establish a final thickness and then get the tuner holes drilled. Hope in to get the body cut done this week also and start on the profiling of the top plate. Something gets done every day!! |
|

Cleaning up the body profile on the spindle sander.
|
(12/3/14) The body is getting its final outer trim. I'm shaping the sides to match the template and generate a nice flat and relatively smooth surface that will allow me to hand sand from this point forward. Once I have shaped the perimieter to my satisfaction I am going to route a step all the way around the outside to create a reference surface which i will use to curve thet top surface slightly. That should look very nice! |
|

Serial number has been added in the battery cavity.
|
(11/29/14) A little like a new baby in a hospital, this insert in the battery cavity (not that babies have those) is a bit like a birth certificate. The bass now has its own unique identification number which is definitely an immportant step. I started cutting the belly cut on the back of the instrument. I will remove more material as we move ahead - it's all part of the carving and shaping of the complete instrument. You keep removing wood till it feels right! |
|

Pickup cavities have been machined.
|
(11/21/14) Next operation to be done was to machine the two pickup cavities to full depth. The hardest part here was to make sure the alignment was right on target. The cavities are now deep enough to house the matching wood pickups which will be ready soon. This is tha last major machining operation I have to do to this instrument. Next is carving of the neck and headstock area and more shaping of the body profile. |
|

Cutting the cavity that will accommodate the batteries in the instrument.
|
(11/17/14) I am now able to get the machining for the battery compartment done. The wiring channel is already machined inside the body so when I cut this material out I will intersect with that channel. While I do this setup I will also cut the slot that will hold the serial number insert. I am anxious to get all these miscellaneous machining operations done so that all I have to concentrate on is the body shaping and getting it prepared for finishing. |
|

Top plate on and the instrument is "whole' Now I have to sand and carve!.
|
(11/10/14) This is the bass the following morning. The joint seems to be great not only between the top and the body but equally importantly between the top, neck and fiber optic components. Happy to see this stage done as I no longer have to worry about fragile fiber optic cables being damaged! Now I can clean up the perimeter of the body to its finished dimensions and get the belly cut started. I will do some contouring on the top also. |
|

The top plate is being glued onto the rest of the instrument.
|
(11/9/14) After a bit of final preparation to make sure the fiber optic components were adequately protected during assemble - I was able to get everything glued up and into the vacuum press. So far everything looking good. I usually leave this under clamping pressure for a few hours but when it comes out it will be, in structural terms at least, a complete instrument. After that I will be doing some shaping and countouring work. |
|

Preparing everything for using the vaccuum press to glue on the top plate.
|
(11/4/14) I am getting everything ready for a very careful glue up of the top plate onto the body. I will be doing this using the vaccuum press as it will provide the top with even pressure. The trick in this task is to make sure everything aligned and fits just right before the full clamping pressure is applied. I want to make sure the transition area where the fiber optic cable are is set absolutely correctly. Will update! |
|

Doing some final adjustments to make sure the top fits just right.
|
(10/27/14) I'm busy fitting the top plate onto the rest of the body. Because there is a cluster of fiber optic cables exiting from the bottom of the fingerboard I have to allow a little clearance for that. I don't want the base of the top putting any pressure on the cables. I now have everything fitting very well. I am going to do a couple of checks to make sure everything is aligned and then I will go ahead and glue the top onto the body. |
|

Gluing headstock laminate onto headstock.
|
(10/19/14) The headstock plate - which is made of the same material as the top of the bass, and has since had decorative veneer added to its joint face, is now being glued onto the neck of the bass. This plate will be figured and tinted just like the body so it will add a very nice continuity to the completed instrument. The grain of the wood is awesome and I know it will be beautiful. I'm al;so ready to get the top glued onto the body. |
|

Cutting out the truss rod cover from the parent material of the headstock laminate.
|
(10/14/14) I need to cut out the truss rod cover before I can attach the headstock laminate on. I do this by using a very small cutting tool on the CNC machine. The picture shows the cover piece after it has been removed from the headstock plate. I'll do some cleanup and trimming and go ahead and get this piece attached to the headstock. Once that's done I can drill the holes for the tuners and get the TR cover fitted back in. |
|

Fiber optic cables have been potted into the body.
|
(10/7/14) The fiber optic wires have now been redirected through the channel in the top of the bass and potted into the body. This yields a nice flat surface for me to use when I am gluing the top plate onto the body. The fiber optic cables are not exposed to damage when they are potted in a solid state condition. My next task is to modify the front of the top plate to clear the fiber optics and then I will glue that together. |
|

Working on those pesky fiber optics.
|
(9/30/14) Getting started on the routing of the fiber optics that leave from the end of the fingerboard and need to travel through the body to the control cavity. I glue them in place to get them more or less organized together and when that's done I pot them so that they are completely encased in a solid state condition. It minimizes any risk of them moving or suffering any damage during further assembly. |
|

Fingerboard now glued on - yeay!.
|
(9/27/14) I removed all of those rubber bands carefully and was very happy to find that the process worked extremely well and I ended up with a very solid bond between neck and fingerboard. Not too much cleanup along the edges either. I can now start working on getting the fiber optic cables threaded through to the control cavity and gluing them in place so we have a nice solid assembly ready for the top to go on. |
|

Gluing the fingerboard on - old school.
|
(9/25/14) Well, if this doesn't work nothing will. A single rubber band has only so much tension but when you use dozens of them the clamping pressure adds up. I think I have a nice even distribution of pressure across the entire board so I am pretty sure this setup will yield prefectly good results. This particular adhesive has a slow cure so I will have to leave it at least overnight before I disturb it. Looks good so far though! |
|

testing gluing fixture to make sure everything is OK.
|
(9/25/14) Just testing the fixture here - looks like it will work fine. I wanted to test everything before mixing the adhesive. I will probably put on two clamps to align it to the neck and then wrap as many bands as I can fit onto the neck. The more the better. This will apply an even pressure across the entire board and should result in a very nice clean joint. There will be some cleanup as usual but the end result should be perfect. |
|

Made a fixture to help with attaching fingerboard to instrument.
|
(9/24/14) Because I have to glue a fingerboard onto a neck with fiber optics installed I decided to proceed using a traditional building tecnique normally used in building acoustic instruments. This fixture will allow me to use a network of tensioned rubber bands to apply pressure on the fingerboard while it is being glued onto the neck. Normally I would do this in the vacuum press but I don't want to damage ant of the parts - this is safer! |
|

Fitting fingerboard to the neck surface.
|
(9/21/14) I spent a little time sanding and shaping to make sure all these parts fit together. Truss rod is now sitting inside the neck nice and snugly and to save some time later I sanded the top surface of the headstock nice and flat so that it is ready for the headstock veneer. I'm making a little holding fixture to facilitate the process of gluing the fingerboard onto the neck and as soon as that's done we will get that done. |
|

Fitting fingerboard to the neck surface.
|
(9/16/14) My next challenge was to get hold of the pre-fabricated fingerboard assembly and make it fit seamlessly onto the top surface of the neck. This involves some careful carving on the internal sufaces to make room for the carbon fiber cables which exit from the end of the neck and run under the top plate. I also have a truss rod in there so it takes a little trial and error to get to the perfect spot. Happy with results - moving on. |
|

Channel for fiber optic cables has been cut.
|
(9/8/14) The channel for the fiber optic cables has been programmed and cut out. Should be plenty pf room now to get these through to the control cavity. I still need to do a little hand carving at the end of the neck but the hardest part here is done. Once everything fits correctly by hand I will get the gluing done. Not sure yet whether I will put fingerboard on first or glue them both on at the same time. I will know when I test-fit. |
|

Preparing for channels in body to accommodate fiber optic cables.
|
(9/5/14) I am now putting the parts together so that I can mark out what material I need to remove to make space for the fiber optic cables to run from the back of the fingerboard through to the control cavity. Typically this involves removing material from the top of the neck plus a channel through the body between the neck and the first pickup. Looks like everything will fit just fine so I marked out what has to be machined. |
|

Body and top after cavity machining.
|
(8/28/14) This is the top o fthe body and the bottom of the top after the machining process. basically I have a complete depth control cavity without the top being glued onto the body. This will allow me to channel the fiber optics into the cavity before the top is glued on. The fingerboard with all the fiber optics will have to go on at pretty much the same time. It will be gereat to have out bass all one piece! |
|

Ready to machine control cavity.
|
(8/24/14) Because we have a full set of fiber optic cables in the neck section of this instrument I have to cut the control cavity before the top plate goes on so that the machining process does not compromise the fibers. I just need to clam the top and body together - machine the cavity and then separate them again. This allows me the thread the fibers through to the machined cavity when the top gets glued on. |
|

Gluing veneer onto the back on the headstock plate.
|
(8/16/14) You can't really see what's going on here but I am gluing a layer of Lavoa veneer onto the back side of the plate I just sanded to the correct thickness for the headstock veneer. Net result of this effort will be a beautiful top piece on the headstock that matches the wood on the top of the body.I will glue this piece on as soon as i get the fingerboard attachec to the neck and we will have a very complete looking result! |
|

One of these pieces will be the matching headstock veneer.
|
(8/11/14) This is some material I saved from the top plate which I will be adding to the front of the headstock. I just sawed it in half to get the rough thickness I needed, so now I have two pieces to choose from. They are both awesome but I will probably use the one on the left. I'll send this down tho the correct thicknedd and add it to the headstock before I drill the holes for the tuners. Beautiful Stuff! |
|

Fingerboard sealed up and readu for the neck.
|
(8/6/14) The gluing of the veneer over the potted fiber optics was very successful. This fingerboard is now ready to be assembled onto the neck of the bass. I cleaned up all the edges and also worked on the upper side to make sure there were no remaining machining marks on the top. I am very happy that this somewhat tricky and time-comsuming operation is complete, and also that it tured out do well! |
|

Gluing a Lavoa substrate onto the back of the fingerboard.
|
(8/2/14) All the work on the Fiber Optic cables has been done. They are all installed and have been potted so that the back of the fingerboard is a completely solid-state assembly. I am gluing a veneer of Lavoa onto the back of the fingerboard so that we have a decorative pinstripe between that and the neck assembly. The veneer also serves as a sealer for the matrix of fiber optics. This is now ready for assembly. |
|

Top plate ready to be assembled onto body.
|
(7/22/14) This is the top plate after the pickup cover material has been harvested out. I will not do a lot more sanding until this top is securely bonded onto the body as that gives me a lot more control. Right now this piece is ready for assembly. I will cut a few channels in the top of the body for internal wiring and then fingerboard and top plate pretty much go on together because the fiber optics need to be run through the body. |
|

Almost done with the fiber optics.
|
(7/19/14) The assembly of the fiber optics and the incorporated side dots is a slightly tricky operation in that it demands using my hands rather than clams to retain the fibers while the adhesive sets. They are relatively fragile and want to be everywhere except where I want them to stay, and I have yet to find a mechanical means to holding them in place while the adhesive sets. I just have to be patient and do it manually!! |
|

Getting ready to machine out the pickup cover material.
|
(7/15/14) The top plate is being set up fpr two critical operations. Firstly I will be harvesting out the pieces of the top which will become the tops of the pickup covers. That will allow me to have a beautiful continuous grain top! Also while I am set up for it on the machine - I will machine out part of the top plate that will fit around the end of the neck. I'm hoping that this will all be done about the same time as the fiber optics install. |
|

Adding contrasting surrounds for the fiber optics.
|
(7/4/14) I am getting set up to run the fiber optic cabling through the chennels in the neck. Because the fibers are a dark grey when unlit, I have to add a white contrasting sleeve to each one as I build it into the structure of the neck. This will make sure the side dots are visible when the fiber optic lighting is not being used. I'll lay one cable in at a time as it is very important that each one is seated properly and below the joint suface of the fingerboard. |
|

Body glued together ready for some more work.
|
(6/28/14) We have a complete top for our bass which I will now clean up and set up to remove the pickup material. I love the figure on this top which you can only just see in this picture because the wood is dry. When the finish is applied this stuff will be awesome. Planning a Sienna Sunburst which I know will make this bass talk! As soon as I have as space on the CNC I will harvest out the two pieces that will become continuous grain pickup tops! |
|

Machining joing faces on the two halves of the top plate.
|
(6/14/14) I need to do some machining to the top plate of the bass to get it ready for assembly. Firstly, I need to machine two very clean joint faces so that I can start by gluing these two pieces together into one bookmatched top. I dut these joint faces in the CNC because I can guarantee flatmess and squareness. Once the top is one-piece, I will harvest out the two pickup tops. The top is thick enough to create a nice sculpted top plate. |
|

Channels for fiber optics are cut.
|
(6/8/14) This is the result of some careful machining to establish channels for fiber optic lighting. Each fiber optic cable starts at the appropriate fret position and runs back down to the body end of the fingerboard. My next move is to drop in the fiber optic cables and while doing so - add accents to the ends so that the side dots can be seen when the LED is off and no light is being transmitted. Looking good so far! |
|

Dry running the fiber optics program.
|
(6/6/14) I am now on the CNC machine running through the program to make sure everything is correct before cutting material. Once this material has been cut out I will be able to insert side dot material and then run all the fiber optic cables through the channels and cement them in place so that the fingerboard and the fibers are all one solid-state assembly. Tricky but as lobg as you go carefully it all comes out just fine! |
|

Setting up fpr fiber optic channels.
|
(6/6/14) This is the fixture I made to hold the fingerboard while I machine the channels that will contain the fiber optic cables. I had to make a new cone because this is the first fretless I have made with fiber optic lighting built in. Because it is a fretless the side dots appear in different locations. The setup is complete and I just have to create the geomatry of the channels in a vector program and convert that to G-code for my CNC machine. |
|

Creating a fixture to facilitate machining for fiber optics.
|
(5/29/14) I have to build a quick fixture for the machining of the fiber optic channels. It is necessary to hold the fingerboard upside down to machine the areas where the fiber optic cables will reside. It is always a good idea to set the process up to succeed, This fixture will make it easier for me to keep everything accurate during machining. Fiber optic cables need to be embedded under the fingerboard and the top plate of the bass. |
|

Made a fixture to allow me to machine channels for fiber optic cables.
|
(5/27/14) I don't remember doing a fretless fingerboard before with LED/Fiber Optic lights installed. Because the side dots on a fretless have to be in different locations than that of a fretted bass, I had to make myself a new fixture to hold the fingerboard while the machining is done. I have to support the fingerboard upside down and machine channels for the fiber optics on the under-side. This fixture will help me make that happen. |
|

The top and bottom halves have been rough sawn.
|
(5/22/14) The material for the top has now been cut slightly oversize. I will now work on machining and sanding it to the correct thickness. Once that has been done I will glue the decorative veneers onto the bottom surfaces. At that point I will be able to machine a very accurate joint face on each piece and glue them together to create the complete bookmatched top. I will document these steps as we proceed. |
|

Very unique quilted maple for the top of the bass.
|
(5/19/14) I am going to use this beautiful piece of quilted maple to create the top of the bass. The photo actually does not do the material justice, it will look incredible on the instrument! First thing I have to do is decide how i want to use the grain (which direction). I will then mark it out using the template for the body and cut out the two bookmatched pieces. This is also going to work really well with the other woods we used in the project! |
|

Gluing the carbon fiber slots into the neck.
|
(3/16/14) The two carbon fiber rods I cut recently are now being glued into the slots in the neck. It's a messy job but I have to make sure the adhesive gets all the way down into the slots. Much of it bleeds out but it's easier to sand that off when it has hardened than to try and clean it up in its liquid form! This will need to sit overnight to properly cure. At that point I will unclamp and clean up the residual glue. |
|

Setting up for a couple of CNC operations in anticipation of fitting the top.
|
(3/2/14) I am going to run a couple of operations on my CNC machine to prepare the body surface for the top plate. While I have things set up here I will do some minor chambering to remove unnecessary mass and make the bass as light as possible. I may also cut the grounding, pickup and battery wiring slots to save having to do those later. It is helpful to get as many of the small jobs done in one set up as possible. |
|

Carbon fiber rods are ready to be glued into neck.
|
(2/25/14) The two carbon fiber rods have been cut and fitted into the slots I recently cut. It is important that they fit tightly and the depth of the rods match the depth of the slots. I usually have to custom fit the rods to guarantee that everything works just right. They are now ready to be securely fastened using aerospace grade epoxy. This will yield a very stable and rigid neck, which in turn will result in well defined sound and good sustain. |
|

Cutting slots for carbon fiber rods.
|
(2/18/14) I had a chance to get this instrument up on my CNC in order to get the two channels cut in the top surface of the neck for the Carbon Fiber rods. This will allow me to get thise installed in preparation for attaching the fingerboard. These rods will add rigidity and stability and help counteract any impact from humidity on the neck. I will glue them into the slots using an aerospace grade epoxy. |
|

Fingerboard profile has been established.
|
(2/9/14) I had some time to get this fingerboard back on my CNC and I was able to machine the entire piece down to the required thickness and also carefully cut the profile of the fingerboard to its finished dimensions. Next step is to cut the compound radius on the top. Once that is all done I will have to turn this board over and machine channels for our fiber optic cabling. Before I do that - the markers along the side of the board have to go in. |
|

Getting ready to do the machining on the fingerboard.
|
(2/4/14) Getting the fingerboard ready for some machining. I will have to machine it first to thickness and then profile the outer edge of the board to its finished size. When that is done I will generate a compound radius along the top surface. This is a great material for a fretless bass - it is a very hard and dense wood and should play a big part in getting a great sound. I am also working on pickup geometry for this bass, pics to follow. |
|

Gabon Ebony for the fingerboard getting ready to be machined.
|
(1/16/14) I have a very nice piece of Gabon Ebony for the fingerboard of this bass. I rough sanded it the other day in order to get it nice and flat. I will continue to sand it until is is relatively close to the finish thickness at which point it will be glued to a stable substrate of 3/4 MDF for futher machining. This will allow me to get this fingerboard up on the CNC and cut its profile and establish the appropriate compound radius. |
|

Machining the back of the headstock.
|
(12/22/13) I set the front face of the headstock up on the table surface in order to be able to machine the extra material off the back of the headstock. This creates an accurate thickness for the headstock allowing for the material I will use to face the front side. I also leave additional material on the back of the neck at the head/neck joint area. This material will be carved to cerate the volute that gives strength to that joint area. |
|

Doing some carving on the back of the neck.
|
(12/7/13) Working on the back of the neck and the interface area between the neck and the body. I left a good amount of extra material on that area when gluing the blanks together just to be on the safe side. At this point I can remove most of that and get the neck closer to finished dimensions. I will also be cutting the headstock to a final thickness very soon. One more job out of the way. Want to get this project in the hands of its owner! |
|

Ready to assemble with cavity filler material.
|
(11/19/13) The two plugs which will re-fill the cavities fit perfectly as expected. Next task is to drum sand the two plugs down to the correct thickness so that when they are glued into the body they will be prectically flush with the top surface. It's always good to plan to have a tiny bit extra on thickness so that I can blend the finished assembly by hand. Once these two plugs are glued in I can machine wiring channels. |
|

Creating plug for battery compartment
|
(11/2/13) Having removed material to release the cavity cover pieces I now have to machine 'plugs' which will fit back into the machined cavities and unltimately become the parent material from which I machine the control and battery cavities. It all sounds complicated but it really does work out as an elegant solution when everything is done. I will machine plugs for both cavities which will be a perfect match. |
|

Removing the battery cover plate.
|
(10/17/13) The two covers on the back of the instrument have been cut to depth and my next task was to flip the instrument over and machine out material to the exact depth that would cause the cover pieces to fall out. This allows me to hold onto the continuous grain covers until we are ready to complete the bass and add them back in. All this work will be worth the effort when we look at the end result! |
|

Harvesting the cavity covers from the back plates.
|
(10/12/13) In order to end up with beautiful matching "continuous grain) cavity covers it it first necessary to cut the cover material from the back of the instrument. This is unfortunately a very laborious process and probably why most builders avoid it. Nevertheless the end results are well worth the effort. Here I cut the covers out using a 1mm end mill. I cut deep enough that when I cust from the other side all the dimensions magically work out! |
|

Machining the top of the bass to prepare for the top.
|
(9/21/13) I'm in the middle of a couple of machining tasks here. Firstly - I cut around the heel end of the neck to establish the area where the top plate and the neck will meet. Once that was done I started cleaning up the top of the instrument to remove excess material and establish a flat surface onto which the top plate will be glued. This has not been completed but is relatively close in the photo attached. It will clean up to one consistent surface. |
|

Setting up to machine the top surface of the bass.
|
(9/18/13) Time to do some more work to this beautiful bass. Here I am setting up the instrument on my machine table so that I can establish the base of the neck/body area and machine a consistent top surface onto which we will glue the Tulipwood top plate. This will also allow me to move forward with the fingerboard work so that we can bring all the parts of this instrument together. After this is done I'll do some shaping on the body. |
|

ready to start work on the cavities and neck!.
|
(9/12/13) This is the bass with the two body halves glued on. It feels light and compact even at this stage. I'll be selecting material for the fingerboard and also getting the assembly up on the CNC so that I can machine the top of the body. This will allow me to generate a flat joint surface for the top and also cut all the wiring channels I'll need internally. I also have some machining to do in order to establis battery and control cavities. |
|

Both the body halves have been attached.
|
(9/3/13) I'm now gluing the Rhengas body halves onto the center core of the bass. I glue them on idividually since th eplacement of the components is quite critical. The body halves are attached using clamping pressure both across the joint faces and also onto a common flat non-stick surface that guarantees that the faces at the back will line up prefectly. Once these pieces are attached we'll start work on the fingerboard. |
|

Body halves with contrasting veneer applied to joing faces.
|
(7/26/13) Here we have the two body halved machined flat and square and the maple veneer has also been added to the surfaces, While this was being done, I also added derker veneer to the maple edges of the core section. These two veneers will come together when the body halves are glued onto the core and we'll have a double-pinstriped joint which will look awesome. Next step is to glue these two body pieces onto the core. |
|

Body halves having their joint faces machined.
|
(7/26/13) In order to prepapre the two body halves for assembly onto the core section of the bass, i have to set the individual pieces up in the mill and carefully machine the joint faces so that they are prefectly square and flat to the center core. Once that is achieved I will move on to gluing decorstive veneer onto both joint faces. The end result will be a very visually appealing interface between the two contrasting woods. |
|

Body halves have been rough cut.
|
(7/26/13) I had been saving some wood called Rhengas in my shop for some time. The colors of wood used in this particular bass were a great match for this wood. I have rough sawn the upper and lower body halves and they are now ready for some sanding and machining to get them ready for assembly onto the core section. I'm looking forward to seeing how these woods look when assembled, should be very pretty! |
|

Cleaning up sides in preparation for body halves.
|
(7/15/13) Now that the center of the instrument has been created I can start preparing joint surfaces for further assembly. Since the next step on this bass is to attach the two body sides onto the core, I am machining the sides of the core at a prescribed taper and thickness. When this is done to both sides I will apply decorative veneer to both the core and the body halves prior to assembly. This will yield a double contrasting pinstripe. |
|

Machining the back face of the neck/core.
|
(7/9/13) Next step in the process is to flip the core section over and machine the back surface of the body area parallel to the opposite side which we just machined to create the correct neck/body angle. I will use this machined back surface to align the two back body halves when we are ready to attach them. I have material for the body halves ready to be cut so we will be adding those pieces to the assembly quite soon. |
|

Truss rod slot is now machined into the neck.
|
(7/4/13) I have just machined the slot which accommodates the truss rod. The slot for the rod has three different widths and depths and I try to machinte this feature carefully so that the truss rod sits in the slot fairly tightly. This avoids the danger of vibration from the rod on the finished instrument. I still have to cut two slots for the two carbon fiber re-enforcing rods. otherwise this neck/core section is ready to come off the CNC. |
|

Machining the profile of the neck.
|
(7/2/13) So far I have machined the top face, the headstock angle and the body angle. These are all critical to making all the parts line up when the job is finished. Now I am machining the neck width at the nut and at the same time establishing the width of this core section at the opposite (bridge) end. Starting to see this beauty come to life! Next step is getting the truss slot into the neck and also two slots for the carbon fiber reinforcing rods. |
|

Starting the machining work on the cebter core.
|
(6/30/13) The two headstock tabs have been added and the assembly has been set up on the CNC machine for a number of operations. I carefully align the blank so that it is square and to the table in all 3 axes. First job is to remove some excess material and clean up the top surface of the neck which is where the fingerboard will be glued on. This has been done and I an now preparing to cut two angled surfaces relative to that neck joint surface. |
|

Gluing on one of the two extra pieces of curly maple for the headstock.
|
(6/24/13) We need to allow for a little extra maple for the width of the headstock. Here I am gluing the first of two extra pieces to accommodate the extra width. These will ultimately be covered by the Tulipwood headstock veneer. Once I get the second piece glued on to the other side I can get this assembly up on my CNC machine and start cutting some of the features. I'll also be starting to work on body halves very soon! |
|

All the neck/core laminates are now assembled.
|
(6/16/13) All five of the neck laminates are now glued together which brings the instrument to the neck stage of production where we start machining features such as the neck profile and slots for carbon fiber and the truss rod. The assembly is lightweight and resonant which is exactly what we want. As soon as I have time and space on the CNC machine I will set this up for several important machining operations. |
|

Gluing the third laminate of the core section.
|
(6/12/13) Next step here is to glue the second paduk laminate to the assembly. Feels good to get all these separate pieces glued together into one piece. I just recently added dark veneer to the two outer laminates so they are ready to be attached to this assembly too. The result of this work will be a beautiful 5-piece tapered laminate neck with double contrasting veneers between each section, Should look really nice! |
|

Starting the process of gluing the core of the instrument together.
|
(6/10/13) I have now added veneer to all the laminates that will make up the neck assembly. Next step is to start gluing these pieces together. I start with the center laminate and glue the neghboring laminate onto it. I will do these one at a time so that I can contol alignment. I'll keep going until I have a completed assembly at which point it will be prepped for ongoing operations on the CNC machine. These woods will look very nice together. |
|

More veneers going onto laminates in the vacuum press.
|
(6/4/13) My vacuum press is busy right now but I found a space to get more of these laminates in there and glue on veneers. Here we see the second side of each of the three center laminates being veneered. This is good news because when they come out of the vacuum press they will be cleaned up and then ready for gluing together to create the core of the instrument. I should be able to get that going in the next few days. |
|

Applying maple veneer to two of the neck laminates.
|
(6/1/13) This picture shows the two Padouk stringers inside the vacuum press where I am gluing maple veneer. I will apply this veneer to both sides of each piece. I also glue darker veneer to the maple components of the neck/core and when I assemble these pieces together it will yield a very attractive double-pinstriped look between eack laminate or wood. I will also continue this theme throughout the instrument. |
|

Machining the two Padouk laminates on the CNC.
|
(5/26/13) Moving along with the same set-up. Here we are machining the two Padouk stringers that will run through the core of the bass. I also machine these pieces to a specific taper so that the combination, when glued together, will perfectly match the natural taper of the neck. Few luthiers do this because it's a pain in the @$$ but I really like the end result! I will now be able to glue various veneers onto these neck laminates and get the core together! |
|

First (center) laminate has been machined to a taper.
|
(5/22/13) Since all the core pieces have been rough sawn and sanded, I was waiting for a time-slot on my CNC to start machining the tapers that will ultimately combine to make a beautiful instrument core. I started with the center piece which is a strip of curly Maple. This was machined to a prescribed taper and is now bears the responsibility of being the centerline of the entire instrument. I will now add decorative veneers to both sides. |
|

Maple and Paduk laminates have all been cut out and sanded.
|
(5/17/13) The components of the neck/core of the bass have now been rough sawn from their respective boards and drum sanded so that I have a nice flat datum surface on each to use for further machining. As soon as I have machine time available these pieces will go onto the CNC and I will cut each one to a pre-determined taper. When all of these tapered laminates go together they will perfectly match the natural taper of the neck itself. |
|
We have some Alder which we are using for the back of the body.

Two of the neck component have been cut from the curly maple.
|
(5/8/13) We have taken a significant step in getting this bass under way in cutting out two of the curly maple neck components. These two pieces will be the outer edges of the beck - they have a beautiful figured grain which will stand out really well on the finished instrument. I will most likely construct the neck using three curly maple pieces and two paduk tapered stringers. These woods will look and sound great together. |
|

Excellent curly Maple for the instrument neck.
|
(5/4/13) Another recent wood purchase is perfect for this instrument. When I find an unusual piece of curly maple i usually buy it because i know it will make a beautiful contribution to an instrument. This particular piece is perfect for the outer sections of the neck/core assembly of this bass. The figure in the maple is perfect for this application and it will look amazing! I'm ready to cut out the blanks from the maple and the Padouk shown below. |
|
We have some Alder which we are using for the back of the body.

We'll be building part of the core of this bass using African Paduk.
|
(4/27/13) I just went out wood shopping for this and a couple of other projects I have which require raw material. I found this very good piece of Paduk which will provide some of the components of the neck of this bass. This wood not only has a very suitable color for this project but it is a very suitable and stable wood from a sound/tone point of view too. We'll get some blanks cut from this piece of wood very soon! |