|
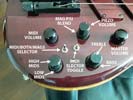
Looks complicated but once you know where everything is it's pretty logical and easy!.
|
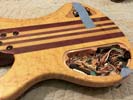
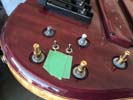
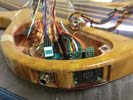
Left: Listing the controls on this bass for clarity .For normal playing you can use all controls PLUS the piezo mix. For MIDI you have the 3-way switch, program selector and the MIDI volume/mix. Right: Only place I could put my logo was below the tuner knobs! Double checked the controls and mag and piezo outputs. Now checking MIDI. |
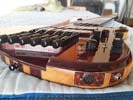
I have been working on the electronics to verify everything is working - last check is the MIDI output which I am busy setting up right now. More news soon.
|
|
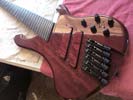
Knobs and truss rod cover now attached.
|
Left: I added all the black control knobs to the instrument and worked on getting the truss rod cover fitted in the headstock. Doing detail work now. Right: Strings are on and I was able to test MIDI and the preamp systems. All worked out really well so pretty much done with this one! |
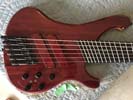
Bass worked out really well electronically - MIDI worked out weel and it's fun to play.
|
|
Time to get the knobs on and do some final adjustments.
|
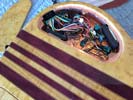
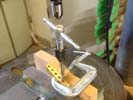
Left: Copper shielding applied to the control cavity cover. I'm checking everything I can think of to make sure we have a complete instrument here! ! Right: I am going to drill a little hole for a battery condition indicator LED. I will have to drill from front face, carefully counersink, then counterbore from the back to get the LED flush with the top. |
Doing a few very careful drilling operations to install an LED light - not mucg room inside so have to be careful!.
|
|
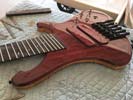
Strings off to make sure nut slots are deep enough, quick leveling of frets, checking condition of fret dressing, fingerboard edge etc etc.
|
Left: I spent some time filing the nut slots to make sure they were just a little lower than the zero fret on which the strings should be sitting. Right: I'm doing a quick adjustment to the control pots to get the best fit with the stacked knobs. It will really look nice with all the hardware attached. |
I added some spacers top the Audere pots so that the shafts didn't stick out too far on the other side..
|
|
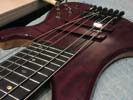
Getting the last few jobs done to the bass so I can give it a final test and get it packages. Days are too short!.
|
Left: Strings are off right now to let me do a few things to the fingerboard. I'm also adjusting nut slots to make sure strings are solidly on the zero fret. Right: I have everything back together again - have a couple of saddles I need to adjust but otherwise I think this bass is just about ready! |

Time to get the knobs on and do some final adjustments.
|
|
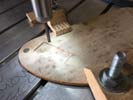
I'm machining a little clearance for the wires leaving the top of the RMC circuit boards. My original setup had the RMC 180 degrees rotated but due to technical necessities it was switched back to standard position..
|
Left: Cavity cover up on the CNC so that I can cut a neat and accurate recess to give some relief space for the RMC unit output. Right: I'm now getting ready to get the knobs attached and do some work on the setup so that this bass is ready to travel to its customer. It's a beautiful and unique instrument. |
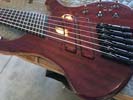
Time to get the knobs on and do some final adjustments.
|
|
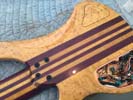
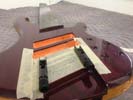
Bettery cavity cover looke really nice in place. Now I will do the sme thing to control cavity cover although I need to make a minor modification to the inside.
|
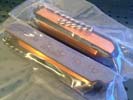
Left: Magnets successfully installed in battery coverand the top fits very nicely and looks awesome with the continuous grain. I'll do the control cover next. Right: There is a lot of wiring at the back end of the cavity so I am going to take a little material off a small area on the back of the cover for safety. |
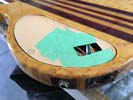
I don't want the cover to put any downward pressure on the wires and circuit boards at the output end so I'm creating a quick template to allow me to relieve a little material on the inner side of the cavity cover.
|
|
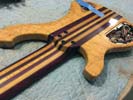
I was able to get the bass back in my own shop today after testing it at the electronics shop. MIDI and Piezo and Mags all seemed to be doing their jobs. Now for a few days of very intense final work to get it out the door!.
|
Left: I picked the bass up from my wiring guy's shop and finally was able to bring it home!! We tested the MIDI there and it all appears to be working as expected. Right: One of the things I wasn't able to do while the bass was away was to get the magnets set into the back covers so the lids will snap on. |
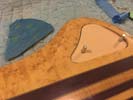
I wasn't sure if I would have to cut any more material out of the covers until all the electronics were finalized. I'm now adding magnets to the covers that are aligned with those in the cavities.
|
|
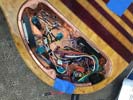
New electronic hardware is doing its job and all we have overcome the major hurdles. Now working out a few bugs but things are looking very promising!.
|
Latest news today is that we got the new Audere hardware installed into the instrument and were able to get everything communicating with everything else. We had a couple of electronic anomalies but from what I understand these are in the process of being looked into and hopefully resolved. The major hurdles are OVER and the inside of the cavity looks very clean despite all the hardware interaction that's going on in there! |
|
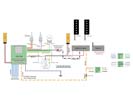
This diagram shows only about 80% of our wiring but the rest is being set up and I'm hoping to have all this behind me in a couple of days.
|
Audere had built me what I understand to be a fairly complex system comprising of a standard preamp and additional boards that are designed to stabilize the piezo signals and facilitate the connection and enabling/disabling pf the RMC MIDI unit. It has been custom built and shipped to my wiring expert and I believe it is now in his caring hands. I have spent a lot in time and money on this, as have Audere and my wiring guru. Now hoping for good news!!!!!!!!! |
|

This diagram shows only about 80% of our wiring but the rest is being set up and I'm hoping to have all this behind me in a couple of days.
|
After countless hours of texting, emails, phonecalls and years off my life my two technical experts suggested we consolidate some of the circuitry into one solid state package in order to make this thing work. I am having Audere build me a breand new custom preamp package which consolidates some of the wiring we were trying to do separately. It's supposed to be a plug and play package and should talk to both the RMC and the Piezo components! |
|

This diagram shows only about 80% of our wiring but the rest is being set up and I'm hoping to have all this behind me in a couple of days.
|
Our collective energy is going into a diagram I am creating that allows all parties to view and make changes to a common reference document. According to Audere we have a solid solution and we are now in the throes of putting that into practice. The image attached is actually a day or two out of date as we have been adding the revised wiring for the supplemental Audere module whose job it is to manage the post RMC piezo signal. |
|
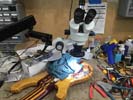
Some of the initial wiring work being done.
|
One of my experts says it can be done, one of my experts says it won't work. They are both extremely techie and knowledgable and I'm working in the middle to frantically exchange information and illustrate wiring diagrams. Interestingly both admit it's going to work out but I am losing sleep over all of this as I have a very patient but human customer sitting in the backgound waiting for his instrument!!! More as it happens. |
|

Some of the initial wiring work being done.
|
Update - The bass that was successfullly wired previously using RMC, Audere and the set of Piezos which were not only used independently for MIDI triggering but were also summed for blending with the magnetic pickups, had a noise suppression circuitry installed at that customer's request. It seems that circuitry was what allowed us to tap off an amplified and summed Piezo signal to complete the feed to the 1/4 jack. We are configuring as I type.... |
|
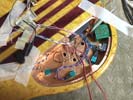
Although it's taking years off my life (and my cutomer too) I am doing my best to moderate communications between Audere and my tech to give us the much needed amplified piezo feed to the magnetic output mix.
|
Update - Working with Audere to integrate a separate feed for the piezo signal to get a balanced blend control to work with the RMC system. Although my electronic knowledge is not quite up to these levels my electronics expert and Audere have been discussing the best way to make this happen while I await their feedback. I have learned recently that we may have to substitute the module I purchased for 2nd independent piezo preamp. |
|
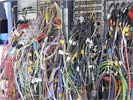
Bass is off to my trusted electronics sub-contractor. He has done this MIDI stuff before and I know he will make a great job of what I consider an unknown black art.
|
Update - New Audere module in our hands and I know that there has been a lot of dialog between the wiring guy, the preamp manufacturer and the MIDI hardware manufacturer so that we create all the correct wiring loops without any grounding issues. I know it's complicated given that we have three VERY experienced brains working together to make all these parts do their job without fighting with each other. I'm patiently sitting on my hands! |
|

Bass is off to my trusted electronics sub-contractor. He has done this MIDI stuff before and I know he will make a great job of what I consider an unknown black art.
|
Left: Update - we have much of the wiring established but had to order a new module from the preamp supplier to work with existing circuitry and add the piezo blend that should be tapped off from the RMC MIDI unit. The piezo feed goes to the RMC unit as individual string signals and turns into MIDI output through the 13 pin output plug. At the same time the six piezo signals are summed together and fed by the new module to mix with magnetic signals! |
|

Bass is off to my trusted electronics sub-contractor. He has done this MIDI stuff before and I know he will make a great job of what I consider an unknown black art.
|
Left: I am handing over this valuable project soon to my trusted electronics expert whose job it is to make all the electronics and MIDI work happily together. Right: My electronics expert took this picture while he was working on the piezo connections inside the control cavity. Looks like a hospital operating room! |

Some of the initial wiring work being done.
|
|
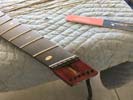
Got the string retainer holes set up with slightly larger access for the top 2 strings. When My adhesive is set I will file down flush and finish then those strings can go back on!.
|
Left: I have to adjust a couple of the string retainer through holes to set up correct alignment - those E and B strings have larger diameters going through here. Right: All the work has now been done to the string retainer and I was very happy to be able to get all the strings on the instrument! Looks pretty good! |
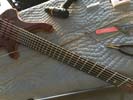
The string retainer work hyeld me up a bit so I am delighted to get that done and get the Kalium strings onto the instrument!.
|
|
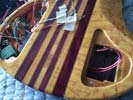
Wiring for power supply has been threaded through from battery recess to control cavity.
|
Left: I have run two sets of power cables through from the battery compartment to the control cavity. These will run the Preamp and MIDI circuitry respectively. Right: Very busy time so posting pics when I can - Just getting started on stringing this bass up with Kalium strings. I'll be able to do some adjustments. |
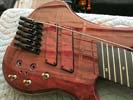
Just about to test drive the mechanics of the bass with some Kalium strings.
|
|
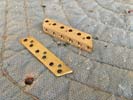
Adjustment to th retainer assembly was hard work but I did get it done and moving on from here!.
|
Left: These little parts are complicated and their features are quite close together. They gave me a little bit of a hard time and I lost a few months of my life but they're now ready to go! Right: Two output assemblies are now permanantly fitted to body. Almost at the point where it's just hooking up wires! |
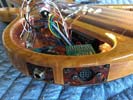
Got the MIDI and 1/4 inch output assemblies fitted and installed in the body recesses..
|
|
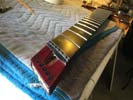
All the string retainer hardware has been fitted.
|
Left: String retainer drilled and tapped and back plate and headstock drilled to match, and everything fitted together! Right: Minor adjustment I decided to do while stringing up the bass. The internal part of the string retainer needed slight adjustment to allow better string clearance through the headstock. |
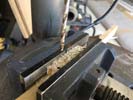
Small mods to the string retainer.
|
|
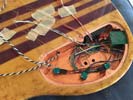
Got the Audere components successfully installed. I have a few more switches but those should be much easier.
|
Left: It has been a lot of work but I think I have all the components installed in the cavity in such a way that they can be successfully wired together! Right: I'm fitting a little plate on the back of the headstock which distributes the force of the string tension to the back of the headstock. It also holds the string retainer in place. |
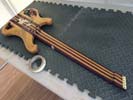
Fitting a little support plate on the back of the headstock.
|
|
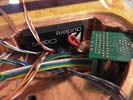
I now have the Audere preamp situated in the control cavity.
|
Left: The Audere 4-band system is now installed in the control cavity. I have also attached power clips in battery cavity with power wires through to contol cavity. Right: There are a couple of knobs and switches related to the piezo input and the MIDI system which I am fitting into the cavity right now. |

Opening out hole diameters to suit Audere and RMC pot sizes before I install the preamp.
|
|
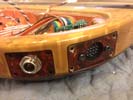
Working on getting the electronics physically installed. Patience is a great asset when doing this work!.
|
Left: Getting the hardware situated in the control cavity. The Audere system is about to be installed and I'm also working on permanently attaching the two output assemblies!. Right: I am VERY carefully opening out the control holes to fit the various pot diameters. Will have the preamp in very soon. |
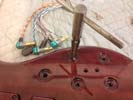
Opening out hole diameters to suit Audere and RMC pot sizes before I install the preamp.
|
|
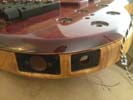
I cut cutom mounting plates for the MIDI and the output jack.
|
Left: I cut custom mounting plates for both the jack plug and MIDI sockets! These will allow me to get the hardware components mounted. Right: As an extra little touch of class I changed the jack plates from black material to a tortoishell that I happened to have and looked good with both the front and back of the bass! |
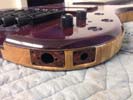
Small change in output plates - a little fancier than the black..
|
|

Nut slot has now been established.
|
Left: This is the small but important string retainer clamp, whose job it is to keep the retainer in place and to take on some of the upward string load. Right: I am fitting the electronic components into the control cavity which involves some careful planning to make sure it all goes in cleanly and without conflict! |
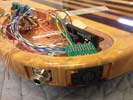
Getting some of the hardware situated in the control cavity.
|
|
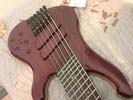
Checking movement and height of tuners and saddles prior to adding the strings.
|
Left: In this photo I'm testing the string saddles and tuner assemblies to make sure they are ready for string attachment. Right: I'm now installing the brass string retainer component to hold the strings at the headstock end. I am creating a small retainer assembly to fabricate and add to keep everything in place. |

Nut slot has now been established.
|
|
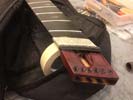
Nut slot has now been established.
|
Left: Gluing in all the little rings on the headstock. Will clean it all up to an even surface when the adhesive has set. Right: Happy to say I got these in - leveled and re-drilled after a lot of fiddly work. Good news is that I can now get strings attached and in turn get bridge units adjusted closer to finished setup. |
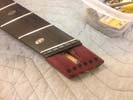
Had a little bit of frustrating work to get these to comply with my wishes but the string sleeves are in and leveled and I can move on!.
|
|
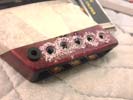
Working on installing sleeves into the six string holes as guides and protection for the surface finish.
|
Left: These are the sleeves that I am inserting in to the headstock string holes. Their purpose is to avoid localised string tension puttng stress directly on the finished wood surface. Right: Getting the cavity ready for all the hardware we are going to install. Want to be sure everything will fit nicely together. |

Nut slot has now been established.
|
|
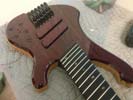
Pickups are now installed in the body.
|
Left: Pickups are in and ready to go - wiring is fed through to cavity. Now working on getting the two output plug assemblies attached. Right: Nut is installed, shaped, contoured and I have established the string slots. My next goal is to install small load bearing sleeves in the string holes in the headstock. |
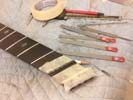
Nut and nut slots are done.
|
|
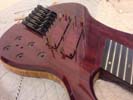
Nut slot has now been established.
|
Left: It's now time to get the pickups permanently installed into the body. I need to carefully center then so that I can establish accurate holes for the adjustment screws! Right: Right before pickups go in I'm running a shielding connection to the cavity copper shielding which will be our common ground. |
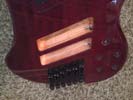
Pickup cavity shielding has been connected to control cavity common ground.
|
|
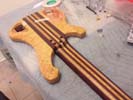
Bass is back in one piece and I'm going to be installing pickups and electronics.
|
Left: The neck has been re-attached as I will need to get strings on this instrument soon. Immediate goal is now to install electonics. Right: Nut is now installed in the headstock. Another task off the list! I have small sleeves to insert into the string holes as guides to protect the finish, that's probably next. |
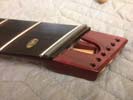
Nut installed and nicely blended with the headstock.
|
|
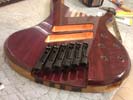
I'm done with the tuner/piezo assemblied. On to the next task!.
|
Left: This is the body with all six of the tuners, piezo saddles and grounding wires installed and attached! It was quite a lot of work! Right: I machined the slot for the nut next to the zero fret and I will now get a nut installed so that we are ready to put strings on. I also have to install little string guides in the six string holes. |
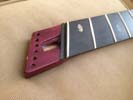
Nut slot has now been established.
|
|
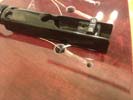
Getting the new bridge assemblied set and installed on the instrument body.
|
Left: Hardware machined and piezo saddles installed in each unit. I have to cut clearance for the piezo wire under each tuner. Right: Getting the hardware permanently fixed to the body. Channels cut for grounding a piezo wires and I'm assembling one set at a time working from B string down to C string |
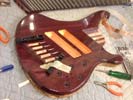
Grounding and piezos set now adding the tuners.
|
|
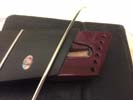
I was able to get all six piezo cables run into the control cavity without having to remove the very troublesome connectors. Having done that I ran a further siz grounding copper wires through too!.
|
Left: I am putting a zero fret into this neck and once that's in I will machine in the nut slot right behind it. Right: I had to be fairly careful but I was able to get the zero fret embedded in the front end of the fingerboard. Also got the piezo wire holes drilled in the saddles so that we can get the piezos installed. |
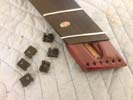
Zero fret installed and holes drilled for piezo inserts in the saddles.
|
|
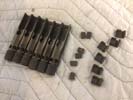
Hardware dis-assembled for some machining.
|
Left: I need to establish a couple of alterations to the ABM hardware to allow the piezo wires to run from saddle through the tuner body. Drilling holes in the saddles first. Right: I am now machining a slot along the underside of each tuner body so that the saddle can move and the piezo wire gets from body to saddle! |
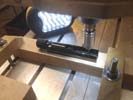
Cutting a slot in the base of each tuner body for the piezo wire.
|
|
Threading the vary fragile Piezo cable through the body to the control cavity was not easy. After several different methods I invented one that yielded success!.
|
Left: I actually cheered when I got this double-ender cable threaded through to the control cavity! I tried numerous nmethods to avoid having to remove the end connectors! Right: Big step forward - got all 6 piezo cables threaded through with connectors still attached - plus ran 6 copper ground wires too! |
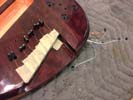
I was able to get all six piezo cables run into the control cavity without having to remove the very troublesome connectors. Having done that I ran a further siz grounding copper wires through too!.
|
|
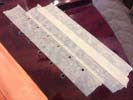
After some careful measurements I successfully drilled each bridge unit hole into the internal wiring channel I machined. I have to route piezo and grounding wires through each of these holes.
|
Left: I just drilled 6 carefully placed holes into the body for the piezo and grounding wires. I successfully connected with the wiring channel inside!! Right: Tis is one of the piezo cables which I am going to try to feed through to the control cavity. I will have to pull them through with a special hooked wire! |
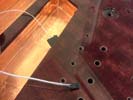
Ready to get the piezo cables pulled through to the cavity. I don't want to take the miniature connectors off unless I absolutely have to!.
|
|
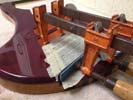
Attaching the nameplate.
|
Left: The activity continues - in this photo I am attaching the purpleheart nameplate panel. Should look good there! Right: The nameplate was succesfully installed and I can now get the set of six tuners marked out, drilled and installed in place. I'll have to remove them to run the piezo cables though. |
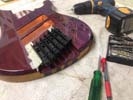
Nameplate on and now back to the tuners, getting them all spaced correctly and installed.
|
|
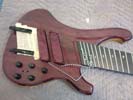
Outer tuners located, pickups about to be installed. You can also see the knobs in place.
|
Left: Outer tuners permanently located, and I am getting the grounding wires for each of the tuners threaded through to the control cavity. Next will be the piezo wires. Right: The logo plate fits nicely at the back of the recess in the body. I will get that fitted in so all of the tuner units can be attached! |
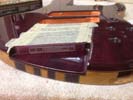
Nameplate ready to go on, once that's done I can finish up with all the tuners!.
|
|
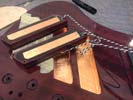
I will be adding the pickups into their wood covers soon and then adding them to the instrument.
|
Left: Pickup sub-assemblies with wooden covers now complete and I'm working on getting them aligned and installed into the body. Right: Cutting and fitting a watson namelplate ast the back of the tuner recess. This will be a nice piece of artwork in itself. I'll inlay it and polish it up and get it fitted asap. |
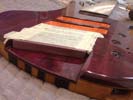 |
|
With the neck fitted I can now accurately place the outer tuners and from those reference points I can also establish holes for Piezo and grounding wires.
|
Left: I'm now taking reference measurements from the neck to accurately place the outer two tuner assemblies. These will provide placement for all 6 tuners and related wiring. Right: The pickups are waiting top be fitted into their respective pickup covers. When that is done I can mount them into the bass. |
I will be adding the pickups into their wood covers soon and then adding them to the instrument.
|
|
Tapping te threads on the string retainer.
|
Left: Doing some final work to the string retainer so that I can get that installed and get strings on. Need the strings on to test the electronics. Right: I am starting the work on the internal electronics. First step is to get as much of the internal electonic hardware and connectors installed as possible. |
I have a lot of electronics to fit in the control cavity.
|
|
Neck boted opn although I'm curently using stainless screws since neck may be on and off a few times. Have black ones ready for final assembly!.
|
Left: This is the bass with the neck now attached to body using our ferrules. String retainer bushings in, working on pickup assemblies. Right: Working on the placement of the tuner assemblies which will allow me to place the holes for the Piezo cables that connect the saddles to the internal electronics. |
Getting the two outer tuners fitted so that I can plot the 6 tuner locations accurately. This will allow me to drill for the Piezo cables.
|
|
Happy to say the neck it fitted! I'm goingg to clean out the neck retainer recesses on the back and get it attached!.
|
Left: I felt a bit like celebrating today becase I had just spent a couple of days working on the neck joint to get the neck to fit. You have to be incredibly careful not to scratch or chip the finish along the joint edges! Right: After some grinding and reaming I got the neck retainer recesses cleaned out for the ferrules. |
The recesses for the neck retainer ferrules were also full of overspray so I had to gring all that out to make the ferrules fit.
|
|
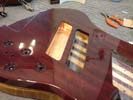
Adding copper shielding to the pickup cavities.
|
Left: I'm now applying copper shielding to the insides of the pickup cavities just as an added insurance since we have a lot of active electronics working inside this bass. Right: Copper in both pickup cavities now - getting the 5-star treatment!, also got started on removing overspray to fit the neck to body! |

The overspray in the neck pocket needs to be carefully scraped out so that I can get the neck to fit back into body. I always leave allowance for this but the lacquer buildup is sometimes quite thick, and it sets very hard!.
|
|
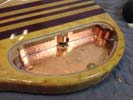
Getting the copper shielding attached to the control cavity surfaces.
|
Applying copper shielding is an art unto itself. It seems to have a wilful mind of its own and wants to do whatever you least want it to do. Nevertheless the shielding is going in relatively well and I just have the remainder of the sides and the upward facing flat surface to do now. Once this is complete I will go back to fitting the neck and providing grounding holes for bridge/tuner units. Plenty of tricky little jobs to do. |
|
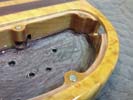
Magenets for retaining the control cavity cover have been installed.
|
Before I start work on electronically shielding the control cavity I wanted to get the retaining magnets installed around the inner edge of the cavity. It's easier to do this before the copper tape is applied. They are installed with common polarity, flush with the mating surface for the cover, and the cover will have corresponding magnets installed in it. I will do the same thing with the battery cavity but right now I need to get electronics installed! |
|
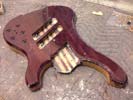
Just about done cleaning up the finishing overspray. Will add magnets and copper shielding soon.
|
I'm done with the back and mow working on pickup cavities and neck pocket. This finish is really hard and I have been scraping and filing till my fingers hurt but I'm almost there. Since the cavity and pickup recesses get copper foil and the neck pocket is quite a critical joint requiring a very good fit, all this cleanup work is very necessary. I'll be able to fit the neck into the body soon and that will really help move things forward! |
|
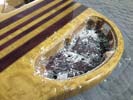
Getting started on preparing the control cavity for the work ahead.
|
I have started the process of preparing the control cavity for all the electronic hardware that will be going inside it. First step is to deal with the overspray from the finishing process so I am scraping those internal surfaces to generate a nice smooth surface which will then allow me to add the copper shielding that will coat the entire cavity interior. I will probably also add the magnets for the covers before the copper goes in. |
|
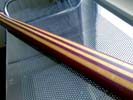
Back of the neck has a really nice matte finish.
|
One thing I was really impressed with was the satin/matte finish on the back of the neck. Colors are perfectly consistent with the body but the back of the neck has a very pleasing matte finish that feels really good. On the front side of the neck they finisher was able to maintain the polished effect on the forward facing surfaces which makes for a much more consistent look for the assembled instrument.. More info coming! |
|
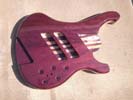
The Purpleheart front face of the bass.
|
We have a really inpressive looking body and neck (pictures of that coming) on this instrument and it's now all systems go for getting the component parts assembled to the point where I can start work on the electronics. We have a lot of electonic features and hardware to install and test in this instrument so the sooner I get it all to that stage the better! I'm liking what I see so far! Nest step it to fit the neck. |
|
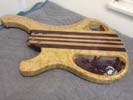
Body and neck have been finished - photos don't do it justice!.
|
I was finally able to pick up this bass from the finisher today. It took a little more time than they usually need because there was a LOT of masking involved in getting the amber tint onto the Birdseye Maple portions of the instrument. I must say they did their typical beautiful fautless job on this bass. The color works very well with the purpleheart and brings out the maple figure really well. Looks beautiful! More photos coming! |
|
Finishing process has begun!.
|
Our valued instrument is now in the hands of one of the best instrument finishers in the country. Our goal, based on my customer's wishes, is to apply a clear polyester resin on the purpleheart to bring out its natural beauty, but to add a slightly amber antique tint to the maple portions. We discussed the finishing process (which is somewhat complex due to all the masking) but everything sould work out fine! |
|
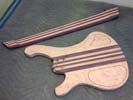
Back of the instrument components just prior to going to finishing.
|
I had to glue a membrane of carbon fiber on the back of the battery lid because I want to make sure it stays flat after the finishing process. It has now been radiused and sanded and I can consider that part complete also. This bass is now going to my trusted finisher where we will be applying a polyester resin all over and doing a slight amber/antique tint to the maple areas. The resulting finish should look really great - can't wait! |
|
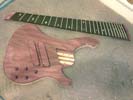
Front view of all the parts ready for finishing.
|
I spent a good part of today on this bass doing small drilling and sanding jobs, checking that everything fits together and cleaning up the neck surface. I also filed and dressed all the fret ends and polished those up. I prepared the little truss rod cover for finishing and drilled the 6 string holes in the headstock. I'm currently working on the little battery cavity cover to get that finished and as soon as that's OK it's off to finishing! |
|
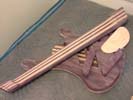
Consolidating all the parts so that I can be ready for finishing.
|
I have been very busy getting all the various parts of this bass ready for finishing. The two pickup covers are now done after I marked out, drilled and counterbored four holes in each for the adjustment screws and cleaned them up and sanded them to a nice smooth finish. I did some work to the string retainer area of the neck and double checked the bneck to body blends. Also radiused and sanded the control cavity cover. |
|
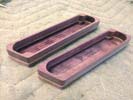
These are the completed pickup covers.
|
I have now machined the two pickup covers internally so that they are a clean and comfortable fit with the pickup bobbins. They have also been sanded and only mow require four adjustment holes in each cover to provide for the adjustment screws. The material between the recess bottom and the outside top surface of the pickup covers is less than .050" so that I don't create an unwanted distance between the magnets and strings. |
|
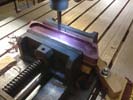
Now busy cutting the remaining material out of the wood pickup covers.
|
In this photo I am busy cutting out the insides of the continuous grain pickups so that my pickup bobbins will fit in there nice and snug. Because they are made entirely of purpleheart I have to machine them relatively carefully. They aqre both a slightly different geometry inside to compensate for the size of the pickup bobbins themselves. Once this machining is done to both I will get the adjustment screws and counterbores established. |
|
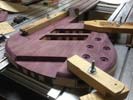
On the CNC cutting the counterbored control holes.
|
I was able to get this body up on the CNC to get the holes and counterbores done for the controls. My CNC has been non-stop busy but I wanted to get this done so that it didn't hold me up in the process of getting the surface finish applied. With these holes and counterbores established I am pretty much done with the body. I still have two holes to drill for the two MIDI switches but those are marked out already! |
|
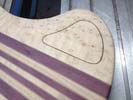
One of the back covers prepped for final assembly.
|
This is the battery cover which I just thicknessed and cleaned up so that it is caught up with the rest of the instrument. We are going to apply a slight honey tint to the maple areas of the bass which will warm up the color a little bit and definitely highlight the beautiful grain in the birds eye maple. It is all coming together and between its deverse capabilities and it's looks it is destined to be bass that will get a lot of attention! |
|

String retainer completed.
|
I wanted to post a photo of the string retainer I created for this instrument. Since no equivalents are commercially available I manufacture these myself. Each is based on the string spacing at the nut and allows the strings to pass through the headstock and be clamped by set screws. This keeps the appearance of the instrument nice and neat and the retainer is discretely located inside the headstock. Will install after finishing. |
|
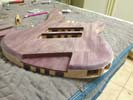
Almost complete body - just been fine sanded.
|
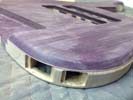
The bass had had some fine detail sanding (hence the temporary lighter purple color) as I wanted to make sure the edge breaks and blends and finishes were all in a complete state. This photo was also taken to illustrate that I will be applying my logo on the step at the back below the tuners. I did this on another bass with similar architecture and it worked out well. I can do that after it has been surface finished. Next up are the control holes I marked out. |
|
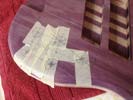
Planning out the controls and their relative placement.
|
Time for me to make decisions of two features. One is number of holes required for switches and knobs on the face of the instrument. The other is choosing the best locations for each taking into consideration that we will have a LOT of hardware, wiring and connections inside this control cavity. Obviously we want it to look elegant from the outside and logical in layout for the player! Once that's done I will cut them all. |
|
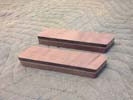
Pickups ready to program and machine.
|
Pickup covers are ready for internal machining. They have been cleaned up, sawn and sanded to the correct height and the next move is to get the interior spaces cut out to match the pickup bobbin geometry. They don't look as purple as they normally would because I jhave just finished sanding them and purpleheart needs to react again to the UV to re-establish its color. Doen't take long. Want to get these ready for my finisher. |
|
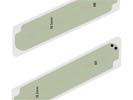
Ppickup are in production - Lots happening in the background.
|
Pickup bobbins have been created and these will be getting some custom winding. They are designed to maximize the amount of copper winding we can put on these but at the same time being compact enough to sit inside the machined cavity of the continuous wood covers. The formula hahs always served me well and the pickups end up looking like a really nice organic part of the instrument rather than parts that were added to it! |
|
Recesses for output plates have been cut.
|
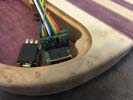
The two recesses that will house the plates for the output sockets have been cut into the side of the control cavity. I cut these taking into consideration the internal electronics and their physical dimensions because we are going to have a lot of electronics and associated wiring to fit inside the cavity. I am going to custom cut the actual plates that fit into these recesses and hold the hardware in place. |
|
Setup now on the CNC fop machining.
|
I am setting up the CNC to do some machining on the lower edge of the body so that I can establish two recesses through to the control cavity. one of the recesses will be for the jack socket and the other will be the plate for the 13-pin MIDI output. Once I get these cut in Ii will sand everything smooth and we will be almost ready to get the body and neck off to the finishing process. Just being careful to make sure locations are right! |
|
Programming and getting ready to cut the two output recesses.
|
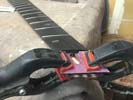
In order to get the body and neck to my finisher I need to cut the holes for the MIDI module and the jack plug. These will need to be slightly custom because of the edge break on the front of the instrument but that should be no problem. I have just programmed cutter paths for both socket areas and I will probably also cut custom plates on the laser so everything fits just right. I also have 7 holes to establish on the top plate! |
|
Attaching the headplate to the neck assembly.
|
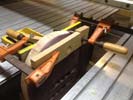
Time to get the headplate glued on. As soon as the glue is set I will trim off the extra material and shape and sand everything to a finished condition. I have to check my records and see if we are doing a zero fret or a standard nut but whichever it is I will probably go ahead and get that cut too. I will then reassemble the whole instrument and check it for overall feel and comfort in case there are small pre-finish adjustments to be made. |
|
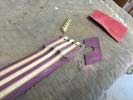
Doing some final work on the headstock and string retainer areas.
|
I have drilled the through holes for the strings and ground and filed the end of the neck down to fit the outer edge of the brass string retainer. I am in the process of sanding that entire area to make sure I have a nice even finish. Once that's done I will glue on the headplate to complete the assembly. Right now it's oversize but I will make everything flush as soon as it is glued in place. After that some sanding and the neck is ready for finishing! |
|
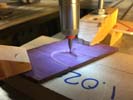
Cutting a purpleheart headplate I made so I have a truss rod access cover.
|
I have made a little headplate out of purpleheart for the front face of the headstock area. Befopre I glue it onto the neck I need to cut out the little cover which will allow access to the end of the truss rod. I will then attach the headplate and the little cover piece will be attached by magnets. Right now I just want to get the neck in a condition where I feel confident to get thesurface finish applied. It's all going well though. |
|
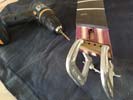
Using string retainer to establish through holes in the headstock.
|
I have done some more work to the string retainer and the recess, and I am now able to use the retainer as a drilling jig to establish the holes at the back of the headstock which will allow the strings to pass through. Having done this I can glue on the headstock veneer and use the same process to establish the upper holes. I'd loke to get this instrument body and neck into the finishing process so it's good to get these little jobs done. |
|
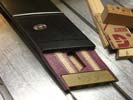
Machining a string retainer for the headstock.
|
I am manufacturing a custom string retainer which I typically do for all my headless multiscale basses. It is first cut to fit the trqapezoidal shape of the recess I cut and I will then drill the six through holes for the strings. Those holes will allow me to then drill through the base material. I will then add a gheadstock veneer plate and when that is securely attached I will reidrill through that plate to create the string holes in the top. |
|
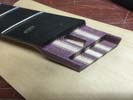
Finished the machining work on the headstock area.
|
This is the end result of headstock machining after the work on the CNC, and some subsequent grinding and sanding. Next task is to glue on the headstock veneer and trim that to the right length. I will probably add a retainer to the front of the assembly and we will be done with this part. I'll do the final sanding after the little headplate gets glued on. Nice to get these details sewn up. I'll have more photos coming soon! |
|
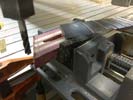
Headstock area has been cut to length - nor for more machining operations.
|
The first stage of the headstock work is done - I have machined the length of the headstock back to it final length and angle. This now allows me to cut the recess that will hold the string retainer. Once that is established I can get the headstock veneer attached and that will take care of the machining operations on the neck. I also have a nut that I will need to install soon at the end of the fingerboard. Getting there! |
|
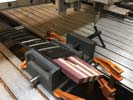
Doing some machining at the headstock end so that I can for a string retainer at the end of the neck.
|
It's time to get the headstock area machined. I have left this area of the neck a little oversize so that I can clean up the excess material after the machined features are established. I need to cut the material back parallel to the end of the fingerboard to allow just enough space for the string retainer block. I will then machine a recess to hold the string retainer and that will thehn allow nme to add a headstock veneer with truss rod access cover. |
|
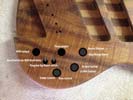
This is the general plan for the control layout. I was lucky in some ways top have a similar configuration on another bass I built.
|
This is the control layout for a very similar bass I built not long ago and I am using its capabilities to plan out the control options on this bass. My goal here is to make sure I have enough space fo all the electronics, which I have, and based on that, where I am going to locate the various control knobs. This layout was fairly intuitive and it looks like it would work well for this bass too.Lots of options for the player!! |
|
Locating the RMC 13-pin output and the 1/4 jack socket.
|
Before I go ahead and cut holes in the face of the instrument for controls I want to see where all the internal hardware would best fit. We have an RMC MIDI module fed by six piezo wires that come in from the bridge saddles. We also have an Audere preamp which will probably tap of the summed piezo signals to feed the standard 1/4 inch jack plug output. It gets complicated but it just needs a lot of planning up front! |
|
Looking at how I'm going to use the cavity space for RMC MIDI, Preamp, PIezo feeds etc.
|
I am looking at the control cavity with a view to making sure I have a location for all the different pieces of electronics that will be going into this bass. Fortuneately we had the presence of mind to make the cavity as big as the lower bout would allow. I want to machine the recesses in the lower side for both the jack socket and the 13-pin MIDI output so I need to make sure I'm locating those correctly before I machine anything! |
|
Planning the control layout for the electronics.
|
I have most of the sanding completed and I'm happy with the shape and feel of the 'whole' instrument. Looks really nice both from the front and the back. I need to now look at the electronic packages we are using and figure out how many control knobs and or switches, how many outputs, and where all these are going to be located. I decided to upgrade this bass to and RMC MIDI system because I have had good experience with their performance. |
|
One of the ABM single string bass tuner/bridges.
|
This is one of the single string ABM tuner/bridges that will be installed on this bass. They will also be fitted with Graph Tech piezo saddles which will allow them to provide a sound signal for the electronics package. I have been using these for some time and for a headless bass guitar it's one of the best options. I will also have to provide wiring and grounding from each of these units to the control cavity. |
|
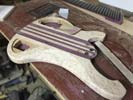
Bass body and neck getting sinal shape adjustments and getting smoother as we continue sanding.
|
I took the neck off again because the parts I have to sand aren't very accessible with the bass assembled. I'm refining a few of the curves at the expense of the skin on the ends of my fingers but I do like the way the body and neck (and the assembled bass) feels. The neck feels the right thickness and I'm just working on the edge breaks everywhere else. Purpleheart is hard to sand but most of the worst sanding is now done. |
|
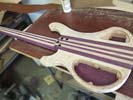
Filing and sanding of body in praeparation for finishing.
|
The instrument is back together and I am working on the sanding and making sure everything between the neck and the body blends nicely. Sanding is pretty work intensive because much of the material is purpleheart which puts up an admirable resistance to being sanded. Nevertheless it's going well and my goal here is to get all the surfaces on this bass ready for finishing. Already starting to plan for the electronics! |
|
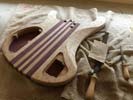
Filing and sanding of body in praeparation for finishing.
|
I'm having a big push on the sanding and filing process of this bass so I can get itready for its actual surface finishing process. Right now I'm filing all the body features to make sure they are all consistent and then following that up with some fairly intensive sanding. I'm also preparing the cavities for the installation of neodymium magnets whose job will be to retain the two covers. Starting to see the light at the end of the tunnel!!! |
|
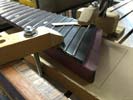
Some careful machining at the heel end of the neck.
|
Back on the CNC to establish the final level for the small plate at the back of the neck. In order to blend with the top the actual surface is slightly tapered due to the angle of the heel. I worked my way in slowly taking measurements as I did successive cuts. When it was done I was pleased that the surface was nicely parallel to that of the body top. Mission accomplished and on to the rest of the final shaping work. |
|
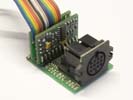
RMC Poly-Drive 1b unit which will be part of the electronic system in this bass.
|
I have decided that the best MIDI processing option for this particular instrument will be an RMC Poly-Drive 1b. I have one on hand for this project and I will be doing some work in the cavity of the bass to establish the best arrangement and layout for the various electronic components we will be using. Fortunately the formula is relatively close to another bass I made a few months ago so hopefully we'll get it configured without trouble. |
|
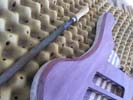
Filing around the edgo fo the body to get a nice consistent edge break.
|
Working on the edge break around the body. I want to try and expose a little of the white border of the birdseye maple if possible. Removing the purpleheart is tough work because it is very hard so my approach has been to grind most of it off and finish with a big flat file. This gives me some control over the geometry and I will of course graduate to a finer file and then to sandpaper to finish. Good too that it reduces weight a little too! |
|
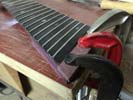
Attaching the plate at the heel end of the neck.
|
I'm now gluing and clamping the purpleheart plate onto the back of the neck so that when it sets I can trim everything to the finished shape and profile. This will allow me to get the neck re-attached so that I can continue the sanding process and get all the surfaces the way I want them to look and feel. My goal is to get everything ready for the finishing process which means a lot of sanding and some work on the headstock area. |
|
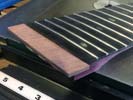
Adding a decorative shim on the end of the neck which i will trim to size.
|
I have cut an oversize piece of purpleheart and partially sanded its thickness so that I can test-fit it at the end of the fingerboard. It will need to me machined a little thinner to blend with the top surface of the body but right now I just wanted to get it attached so that I could make the subsequent refinements when it is secure. The color is much lighter because the purpleheart has recently been cut - it will darken to the same body color. |
|
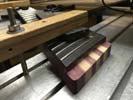
Some finishing work on the back of the neck.
|
I have the neck up on one of my machines to establish a surface onto which I will be adding a Purpleheart plate to the top of this surface so that the neck blends nicely with the top of the instrument. I will then reassemble the neck and body so that I can finish the sanding of the transition area and some other parts of the instrument. I am also finishing up a string retainer block which I will be installing in the headstock area. |
|
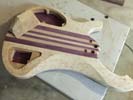
Working on the shaping and sanding of the body.
|
I'm sanding the body which is quite a task as much of the material is very hard purpleheart. I was able to use a miniature grinder to get a lot of the material removed and now I am at the filing and sanding stage to get all the curves blended together nicely. The hardest part is getting the curves at the neck/body transition. I have most of the electronics on hand now so I will soon be cutting for jack and 13-pin sockets. |
|
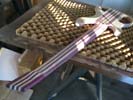
Doing some detail shaping and sanding on the back of the neck.
|
I spent some time today carving and sanding to get the feel of the neck just right. The thickness at the nut end seemed to be a little more that we wanted but now it feels much better and I can now graduate to finer sandpaper and bring many of these surfaces on the bass to a finished condition. In the meantime I have n RMC Poly Drive MIDI unit on the way and I'm working on the pickups for this very unusual bass. |
|
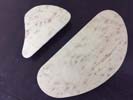
The two continuous grain cavity covers for the back of the instrument.
|
I am getting the cover plates prepped for the back of the instrument. I cut them out of the material I used for the back so the grain on the two covers matches perfectly. I need to make sure they fit and get the edges radiused a little bit. I also need to make a small cutout on each to allow the lid to be lifted off the neodymium magnets that will be holding them in place. The back of the bass will look really nice! |
|
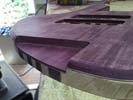
Tuner recess complete and looking nice.
|
This is just about the end result of my work on the area below where the tuners will reside. It's now a nice clean transition between the top and the recessed level and from the top of the bass, because we used harvested wood, the transition is as invisible as it could possibly be. Should look very classy on the finished product. At this point it's back to sanding and shaping of body and neck countors. |
|
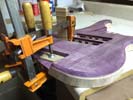
Gluing the top plate into the recess for tuner access.
|
I was successful in adding the purpleheart veneer around the sides of the tuner recess. The end result looked very good so I decided I could safely go ahead and glue the little harvested plate onto the upper surface of the tuner recess. This will give the bass body a really nice continuity and the area we removed for the tuners will blend back in nicely. I will post a photo of the end result of these efforts. |
|
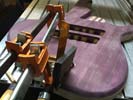
Gluing a piece of purpleheart veneer into the recess.
|
I was at the point of gluing the harvested purpleheart plate into the tuner recess when I decided that it needed to have amore complete - less "cut" look so I decided to cut a piece of purpleheart veneer, heat bend it to shape and glue it in to cover the visible split that you could see between the top and the baseplate I am going to glu in. Blame it on my need for perfection - it just didn't look to me as good as it could be. Tricky gluing job! |
|
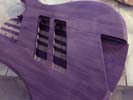
Making sure the insert fits below the tuner assemblies.
|
I have to now get the little plate I havested out of the top glued into the recess we machined. I can't finish the body profile properly without this piece being glued into place. I tesyed it for "finger access" with a tuner assembly to make sure even someone with fairly large hands could get into the c-string tuner and use it comfortably. Once this piece is installed I mey put the Watson logo on the vertical surface as seen from the back. |
|
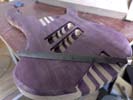
Working on the edge treatment around the body contour.
|
A lot of my time recently has gone into the shaping around the body. I am trying to establish a nice consistent edge break around the perimeter that slightly exposes the pale behind it but at the same time is even and consistent all the way round and doesn't compromise the look of the instrument. Right now much of that is done with a hand file because purpleheart is so hard sanding is not yet an option. I'm not far from done and it will look great. |
|
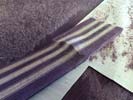
Lots of wood chips after carving the geometry on the back of the headstock.
|
I have machined the back surface of the headstock by bearing on the front for reference. That guarantees me a parallel surface when I machine the back to the required thickness. After the machining I needed to do some carving in order to blend all the surfaces and features together. It's a bit like carving artwork at this stage as it all needs to be done by eye. Nice to see this part come together, it's always a complicated step. |
|
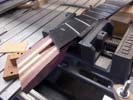
Machining the upper surface of the headstock area.
|
I needed to establish a flat surface on the headstock area so that I can get the purpleheart face cut and prepped for assembly. This required a fairly tricky setup to achieve just the right angle to match the fingerboard. I now have a nice flat machined surface and yjay will become the joint face for the little top plate. I now need to flip this neck over and machine the back surface of the headstock parallel. |
|
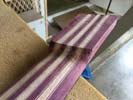
A little carving and shaping required at the headstock area.
|
This is the back of the "headstock" area which I needed to cut and carve closer to finished geometry. The end of the neck profile curve has to extend far enough past fret 1 to feel comfortable for the player but no so far that it creates a weakness in the cross section. I spent a little time carving that. I also made the sides flush with the edges of the neck and now I need to do some machining to create the correct thickness. |
|
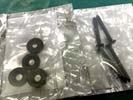
Some of the black hardware that I will be using on this instrument.
|
I ordered black hardware for this bass, this is the neck retaining screws and rings that will hold the neck to the body. The tuner/bridge assemblies will also be black hardware which should all look very good on our purpleheart instrument! The fingerboard is black so the hardware will compliment that too. I will probably put a discrete logo on the bass somewhere - also in black. Will discuss with my customer. |
|
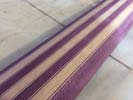
Spent some time on the neck profile removing material.
|
Now that I have the neck and body attached I have been able to work on the back of the neck. I removed quite a large amount of extra material and shaped the profile much closer to the finished curve. Purpleheart is tough stuff to work and carving and shaping it can be a little laborious. Net result here is that the neck is now close to its finished "feel" and as a result is much lighter in weight too. Stil working on heel and headstock. |
|
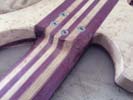
Working on the transition between the neck and the body.
|
This is the intersection between the neck and the body. Normally for a bolt-on instrument you have a great big square heel that gets in the way of the player's hand. I want to sculpt this transition so that when you play the bass nothing gets in teh way of your acess to the upper frets. I am in the process of carving away at the intersection and when I am happy with the feel I will file and sand until smooth. |
|
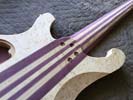
Retaining holes done - now fitting neck to body.
|
I have drilled the neck retaining holes through to the pocket and also centered the hole locations in the back of the neck heel. Next step is to drill for the retaining screws and secure the neck in place. That will allow me to work on the two pieces as a whole so that I can carve just the right blens between neck and body. At the same time I can move ahead and finish the nack radius and headstock geometry. |
|
retaining holes and counterbores have been machined.
|
These are the retaining locations for the neck. I am using chrome retaining rings which I happened to have on hand although the hardware on this bass may end up being black. That choice will be up to my customer. Now that I have these established I can get the neck attached to the body so that I can take care of some of the carving and shaping that will need to be done in that area where the two pieces meet. |
|
Setting up to establish neck retainers
|
Setting up to establish the holes that will be holding the neck onto the body. I had planned on five but in reality the fifth one is redundant. Four robust screws are more than sufficient to apply the clamping force to hold the neck onto the body. I'm going to machine the holes and at the same time counterbore each one to accommodate a retaining washer. Should work out fine and also look good with the neck/body tapers! |
|
Establishing the right edge conditions around the body perimeter.
|
I'm working my way around the perimeter of the body with my filing and grinding tools to generate the best edge break that will expose the maple behind the purpleheart. I think we'll end up with the desired result. I am using my material removed around the control cavity as a gauge for the material removal around the rest of the body and once I have shaped everything i will go back and revisit the test area and see if I can remove more! |
|
This is the tuner relief with the harvested top plate in place.
|
The machining o fthe tuner relief has been done and I'm happy with the relative depth of the cut based on having the harvested plate in place. I still have a little room for minor adjustment but right now I can get hold of the most inboard knob with relative ease. I am using a stock tuner to judge that depth. I will probably run a little veneer trim around the insert for continuity before gluing the purpleheart piece back in. Looks good though. |
|
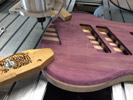
Getting ready to cut the body relief for the area behind the tuner knobs.
|
The body of the bass is set up on the CNC right now so that I can remove some of the material at the back of the body to make room for the player's fingers when using the tuning knobs. I need to match the cut that I previously made to harvest out the section of the top plate, so that takes a little careful adjustment to achieve. I then cut the lower surface down to a level where access to the knobs feels correct. |
|
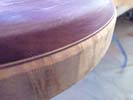
Working on the edge break around the body profile.
|
This is where I am right now with the edge break at the top of the body. Goal is to expose a little of the underlying maple around the edge of the body. Due to the space our electronics need, I have a relatively large/deep control cavity behind this area. Based on that necessity, I can go too much further on the edge treatment without the fear of breaking into the cavity below. I think I can get a little more - just have to be CAREFUL! |
|

Programming the recess to provide clearance for tuning knob access.
|
Lots going on with this bass right now - I'm working on both the neck and body refinements but at the same time I need to machine out the recess that will provide access to the tuner knobs for the player's fingers . This requires first machining out the core material to the correct depth then shaping and inserting the purpleheart top material I harvested out so that from the front the grain of the wood is continuous. |
|
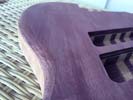
Starting to shape the top edge of the body to reveal a little of the core wood.
|
One of the thinks my customer wanted was to be able to see a witness of the whiter maple around the perimeter of the bass body. To achieve this I have to remove some of the purpleheartaround the upper edge. Right now I am doing a couple of small experiments to evaluate how much mmaterial needs to be removed to achieve the desired effect. Once that is known I'll goo right round the body perimeter and make that happen. |
|
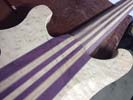
Carving away at the neck joint to make the perfect combination.
|
I'm working my way in carefully with this neck joint so that I don't remove more material than I should. I'm shaping the joint area and then holding the bass with the neck in place to see how it feels. Then I take more meat off and repeat. It actually feels really good right up at the top frets right now so I know I am close. Now the artistic side of me demands that I make it look balanced and perfectly contoured. It will be nice! |
|
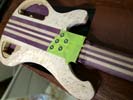
Working on the neck and body joint - establishing locationd for retaining screws.
|
It's time to get the neck joint carved out and shaped. before I commit to a specific geometry I have to lay out the locations for the retaining screws and rings. 5 of them should be prefectly adequate to securely hold the neck in place so the challenge is to get them distributed so that they do their job but don't get in the way of the carving of the joint area I plan to do. I have to make sure there's comfortable room for the player's hand. |
|
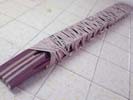
Gluing the fingerboard onto the neck.
|
Unleashing the power of the rubber band! The fingerboard is being glued onto the neck and sometimes when you are dealing with irregular shaped items that you can't just clamp down on a flat surface you have to find other ways to apply adequate clamping pressure. In this particular case it made sense to use rubber bands which are hooked onto a special fixture below the neck and combine to apply a very even and consistent grip. |
|
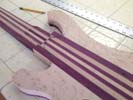
Woring on the best distribution of retaining screws to hold the neck onto the body.
|
While I am working on the neck I can also start work on the geometry for the heel itself. We will want 5 or 6 retaining screws to securely hold the neck and body together so I need to make room for that. At the same time, I want to find the best way to distribute these retaining screws so that we minimize the amount of physical material that would get in the way of the player's hand when playing on the upper frets. More on this very soon! |
|
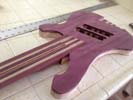
Fitting the neck into the neck pocket on the body.
|
One of the things I wanted to get done before the fingerboard goes on was to get a nice solid fit between the heel of the neck and the pocket in the body. I spent a little time working on the neck to get things to fit together just perfectly. This allows me to double check the linear placement of the fingerboard before I attach it to the neck. It also will allow me to refine the shaping at the back of the heel. |
|
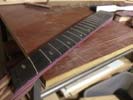
Fingerboard being prepped to go on the neck.
|
I'm ready to attach the fingerboard to the neck. I am making sure we have clean and flat joint surfaces and also double checking the fit between the truss rod and the slot geometry it needs to fit snugly into. I will then mix up some of my high grade epoxy and make this fingerboard part of the neck assembly! Looking good so far and this will allow me to finish carving the neck profile to the final neck dimensions. |
|
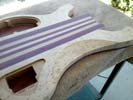
Working on the belly cut at the back of the body.
|
While I am working on the body I wanted to get the belly-cut established. Doing this is very much a cut and test situation. I do a standard bellu cut then I compensate for the feel and the body shape but carefully continuing to cut until everything feels and fits just right. The belly cut alse shows off the wood grain nicely!! May take a little more off until I feel things are set just right. |
|
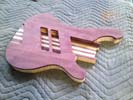
Done with the neck joint, now back to body shaping.
|
I now have a neck pocket that will allow me to get the neck fitted and start working on the neck and body joint. This needs to be strong enough to retain the neck but compact enough not to get in the way of the player's hands on the upper frets. I think everything will work out really well in that area because I do have plenty of room for the retaining bolts and that should allow ne to carve out a nice elegant body/neck transition. |
|
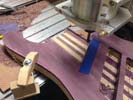
More work on the neck pocket, should have a good solid body to neck joint!.
|
Initial machining worked out very well so I ran a few passes to rough out the cavity. I went back to double check some sizes based on final neck dimensions and now have a program that can generate the finished taper, neck angle and correct depth. So far all looks good and I'll have this portion of the work finished soon. I'll then be able to test the neck angle and probably go ahead and assemble neck & fingerboard. |
|
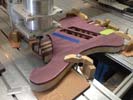
Cutting the neck pocket into the body.
|
Finally got this on the CNC as I had a very busy run of machining setups. I'm now setting up for the cutting of the neck pocket. This setiup requires a little calculation since the angle of the neck to the body has to be just right in order for the strings to meet the bridge saddles at just the right height off the top of the body. The instrument is set up on the table to compensate for that angle. |
|
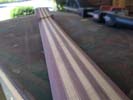
Final checking of relative dimensions before cutting the neck pocket.
|
I just want to make sure that all the dimensions line up before I cut the neck pocket. It has to be fairly accurately located so that the fingerboard will end up in the right place relative to the bridge units, and that we have enough space for a pattern of location bolts on the back. I have marked out all the relative locations and I'm now able to go ahead and set this up with a program to cut out the pocket. |
|
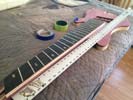
Working on the rough shaping of the back of the neck prior to attaching fingerboard.
|
I removed a good amount of material from the back of the neck to get it closer to finished dimensions. Feels a lot lighter now also. I'm doing this to prepare for attaching the fingerboard to the neck and at the same time getting a better feel for the finished neck profile. I'll also be cutting the body to attach the neck soon so having it profiled closer to final dimensions is a huge plus. Neck is very stong and looks beautiful! |
|
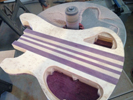
Body contour being sanded to the template profile.
|
I'm getting busy saning the perimeter of the body down to the exact profile of the template. This will refine the area around the area where the neck pocket is going to be. I don't want to cut the neck pocket until I have the right geometry established in that area. It will be nice to have the neck and body as one piece, I know it's going to look amazing. I will also be starting soon to radius the edges around the top plate. |
|
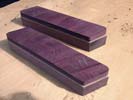
Sub assemblies for pickup covers are complete.
|
Here are the pickup covers after I have added veneer to the bottoms and glued the tops onto a base of purpleheart. I need to clean them up around the edges so that the sides are flush. Once I have then nicely cleaned up on the outer surfaces, I will set them up on the CNC and machine out the space that will accommodate the pickup assemblies for this bass. These covers will look great when all the parts of the bass come together! |
|
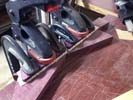
Starting the work on the continuous grain pickup covers.
|
While I work on other operations I have the two harvested pickup covers being glued onto decorative veneer and purpleheard bases. When this is complete I will saw them apart and machine the sides flush. Once the outside of each pickup cover is complete I will set them up on the CNC and machine out the inner space to accommodate the pickup assemblied leaving a thin wall of purpleheart all around. |
|
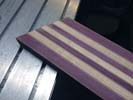
Machining parts of the neck in preparation for fitting to body.
|
I machined the heel end of the neck to achieve a flat and co-planar surface and also to establish a thickness before Icut out the corresponding neck pocket from the body. I want to get that done so that I can start the final shaping of the body countour and edge treatments but it's safer to do that after the neck pocket is established. I will also be assembling the fingerboard onto the neck which is bound to look really nice! |
|
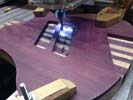
Cutting the two pickup cavities in the body.
|
I have set up the body on the CNC in order to machine out the material of each of the two pickups cavities. I work within the profile that was used to harvest the pickup covers and machine out cavities to a depth that will clear the pickup assemblies and also leave room for the associated wiring under the pickups. One the is job is done I will move on to fitting the neck into the body and hhaping the body. |
|
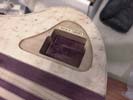
Serial number insert has been added inside the battery cavity.
|
This bass has just received its unique identity. I created the tag with the serial number and added that into the slot I recently machined in the battery cavity. I will soon be adding the continuous grain wood cover for the compartment which should look really nice. Next up will be cutting the pickup recesses to full depth which I will do on the CNC machine. Also need to cut the step-down at the back of the body for tuner clearance. |
|
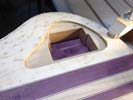
Battery cavity has now been cut with provision for third 9v battery.
|
I decided to cut space for a third unique 9v battery because I have learned with other projects that a separate power source for the MIDI processing is a good idea. This allows me to retain the 18v supply for the pream and use the 3rd 9v for the powered board we will be using. Wiring up a system like this for MIDI ic a complicated task and this will at least facilitate the power supply challenges! Also cut slot fo serial number insert. |
|
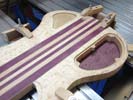
Control cavity completed.
|
This is the completed control cavity. I'm now in the process of setting up to do the same thing for the battery compartment above. I am pretty sure the control cavity is large enough for the package of electronics we are planning to build into it. I used most of the available space for that reason. I'll have two 9v batteries in the other compartment. It's already a very nice looking bass, we'll be fitting the neck before too long. |
|
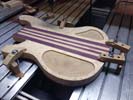
Setting up to cut the control and battery cavities.
|
It's time to machine out the control cavity and battery cavity from the back side of the body. I will machine the control cavity first - cutting that deep enough to leave just the right amount of material on the purpleheart front to allow for the potentiometers that will be installed. The battery cavity will be cut to accommodate two 9v batteries. Each of these cuts will intersect with the wiring holes we machined into the body top earlier. |
|
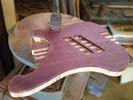
Body has been assembled - now removing excess material.
|
The top plate has now been glued onto the rest of the body. We now have a very solid, slightly oversize body. My next task will be tp shape the puter perimeter to match our original template. Once I do that I can plan things like the belly cut and those edge breaks we are planning to do all around the body perimeter to highlight the purpleheart transition to the birds eye maple. I'll also have to get the pocket for the neck cut! |
|
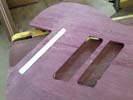
Grounding plate secured - ready to glue top onto body.
|
The brass plate has been cleaned up and fitted to the recess. I also glued on a piece of maple veneer to the upper side so that when complete i would still have a wood-to-wood joing surface in that area. It was a little over exposed in the photo! The brass/wood laminate was glued in and when solid I sanded and scraped the two surfaces flush. We are now ready to get this top plate glued onto the body. |
|
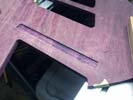
Recess for grounding plate has been done.
|
Mission accomplished on the recess for the grounding plate. I will glue the plate in and add a small layer of wood veneer on the back so that I don't lose any adhesion when I stick the top onto the body. (Wood-to-wood rather than metal-to-wood). When that's complete the top can go on and I can get the pickup cavities and the recess for the tuners machined. I am also working on neck details right now. |
|
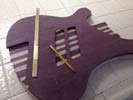
Putting a grounding plate in the back surface of the top plate.
|
Before we assemble I decided to put a small brass plate under the top so that I have a continuous common connection I can use when grounding the individual bridge units. It's always tricky trying to run a wire from each - this way instead of 6 wires I can use this to give me a single embedded ground which i can then run to the control cavity. Obviously it will be shorter than the piece illustrated and negligible weight. |
|
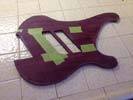
Top plate ready to be attached to body blank.
|
This is the top plate with the small piece at the tuner end harvested out for later use. Now I have to get things ready for gluing this top onto the body. I'm going to mark out the locations of some of the key features and then look at the body blank. I have already cut wiring channels in the top of the body so all being well there will be minimal work in preparation for gluing this top on. Just want to be sure all measurements agree. |
|
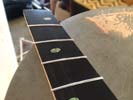
Getting the stainless steel frets installed.
|
Time to get these stainless steel frets into the fingerboard. They are a little more work than nickel frets because they have to be pre-bent a little closer to the actual fingerboard camber and are not quite as forgiving as nickel frets. The payback is that they are super hard-wearing and will last a very long time! I will install all the frtes and then clean up the extra material on each end so that the frets themselves are flush with fingerboard edge. |
|
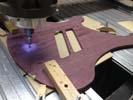
Cutting out recess piece from the back side of the top plate.
|
This bass will have six single string tuners set at a specific angle to accommodate the multi-scale layout of the bass. Because we want to maintain the more traditional rounded back of the body I need to create a recessed area which will allow the player's fingers to access the tuning knobs. To that end I have to harvest out a piece of the top plate so I can re-install it later to maintain continuous grain on the recessed area. |
|
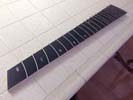
All the stainless frets have been rough cut for installation.
|
Finally got all the stainess frets cut - this time with a dremel and abrasive wheel which is really the most reliable way to cut this wire. I can now get thing s set up to install the individual frets into their respective fret slots and consider the fingerboard done for the time being. The other task I have on this bass is carefully marking out features that I need to remove from the top plate before it gets attached to the body blank. |
|
Starting fret install - cutting the frets.
|
I am putting stainless steel fretwire into this fingerboard. I pre-bent the wire and now I am starting to cut the frets themselves, a little oversize so that they can be trimmed back when we are done. Normally I can use mechanical snips to cut regular nickel wire - I tried on this stainless but the stuff is just too hard. I'm going to have to default to my dremel with an abrasive cutting wheel in order to rough cur the remainig 22!! |
|
Fret dots being installed.
|
I am ready to install the frets but I decided it would be good timing to insert the side dots into the neck first.These are glued into the holes I previously drilled along the upper edge of the fingerboard. Once the glue is set I can snip off the excess material and I will then carefully sand the edge down until the insert material is perfectly flush. One more job out of the way as we move this project closer to completion. |
|
Cleaning up the heel of the neck.
|
After doing some careful marking I can cut the angle that will be the back (or heel) of the neck. This in turn will allow me to cut out features on the top that will let me complete the top and glue it onto the body. A lot of things to think about since this is my first fanned fret bolt-on, but everything seems to be working out fine. I have to leave enough on the neck/body joint to accommodate the screws that hold neck and body together |
|
A couple of setups on the CNC for neck angle and side dots.
|
I have to do a couple of things atthe same time on this neck and fingerboard. I need to cut the exact angle at the end of the neck blank and in order to do that properly i want to separate the fingerboard from the substrate that it is currently glued onto. In order to do that I need to put in all the side dots on the fingerboard. Once that's done I'll use the fingerboard geometry as a reference for the angle at the end of the neck. |
|
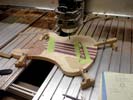
Cutting wiring channels in the top surface of the body.
|
Now that I have locations for the two pickups I can map out the other features for the inseide of the body. I used the relative positions of the pickups, fingerboard and tuners to mark out channels which will accommodate the sets of wiring for the pickups, gound wires, battery wires, piezo etc. I will cut these out of the body material before the top goes on permanently. I'll also cut some weight relief where I can. |
|
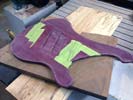
Pickups have now been harvested from top plate.
|
It takes a few separate set-ups and machining operations to cut out the pickup covers as I have to machine them from both sides. However, everything went well and I now have the pickups separated from the top so that they can be continuous grain covers on the assembled instrument. I'll go ahead and glue up the wooden covers and machine their interiors while other work continues on the instrument. |
|
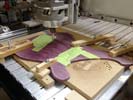
Starting work on the top plate.
|
I now have the top plate up on my CNC machine for a couple of critical operations. I need to harvest out the pickup covers from the top plate so I can re-use them to create the continuous grain pickup covers. Also while I have the top aligned and set up I will cut out the section at the back end that will become a drop-down area to provide clearance for access to the tuning knobs. More pohots soon. |
|
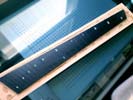
This photo shows all the inlay pieces.
|
This is the neck with the inlay pieces inserted. The pattern is a perfect mathematical curve and the size of the angled ovals changes in relation to the space between the frets. It all makes for a very pleasing geometric pattern. I need to clean off this board, get the dust out of the slots and allpy a protective coating which will create a glass-like barrier over the shell inlay. Once that is done we'll install frets. |
|
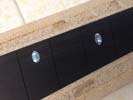
The cool shell inlay which we are using for this fingerboard.
|
I am using a very colorful shell for the inlay of this fingerboard. Lots of blues and also shades of purple in there to match the Purpleheart wood! Each inlay is not only a different unique size, but in the process of cutting the shell I hand picked each piece for its color content and visual "depth". Each inlay piece is beautiful and the overall effect of the entire fingerboard is very impressive. This was a design requested by my customer. Very nice. |
|
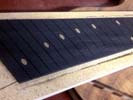
Starting work on the inlay process!
|
The process for creating the inlay has begun. I try to make the inlay components follow that exact curve of the compount radius. I start by cutting out plugs on the laser that fit exactly into the recesses in the fingerboard. These are inserted into the board and then sanded so that the top surfaces of each are perfectly flush with the surface of the fingerboard. This gives me a set of very accurate plugs which wil support the inlay to come. |
|
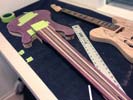
Marking out critical features of neck/body relationship.
|
Some of the calculations on a multi-scale bass are pretty complicated, and more so because in this particular case we are dealing with a bolt-on neck. I am marking out all the important features relating to the placement of the neck and the tuner/bridge pieces so that I can be sure everything will work happily together. This gives me valuable data on things like the neck pocket and relative neck/body relationship. |
|
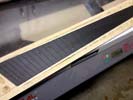
Fretslots and custom inlay have been cut!
|
I was able to move ahead with the machining of the fret slots. Everything is carefully located so that we have a zero fret in just the right place and our last fret will be the correct distance from the end of the fingerboard. Once that was machined I reset for cutting our inlat geometry which we have been discussing and refining with our customer. This resulted in a very pleasing layout of inlay markers across the fingerboard. |
|
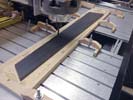
Cutting the perimeter of the fingerboard and generating the compound radius.
|
In this photo we have established the perimeter of the fingerboard and are in the process of cutting the compound radius on the top surface. This has to be done before the frets slots and inlay details are cut. I use the CNC to accurately cut the compound radius to yield the correct thickness on the fingerboard. Once that is done I sand the surface to remove the machining marks. I then proceed to cut fret slots and inlay. |
|
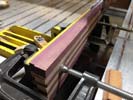
Cleaning up the end of the neck.
|
While the work on the fingerboard is going on I need to prep the neck for assembly with the body. I left some of the naterial on the neck oversize but since all the critical dimensions have now been established I can go ahead and machine off the extra material and have the heel end of the neck machined and ready for fitting of its respective pocket in the body. Some care has to be taken because we have to allow sufficient joint area. |
|
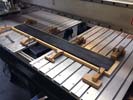
Fingerboard material ready for cutting.
|
In order to get things moving on the Gabon Ebony fingerboard I have set it up on the CNC so that I can get started on some of the basic geometry. The first thing to establish is the exact geometric perimeter of the fingerboard. I make sure this is mathematically correct on my vector drawings and transfer that to a computyer program. I them machine the perimeter to the exact dimensions required. |
|
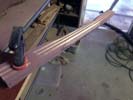
Getting started on carving the back profile of the neck.
|
Getting into some serious neck carving here. Purpleheart is a very hard wood and does not like to be shaved or carved so it takes some patience and determination to cut into this material. This will be an extremely solid and rigid neck by virtue of its materials and construction. This will also translate into a gret deal of sustain on the finished instrument. Things are moving along quite well and it's looking good! |
|
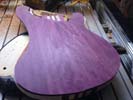
The purpleheart top ready to have pickups cut out.
|
I thought I would post a quick photo of the top of this bass to show the color and grain of the purpleheart top. The top is ready to have the pickup covers harvested out and some other machining work done to it but before that was done I wanted to post a photo to show how nice it looks - even in its relatively unsanded/polished state! It's goint to look awesome when it's all finished up and finished carved. |
|
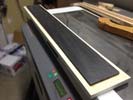
Ebony for fingerboard ready for machining.
|
The Gaboon Ebony for the fingerboard has been sanded flat and mounted on a solid substrate for support while I do all the various machining operations. I'm working on the computer right now establishing all the geometry for the fingerboard, fretslots and inlay etc. Next move will be to start cutting this piece on the CNC. I'll establish the outer perimeter next , then the compound radius on the upper surface. |
|
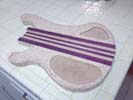
New material in body ready for machining.
|
Both cavity lids have been harvested by machining from the top side of the body to relearse the cover material. In doing so - I create a slightly oversize recess behind the "lid" area. I then machine plugs which fit perfectly into those recesses (in this case from Alder) and those plugs are securely pressed and glued into the body and subsequently machined and sanded flush. I am now back to the solid body state minus the cavity covers. |
|
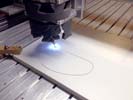
Machining a fixture for further work.
|
In order to accurately place machined features on the instrument body I start by securing a piece of flat material on the CNC and cutting a reversed version of the cavity cover shapes. I will then use inserts of the same 1mm thickness to bind this slot and the one of the instrument body accurately together. This allows me to very precisely place and align machined features on the opposite side of the body. |
|
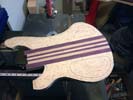
First stage - cutting the cover shapes in the back of the bass.
|
The process to harvest out the actual continuous wood material for covers is a bit laborious but on a high-end instrument it really has a great visual impact and well worth the effort! The first stage in this process is to define the cover shapes based on the body style and amount of anticipated electronics. Next I write a program to allow a 1mm carbide cutter to define the control and battery cavity covers to a prescribed depth. |
|
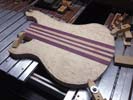
Ready to cut the covers out of the back of the instrument.
|
Both sides of the body blank have been machined and cleaned up. I used my template to mark out the top plate and the body so that I know the geometry is good on both even though they are still both oversize. Next thing I have to do is harvest out the continuous grain covers for the battery compartment and the control cavity. This will be a slightly work-intensive process but well worth it to get matched covers. |
|
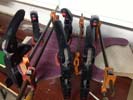
Gluing top plates together.
|
The two halves of the top plate have now been double-veneered on the underside. I took those two plates and set them up on the CNC machine where I machined the joint faces of each half so that they were perfectly straight and square. This guarantees me a good joint when the two plates are bookmatched together. In the photo, the two halves are being glued into one top. We can now get the pickup covers cut out. |
|
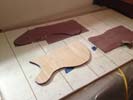
Gluing Purpleheart veneer onto the top plates.
|
In order to prep the two top plates for gluing together I have to add a layer of Purpleheart veneer to the jooint faces which already have a maple veneer. This is all tied in to out vision of the finished instrument. The two veneers will play a big part in the visual impact of this bass. As soon as these veneers are on I can cut the joint faces and glue up the completed top. Meanwhile, I will be working on the other parts! |
|
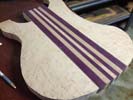
Back of bass now cleaned up and ready for covers to be cut.
|
After the two sides were attached I had some extra operations to do to level the surfaces and prepare the back surface for further work. The back surface is essentially complete but I have to now harvest out the covers for the battery and control cavities. This will require very carefully milling the instrument from both sides to remove the cover material from the back and the cavity material from the upper surface. |
|
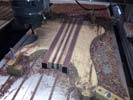
Milling off extra material from the body assembly.
|
Now that the two body halves and the core section combine to make the back portion of the body, I have to remove the excess material on the upper side and create a nice flat joing face for the top plate. Since the back is already nice and flat I locate that on the machine table and mill off all the extra wood from the top. I just need to go far enough to clean up the surface. The maple and purpleheart on this bass look great together. |
|
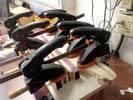
Gluing the top body half onto the core.
|
Here we are cluing the first of the two body halves onto the core section of the body. I do one half at a time so that I don't risk eny unexpected slippage between the parts. The core section and the body half are not only tightly clamped together but also securely clamped down on a non adhesive flat surface so that I get a smooth blend between the mating parts. I will repeat this process with the second body half. |
|
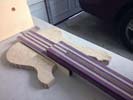
Body halves ready to be glued on.
|
In order to make sure all the geometry is correct and that the various parts are attached in exactly the right place relative to each other, I need to lay the components out and do some measuring. I carefully mark out the scale lengths, location of the bridge pieces and based on that can define where the neck should meet the body. That information in turn allows me to establish where each of the body halves locate on the center section. |
|
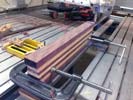
Machining the body core joint faces.
|
In order to assemble the body halves onto the core of the bass I have to first machine the joint surfaces so that they are cut square and straight and also at the correct angle front to back. I machine each side to satisfy these conditions and then I will glue decorative veneers onto the joint faces to continue the theme through the entire instrument. Looking forward to seeing the body parts all glued together! |
|
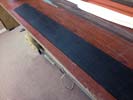
Gabon Ebony fingerboard ready to be sanded and machined.
|
This is the Gabon Ebony material we are going to use for the fingerboard of this bass. Right now it's rough-sawn but I am ready to sand it and get it prepped for machining. This will combine well with the purpleheart body top - should look very nice! This piece is larger than standard due to the 6-string milti-scale configuration. Also - this particular Ebony is definitely getting harder to procure and is now very expensive to buy. |
|
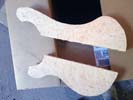
Cut out the two back plates from my BirdsEye Maple board.
|
I wanted to move thing sahead a bit with the body components. My customer's vision was for a Birdseye maple back behind a purpleheart top. We're going to relieve the body contour in such a way that the maple can be seen as a white trim around the prople top. This birdseye maple is worthy of being on an instrument top but will look beautiful on the back of this instrument. You can't see much of the detail in the photo - that will show later! |
|
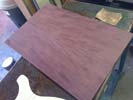
Top plate halves have been resawn and sanded ready for bookmatching.
|
Sawing purpleheart is not an easy thing to do - it's hard on the saw, the saw blade and the luthier. However, I was able to successfully saw the top plates from my block of purpleheart, which took a while, and thereafter, sand the pieces flat so that they are ready for ongoing work. You can't see much of the actual color or figure because the material has recently been cut. It will return to it's purple gl;ory in a day or two. I'll probably go ahead and rough cut the body shape from these pieces next. |
|
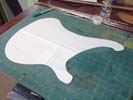
I made a template for the custom body shape of this bass.
|
I made a template for the body of this bass after several exchanges with my customer. He would like a specific body shape (one I have not produced before) and combine that with the headless technology and design that I have developed. This requires several changes in the way I would normally build a 6-string headless but we are resolving each technical and aesthetic issue as they come up, designing as we go! So far so good! |
|
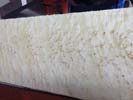
beautiful Birdseye maple for the back.
|
It's time to start work on the body of this instrument and I bought a really spectacular piece of birdseye maple for the body halves. The plan is to make the back halves of the body out of this material and have it exposed in such as way that it can be seen from the front as a light border around the purplehear top and the shape of the body. I'll cut the maple slightly oversize to achieve this effect. Can't wait to see how it looks! |
|
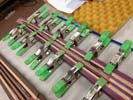
Gluing Carbon Fiber in the neck.
|
The next step in the process is to cut and secure the two Carbon Fiber rods into the neck. I had already cut slots for these rods in the previous machining operations. The rods are cut to length and then secured intop their slots using an aerospace grade epoxy. The clamped assembly is left overnight and when the adhesive has fully cured the excess is sanded and scraped off. The neck will then be shaped and prepared for its fingerboard. |
|
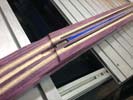
Machining features into the neck section.
|
This is the neck after the machining has been completed. I leave extra material on the headstock area which I will remove at a later stage. The angle of the end of the fingerboard and nut has been established, and the slots for the truss rod and the two carbon fiber re-inforcing rods have also been cut. You can see the truss rod sitting in its channel and the tw CF rods are sitting partle embedded in their respective slots. |
|
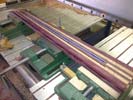
Machining features into the neck section.
|
The neck blank is now on the CNC for several machining operations. We cut the top face flat and this will become the joint face for the fingerboard. Next I machine the perimeter of the neck to its final dimensions based on string spacing at the bridge and nut. When that's established, the head angle is rough cut which establishes wherethe nut will be. Then I cut a special channel for the truss rod and filanny two slots for the carbon fiber rods. |
|
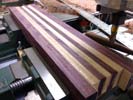
Body core glued together.
|
All the various tapered sections for the core have been veneered and glued together to create a neck blank and a body blank. Next task is to machine these to create some finish surfaces which we will use for reference for the rest of the building process. Here we have the blank for the body core which we are cleaning up and machining flat and square. Onve this is cleaned up it will be ready for assembly with the bock body halves. |
|
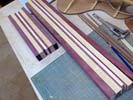
Getting the laminates ready for assembly.
|
We have now rough sawn all of the maple pieces that will combine to make the neck and body core laminates. These maple pieces will also be machined to the correct tapers so that when they are all assembled together, the sum of their tapers will equal the natural taper of the neck. This is certainly more time and effort than making straight laminates, but results in a very unusual and pleasing visual effect not often found on such instruments. |
|
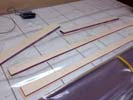
Maple components for core have been cut.
|
All the Purpleheart pieces for this bass have been sawn, sanded and tapered. I have to proceed soon to the corresponding Maple parts but in the meantime I have been gluing the decorative Maple veneer onto the Purpleheart stringers. This is done in the vacuum press, which is one of my busiest tools in the shop!! As soon as I have time I will cut all the Maple parts and get those veneered in a darker wood. |
|
Cutting datum faces on the neck stringers.
|
In order to get the various neck and body components ready I have to take the rough sawn components and establish clean machined surfaces on them so that I can move ahead to cutting the various tapered pieces that will combine to make the neck and body cores. Here I am machining a datum surface on the two center purpleheart stringers for the neck. Once this is complete I will locate on that machined surface and cut the prescribed tapers. |
|
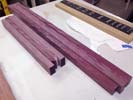
The purpleheart components of the neck and body have been rough cut.
|
I spent a little time on vector software redesigning out standard headless multiscale 6-string so that this version of it could be a bolt-on design. That done, I can rough cut most of the component parts of the neck and body core. The core section of the body and the neck itself will be constructed of Purpleheart and Maple. I'll saw the maple parts in the very near future. These will need to be sanded and machined to tapered sections. |
|
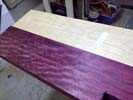
Some of the materials we are starting with.
|
This exciting project is now getting under way. It will be a variation on our standard headless multi-scale bass in that it will feature a bolt-on neck. We may also be incorporating some body redesign at our customer's request. Much of the instrument will be constructed of maple and purpleheart - two very successful and predictable tonewoods for bass guitar construction. I have just completed scale drawings and working on templates. |


