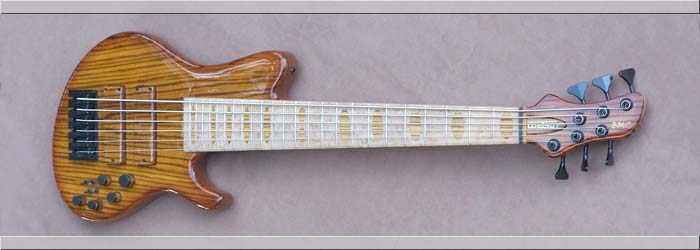
This is a very exciting project. Our customer requires a very short scale bass which will also be a 6-string. This is the ultimate challenge for achieving a strong and well-defined low B string response. We have some creative plans to maximize the B string response. It will feature our single-cut style with enhanced access to the upper frets.
We will be using mostly lightweight materials throught the construction of this bass. The Butternut back will certainly be nice and light. We have a center laminate of gaboon Ebony by our customer's request. This will add some weight as it is a very dense wood, but we hope to be able to trade that for the extra sustain it may yield on the finished bass. Weight and a good physical fit for our customer are the two big goals. Good tone and playability being of course a given!
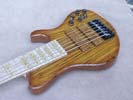
Nice shot of the body.
|
(11/05/10) The bass is now essentially complete. I have to make a set of knobs on the lathe but everything else is ready to go. |
|
|
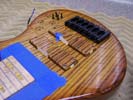
Working on installing the pickups.
|
(10/30/10) Left: Pickups are being installed. I have to be careful that they are mounted exactly on center of the recesses. Right: Strings are on and I was working on the nut a good part of the day - that's often a time-consuming job to get the instrument playing just right. I was pleased to note that at least acoustically, the low B sounds GOOD. |
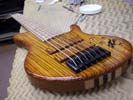
Strings are now on - just need to wire the thing up!.
|
|
Getting the lacquered coveres to fit after finishing is always a time-consuming task.
|
(10/28/10) The two covers for the battery compartment and the control cavity have been fitted. This is a job that has to be done very carefully so that the finish on the back of the bass is protected. Right: The bridge is attached and we have installed the four switches. two for pickup coil tapping, one for active/passive/mute, one for LEDs |
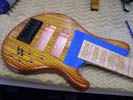
hardware is now being attached to the body.
|
|
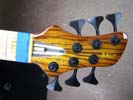
Doing a test-fitting of the tuners.
|
(10/25/10) Left: We are test fitting the tuners onto the headstock.Once the overspray has been cleaned from the holes the tuners fit nicely. Right: Copper shielding is now in the control cavity. This is a relatively fiddly and time-consuming job, so glad to that done! Now we can start thinking about adding electronics. |
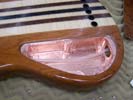
Got the copper shielding into the control cavity.
|
|
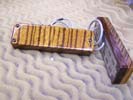
We're now fitting the pickups into their continuous wood grain pickup covers.
|
(10/18/10) We have started the process of building ths bass, which entails adding hardware, cleaning up areas of overspray - adding copper shielding. On the left you can see we have fitted the dual coil pickups into their respective continuous wood grain covers. On the right, the bushings for the string retainers have been installed. |
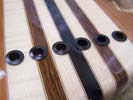
The string retainers have been installed in the back of the bass.
|
|
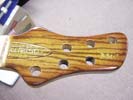
headstock post finishing - the colors look really nice.
|
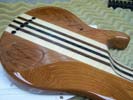
(10/17/10) We have some preliminary photos of the finish on the bass. These two images show a little bit of what we're going to get on the instrument. The front has a Tobacco Sunburst finish and the back has been masked off at the center core allowing the tobacco tint to wrap around from the front and over the butternut wings. |
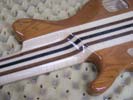
Center core wal left clear and the tobacco stain covers the butternut wings.
|
|
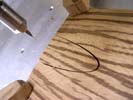
Cutting the truss rod cover from the headstock veneer material which is usua;;y abou 1/16" thick.
|
(9/25/10) Time to work on the headstock. First we bookmatch some zebrawood for the headstock veneer. We then cut the truss rod cover from the parent material (left). The remaining material is reansferred to the laser where we cut the recessed for the inlay, and finally the completed veneer piece is glued ontop the headstock. |
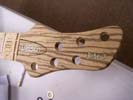
This is the headstock more or less completed, including the inlay on the truss rod cover and the headstock itself.
|
|
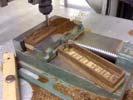
Machining the insides of the wooden pickup covers.
|
(9/21/10) The material we harvested from the top of the bass has been glued to rosewood bases. These in turn have been machined and sanded to the correct outer dimensions. We now have to take these two solid pieces and machine out the material inside to make space for our pickup assemblies. This results in a relatively thin wall thickness all around so care must be taken not to damage the covers once they are machined. |
|
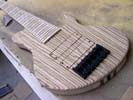
This is what the bass looks like with its pickup covers and bridge in place - glimpse of the future!.
|
(9/20/10) The photo to the left shows what the bass looks like with some of its parts assembled together. The fingerboard looks really nice against the Zebrawood, and will be even more so once the wood adopts its honey color after finishing. Pickup covers will also be a great visual feature - they are a bit of extra work to do but well worth it in the end. The hipshot aluminum bridge is very lightweight, we;re hoping yo yield a lightweigh bass too! |
|
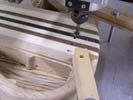
Drilling and counterboring the six string recesses for the string retainers on the back of the bass.
|
(9/18/10) Most of the machined features are now done on this instrument but we have to make provisions for the string-through-body feature which we are able to do using Hipshot bridges. This involves carefully marking the bridge position on the front of the bass anddrilling 6 holes through from that side. Then we flip the instrument over and counterbore the 6 holes to suit the string retainer inserts which came with our bridge assembly. |
|
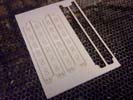
Pickup flatwork being cut in our laser.
|
(9/15/10) While all the machining is going on we have been working on creating the pickups. The string spacing is custom so we cut a special set of bobbins on our laser. The bobbins were assembled with their magnets, and after some careful preparation we wound them with a suitable gauge of copper wire. These will be humbuckers. |
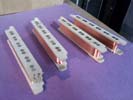
Partially completed pickups, custom made for this project.
|
|
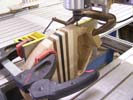
Cutting the recess for the Neutrik locking jack socket.
|
(9/12/10) As with every instrument we do - we have to machine a seating in the edge of the body to accommodate the Neutrik locking jack socket. In the case of this instrument, out customer wanted the socket to be hidden so that it could not be seen from the front of the bass. We decided to bury the socket further into the side of the bass at a slight angle so that it was more discretely located and essentially hidden from view. |
|
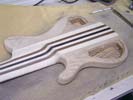
Control cavity and battery cavity have both been machined.
|
(9/10/10) Two more major features have been established on this bass. The control cavity and the battery cavity and the respective recesses for the lids have been machined. We're just about done with machining operations. As you can see from the photo we have also started on the belly cut on the back of the body and rounding off some of the edges around the body. This bass is really starting to take shape now. |
|
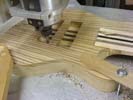
machining out the pickup cavities.
|
(9/4/10) First in a series of machining operations is cutting the pickup cavities to their final depth. We have to be careful to re-align the bass on the table of the machine so that we cut in exactly the same locations where we removed the pickup cover material. Most of the remaining work involves removing material so the instrument will continue to get lighter as we add more features! The body is still a tiny bit oversize so that will be cleaned up too. |
|
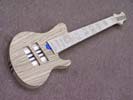
Top is now part of the bass.
|
(8/28/10) It's always nice to get the top of an instrument glued on. It's really the first time it looks "complete" and you get your first impression of the weight and th fit of the instrument. This one feels good - I think we are doing well on the weight department. We are now able to move ahead with several machining operations (pickup holes, control and battery cavities etc). We'll also be putting frets into the fingerboard and preparing to attach it too! |
|
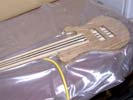
The top is being glued onto the body in the vacuum press.
|
(8/25/10) The bookmatched Zebrawood to has been prepped and fitted to the body. We are now gluing it down permanantly. I use th evacuum press for this because it applies a nice even clamping pressure all over the instrument and I always get a really nice joint. Just to be on the safe side I leave this clamped in this manner overnight to make sure the glue is 100% cured. When the bass comes out of the vacuum bag I'll sand to clean up the edges. |
|
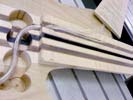
Some tricky work getting fiber optics ready for running through the body.
|
(8/23/10) I'm in the process of getting everything ready to glue the top of the bass onto the body. In the case of this instrument it's not as simple a task as it seems. I want to glue the top on permanantly but NOT the fingerbboard. However, all the F/O cables are attached to the fingerboard. I decided to use a piece of tubing to allow me to thread the bunch of fiber optic cables through the body at a later date. We are now ready to glue! |
|
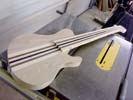
Top surface of the bass is machined and cleaned up around the end of the neck.
|
(8/16/10) Having machined the back face to create our datum, we are now able to clean up the top face ready for the zebrawood top. In order to do this I use the CNC to very accurately cut around the end of the neck to the rquired depth. When this has been done, I remove material from the rest of the top top the same depth. The result can been seen in the photo to the left. We still have to machine in wiring channels and space for the fiber optic cables. |
|
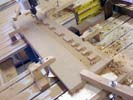
Working on the back side of the fingerboard for the fiber optic cables.
|
(8/13/10) Now that we have machined all the features into the front side og the fingerboard, we have to flip the board over and machine it from the other side in order to put the side dots and the channels for the fiber optic cables into the back side of the fingerboard. I remove material from the baseplate and then machine slots for the side dots. I put carbon fiber side dots into these slots. Then I cut all the fiber optic channels, which terminate at each side dot. |
|
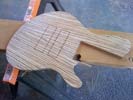
We have just machined the joint for the neck and cut out the two pickup covers.
|
(8/11/10) We have set up our Zebrawood on the CNC machine and cut out the exact shape of the neck so that we have a nice press fit between the top and the body. Also - the material for the tops of the two pickup covers has been carefully machined out of the top plate. I will keep these aside and they will be used to create continuous-grain wooden pickup covers later in the process. We'll soon be ready to glue on the top. |
|
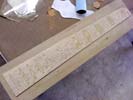
Fingerboar has been sanded down so the inlays are flush with the top surface.
|
(8/7/10) The photo on the left shows the fingerboard after the insert were glued in and sanded down flush with the compound radius top surface. The effect is very nice and will be more obvious once the finish has been applied. The top surface of the neck gets a special formula polyester resin coating which will be a satin finish. This will protect the maple and at the same time bring out all the beauty of the birds-eye figure in the grain. |
|
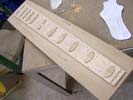
Half way through the process of inlaying the zebra into the fingerboard.
|
(8/6/10) While the fingerboard was on our CNC machine we cut all the oval recesses for the inlay so that they would be positioned very accurately. Once that was done and we cut the nut slot, the assembly can be removed from the CNC. I cut the oval inserts from a nice straight-grained piece of zebrawood using our laser. This ensures a very accurate fit on each location. We will now go ahead and glue the inserts into the fingerboard and sand flat. |
|
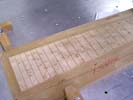
Nice Birdseye Maple fingerboard being machined.
|
(8/1/10) Our customer wanted a maple fingerboard, and we happened to have some nice birdseye maple in stock. This will look impressive against the zebrawood body. We are also planning to use zebra for the fret markers. We have set the fingerboard up on our machine and cut the perimeter and the compound radius. Having done that we cut the 24 fret slots based on our 30" scale length. So far everything looks good. |
|
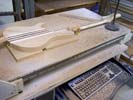
Cleaning up the back surface of the bass.
|
(7/15/10) In the case of this particular instrument I wanted to be sure there was enough internal volume and mass to make space for the electronics and the fiber-optic cabling, and also to ensure a comfortable fit for our customer. I built the body intentionally thicker, and now that we have it assembled I can decide on the optimal thickness based on the combined thickness of the bouts and the zebrawood top. Here we are machining to establish final thickness. |
|
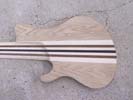
Both body halves are now attached to the core of the instrument.
|
7/5/10) We now have something that looks much more like a real bass guitar. Having attached both body halves we get a good idea at this stage about the weight of the instrument. The ebony in the neck core is dense and heavy, but offset by the lightweight properties of the two butternut body halves. My guess at this stage is that the bass will end up being close to our target weight. Looks good so far and very exciting to see it come together. |
|
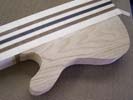
Lower body half is now attached..
|
(6/25/10) The lower body half has been successfully glued onto the core of the bass. The contrasting veneers look very nice against the maple and butternut woods. We will proceed to glue the top half of the body onto the core section, taking care to place the additions just in the right place so that the neck and bridge are correctly positioned when the instrument is done. A great deal of measurement and double checking is done before gluing for this reason. |
|
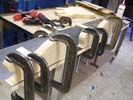
Decorative veneers are being glued to the Butternut body halves.
|
(6/18/10) in an effort to get this instrument glued together into one shape that resembles a bass guitar I am working on some of the routine gluing jobs to get there. In the photo to the left you can see that we are gluing the Butternut body halves to decorative Maple veneers. We also have some veneer work to do to the center core of the instrument, but once that is done we'll be able to attach these body halves and have an infant bass guitar! |
|
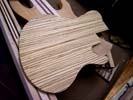
Zebrawood top plates have been resawn and bookmatched.
|
(6/12/10) The Zebrawood has now been successfully resawn down the center of the blank creating two nicely bookmatched pieces just over 3/8" thick. I also cut the top and bottom shapes closer to their finished sizes. Currently they are between 1/8" and 3/16" oversize all round until we are done with shaping and gluing. The material looks very nice. It finishes to a strong golden brown and we're planning a Tiger-Eye sunburst to set it off too!! |
|
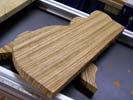
The rough shape of the instrument has been cut from our billet of Zebrawood.
|
(6/4/10) This material is the Zebrawood we are going to use for the top plate. I rough-cut the shape of the bass from the board I had in stock and next I will drum sand both sides so that we have a nice smooth and flat piece to work with. This zebrawood has a very consistent and evenly spaced grain so it should look very nice on the finished instrument. Next challenge is to resaw the wood down the center so that we create a bookmatched set. |
|
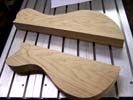
This is the Butternut material for the back of the body.
|
(5/30/10) The back of this bass is going to be a unique wood called Butternut. Similar to mahogany in many ways, Butternut has a very attractive grain and is also remarkably light. For this project it is the perfect wood for the application. It will look nice against the Zebrawood top and will not add much to the weight of the instrument. The photo to the left shows the upper and lower halves of the back of the bass. |
|
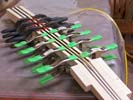
Here we are gluing the carbon fiber rods into the neck.
|
(5/21/10) We have moved the neck core piece a little further on by doing some secondary machining operations on it to prepare the sides for the body parts which we plan to attach soon. In the meantime, we glued the carbon fiber rods into their respective slots in the neck using high-grade epoxy which we will leave to fully cure overnight. In the morning we will clean up any squeezed out adhesive and start looking at the body halves. |
|
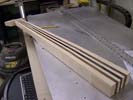
CNC Machining is complete and we're ready to start working on the body.
|
(5/4/10) All the CNC machining operations have been completed. The joint faces have all been established and we have slots cut for the two carbon fiber slots and the truss rod. The body angle to the neck has been established so that we can now locate on that surface in order to clean up the back of the core section. We will then start cutting up the materials for the body halves and the bookmatched Zebrawood top. |
|
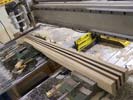
The neck/body core is now being machined on the CNC.
|
(4/29/10) All the laminates have now been glued together and the assembly can now be mounted on one of our CNC machines. This will allow us to do several operations at one time while the core section is constrained in the fixture. First we will clean up the joint face where the fingerboard will be attached, then cut the headstock and body angles. Then we cut the tapered profile of the neck/body section and finally CF and Truss rod slots. |
|
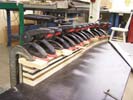
Now we are gluing the seven neck/body core laminates together. Looks really good so far.
|
(4/8/10) We have been busy over the last 2-3 days gluing the various laminates of the neck/core section together. We started by gluing contrasting veneers onto the individual laminates. Once the 12 or so veneers were applies we started gluing the tapered laminates together starting with the ebony center strip and working outwards from there. In the photo we are gluing on the sixth of seven indiviual veneered pieces together. |
|
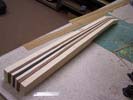
Cutting tapers is done - now we have to apply veneers.
|
(3/29/10) All the center laminates in the neck have been cut to the correct tapers. The next task is to apply contrasting veneers to each of the laminates. This will be done in the vaccum press over the next couple of days. As soon as the veneers are on I can start gluing the parts of the neck/body core together. This is a relatively slow process for multi-laminate necks because to get the best results I only glue one laminate at a time. |
|
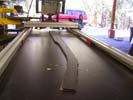
Machining the center laminate to a taper.
|
(3/28/10) We have now cut the center ebony strip from our raw material and sanded it to thickness. Now it's up on the ornamental mill so that we can machine it to a pre-defined taper along its length. We will then move on to doing the same machining operation to the two East Indian Rosewood strips and the two Curly Maple strips. This will give us a total of five tapered center strips for our neck, which should combine to make a very rigid assembly. |
|
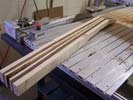
Most of the blanks have now been cut - just the ebony now!
|
(3/26/10) I have now split the East Indian Rosewood and Maple blanks to make six out of the required seven body core laminates. The last one will be a little bit of work to cut as I have to resaw a larger piece of very hard Gaboon Ebony. The bass is starting to take shape and we'll be sanding these pieces and getting them on the ornamental mill very soon to cut them to the correct tapers. So far so good. |
|
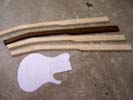
Some of the rough cut neck blanks plus the body outline for the bass.
|
(3/25/10) The cutting of the core pieces on this bass continues. In this particular case we have a lot of wood to resaw in order to get all the components ready. We are splitting the East Indian Rosewood section and one of the Maple sections each into two pieces. Also - we need to prep and saw up a piece of Gaboon Ebony which will run as a continuous laminate right through the center of the instrument. Lots of sawing to be done! |
|
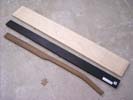
We've started cutting blanks for the core of the bass.
|
(3/23/10) I am in the process of cutting up the various woods which will go together to make up the core section of this 6-string bass. In the photo to the left you can see the curly maple which will make up most of the neck, the Gaboon Ebony which we plan to use for a strip down the center of the instrument, and the East Indian Rosewood which we will split to create two laminates running through the instrument. |
|
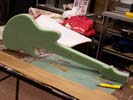
Foam mockup of the bass for a test fit with our customer!
|
(3/11/10) Because this project is very much focused on our customer's specific requirements we chose to make a mockup of the overall shape of the instrument. This will be sent to our customer so that we can establish some critical measurements before we commit to shaping the body of the actual instrument. In the photo the headstock is separate - we need to attach that and do some carving before it goes out. |
|
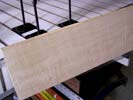
This Curly Maple will play a big part in the construction and sound of the bass.
|
(2/14/10) We're off to a flying start with this very unusual bass guitar. First order of business is to cut up some of our Curly Maple stock for the core section of the instrument. The photo on the left shows part of the board we will be cutting the maple components from. It has a nice curly figure which will show up nicely on the finished product. I have established scale drawings and plans for this bass so we're in a good position to get started! |

