|

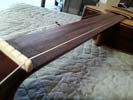
ONly thing left to do on the board is cut and shape the radius on the back end to match the soundhole.
|
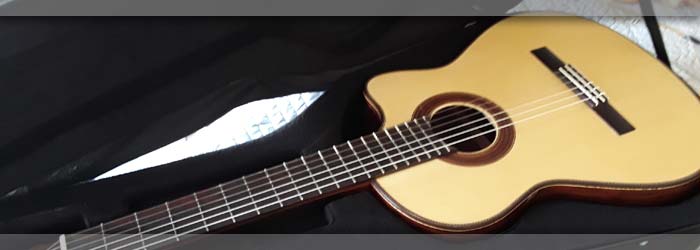
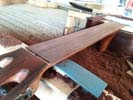
Left: Working on the last stage of this job which will be fixing the new fingerboard onto the neck of the instrument. With that done it should only require normal adjustments to play. |

ONly thing left to do on the board is cut and shape the radius on the back end to match the soundhole.
|
|
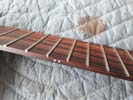
Side dots are in and I just need to do a little dressing on the frets.
|
Left: The white side dots have been glued in to the fingerboard and as soon as the adhesive is set I will finish dressing up the ends of the frets. Almost there! Right: All the side dot material and the ends of the frets have been trimmed flush with edges of fingerboard. I'm also hand-dressing the ends of each of the frets. |
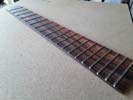
ONly thing left to do on the board is cut and shape the radius on the back end to match the soundhole.
|
|
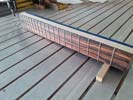
Setting up for side dots. Will be able to get this board onto the guitar pretty sooN!.
|
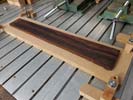
Left: Now setting up to do the side dots on the edge of the fingerboard. Once these are done the board can come off the substrate and I can dress the frets. Right: I have set up and drilled the holes for the side dots and also separated board from substrate. I will probably use white dot material to create the best contrast to the wood. |
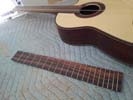
I drilled the hol;es for the side dots and removed the board from the support material. Now I need to glue in the side dot material.
|
|
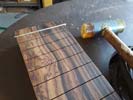
Getting started on the fret installation. Wanted to try one out but went in very solidly.
|
Left: I had to try one fret to make sure the tang and the slot were a good fit. So far so good - feels tight in there but seats very well on the surface so we sould be pretty good! Right: All the frets are now installed in the fingerboard. I will trim the ends flush along both edges and then look at the addition of the side dots. |
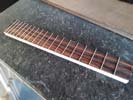
Got all the frets in the board. I'll do the side dots on the CNC for accuracy.
|
|
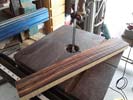
I removed all unnecessary support wood so that I have room to take care of fret installation and side dots.
|
Left: We are ready now for the installation of the frets and following that, the addition small side dots on the bass edge of the fretboard-singles at 3, 5 and 7 and two at 12 Right: Got all the frets cut and ready for installation. Once I get these all carefully installed in the fret slots I will trim all the ends flush to fingerboard edges. |
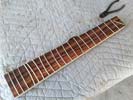
I Had just enough fret wire to create all the frets - you can see the little leftover piece on the right side! I will get these installed asap.
|
|
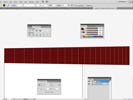
I drew the fingerboard to scale and added all the fret slot lines so that I could create a machine program.
|
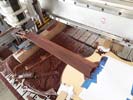
Left: Getting program and machine set up to cut the fret slots in this fingerboard. I have a .020" micro end mill that should do a good job in cutting the slots. Right: Running the fret slot program first pass to make sure everything looks right. Once the slots are all cut we'll have to revisit our decisions regarding inlay/side dots. |
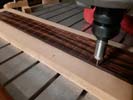
First pass on the cnc for the slots looks OK - moving forward.
|
|
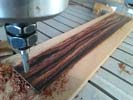
Fingerboard is now at final thickness. I had to machine part way and measure after each cut. I was able to shim the support board in order to achieve a pretty accurate thickness at both ends.
|
Left: This photo was taken just after I machined the fingerboard thickness down to what we exypect to be the best size for both nut and body end of the board. Right: The outside perimeter and length of the fingerboard has now been machined to match the dimensions measured off the existing neck of the guitar. |
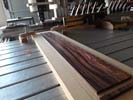
After establishing thickness I programmed to cut around the entire board so that it ended up the same width as the guiotar neck and just a few thousandths longetr in length as I have to establish the curve at the soundhole after fretting.
|
|
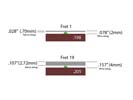
These numbers are allcalculated from the existing angle of the neck to body after machining, and also the minimum requirements for neck to string allowances at both ends of the neck. We also took into consideration the required leveling of the frets after assembly and the fact that we have limited downward adjustment on the bridge saddle.
|
Left: After some research, consultation and careful measuring I believe this set of figures represents the best plan for machined dimensions of fingerboard. Right: Getting started on the fingerboard machining. 1st task here is to make sure my thickness compensation between both ends is correct. Then will machine to finished thickness. |
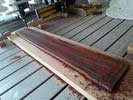
Fingerboard up on CNC for first operation. Once I get material to finished thickness I will cut the perimeter to size.
|
|
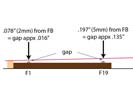
This derawing is a result of some research regarding the optimum distances between fingerboard/frets and the strings themselves. From this data I can calculate the actual fingerboard thickness.
|
Left: I am now ready to machine the tapered fingerboard to the required thickness at each end and at the same time cut the outer perimeter so that the board accurately fits the neck of the guitar. Right: In order to double check the required thicknesses for the new fingerboard I re-strung two of strings to measure the gaps at both ends! |
Having a couple of strings on the instrument allowed me to verify some of the finished dimensions for the new fingerboard .
|
|
I don't want to remove any more material so the remainder of the neck angle compensation will be taken up by the new fingerboad thickness..
|
Left: I machined the old fingerboard off at an angle to the point where I only have a very small amount of the old material left on the neck. Looks like that will all work out. Right: Now setting up on CNC to cut all the features of the new fingerboard. It has to be shimmed to the exact angle I need first so the setup is fairly involved. |
I am confirming the actual amount of taper required to give us the right relationship with the strings. I'll shim the nut end of the fingerboard assembly accordingly before I clamp everything down and machine.
|
|
Cutting the old fingerboard off and will be macjining more off the nut end than the body end as part of the compensation to re-adjust the neck to body angle.
|
Left: Part way through the machining process being very careful. Since I can only hold the guitar gently at the body end I am only taking .015" per cut off. So far so good. Right: I think I have machined as far enough down to create a suitable angle and to leave a base of hardwood onto which we will be gluing the new fingerboard. |
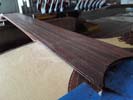
So far so good - machined most of the old fingerboard off leaving a partial compensating angle onto which we will build the new fingerboard.
|
|
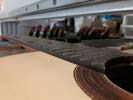
Roughly speaking I am trying to split the original neck angle error in half and the first half will be incorporated in this machining operation. The second half will be built into the new fingerboard thickness.
|
Left: The goal here on the CNC is to machine a nice clean joint surface for the new fingerboard. That surface has to be about .070" deeper at the nut end than at the body end. Should also machine out previous fret slots. Right: After 4 different setups involving shims and vary careful clamping I got the whole thing set up square. |
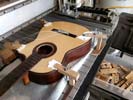
Took a few tries and quite a while to get the cutting angle right while at the same time maintaining accurate squareness across the instrument. Lost of little shims under that white padding which protects the surfaces while under clamping pressure.
|
|

I removed all the original frets and can now machine a new fingerbopard joint surface.
|
Left: Got all the frets removed from the fingerboard and now I can get this instrument set up on the CNC so that I can machine off the existing board at the correct angle. Right: Setting the guitar body up on the CNC in such a way as to hold it at just the right angle to generate a slight taper between body and headstock. |
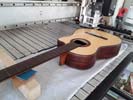
Slightly tricky setup to guarantee squareness across the instrument and also the desired angle to be machined to yield good results at the end.
|
|
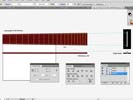
I am using this drawing to accurately set the angles of the fingerboard taper AND the surface of the neck I will be cutting. Having a 100% scale drawing allows me to set the best combinations of cuts that will yield the finished string action relative to frets!
|
Left: I have created a 100% scale Illustrator drawing of both the top view and the side view of the actual dimensions of the fingerboard and related parts of this guitar. Right: I am now committing to pulling out all the frets on the existing fingerboard which will then allow me to set up and machine a joint face on the neck. |
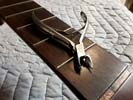
Starting the fret removal process - and these frets are well seated! I need to get them all out before I cut the fingerboard material at the correct angle on the CNC.
|
|
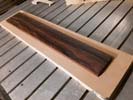
Fingerboard attached to a support piece so that I can start machining work on it.
|
Left: The MDF support has been cut and I glued the fingerboard blank onto it. I will start by carefully measuring the existing fingerboard and cutting this piece to the same outer profile dimensions. Right: Taking several measurements from the instrument, one of them being the current space between the 12th fret and the strings. |
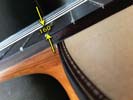
The calculations I need to make will net out to reduce this space to a much more playable action. It will likely involve a slightly tapered fingerboard and a machined surface on the neck that is very slightly offset along its length, the combination of which will create a much more normal relationship between bridge and fingerboard.
|
|
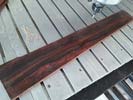
This is our candidate for the new fingerboard so I will get some CNC programs written.
|
Left: This piece was selected from the previous wood options so I will go ahead and plan for machining on this. The wood color will be temporarily lighter after machining but will darken again naturally due to UV light. Right: The fingerboard will now be attached to some 3/4 MDF so that it is kept rigid and straight while machining is done. |
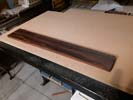
Step 1 for the fingerboard is to cut a piece of MDF on which I will glue the material. I can then machine and complete the side dot and fret installation on a nice rigid and stable surface.
|
|
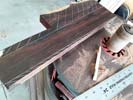
Marked out the rough cut leaving a little extra all around.
|
Left: I measured the existing fingerboard so that I could mark out the material blank for rough sawing. I'll get two fingerboard blanks out of this thick piece so we'll choose the best one of the two. Right: FB wood has been rough sawn to size and then split into two pieces. This pic shows front and back of both potential fingerboards. |
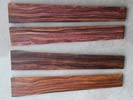
Not that these were just cut and they will darken a little naturally over a fairly short time. I put all 4 sides up incase there was a preferred wood grain!.
|
|
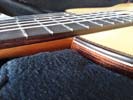
Current action over fingerboard is very high due to a zero angle between body and neck and no remaining adjustment at bridge.
|
Left: We have around 5mm of space between fingerboard and strings at their lowest adjustable point. Our goal is to replace fingerboard and resolve this. Right: I have this hardwood (which I believe is some type of rosewood). Beautiful hard stuff and it's long enough to use to make the new fingerboard. This is a good candidate at least! |
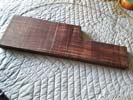
This chunk of wood is an inch thick so I will have to start with some rough sawing.
|
|

