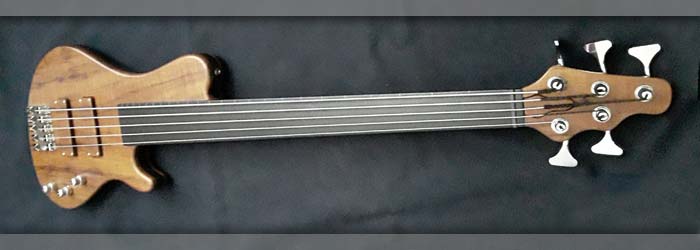
|
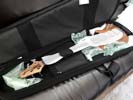
Making sure the bass is very well protected for shipping.
|
Left: finally time to get the bass safely packed not onli in its own Protec case but in the box itsef in which the bass and the case will travel. I just wanted to have enough packing to prevent any movement and also some padding between the strings and the fingerboard since there are no frets in there to protect its surface. The case was sealed and then packed in a very padded cardboard shipping carton which should keep it all safe to its destination. |
|
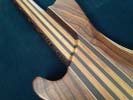
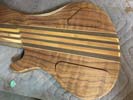
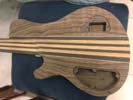
The woods on the back of the bass are really nice. The satin finish feels great!
|
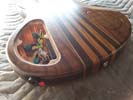
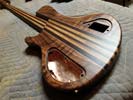
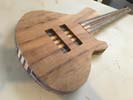
Left: This photo shows the transition of the body to the neck. Plenty of thumb space for the player and a solky smooth satin finish on the wood makes it feel good to play. Right: This is the back showing the continuous grain covers attached. No ugly screws - these are held on with neo magnets. Sorry my phone didn't take great pictures! |
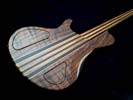
Back view of the bass with its continuous grain cavity covers.
|
|
You never really know when you plug a bass in for the first time! Everything worked great and I am anxious to get this one finished up.
|
Left: I added two 9v batteries to the system and plugged the bass in. Everything sounded great - lots of tone and pickups are doing a great job! Now going to set bridges for height and intonation. Right: Bridges set for intonation and truss rod adjusted for comfortable playing (at least here in CA!) The bass is pretty much ready to travel. |
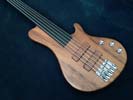
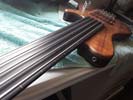
I took a bunch of photos of the bass before packing it up only to discover after packing that they didn't come out as well as I had expected. The grain is much more detailed in real life!.
|
|
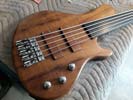
Knobs on and pretty much ready for testing.
|
Left: Got the three stacked knobs set up and locked in place. One more small job out of the way. Now I need to work on the nut and get those strings settled at the correct heights. Right: The nut slots and the string depth ended up being quite a lot of work. I think I have everything pretty close to finished in that area now!!! |
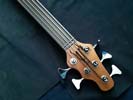
Nust slots are done in the nut and I'm testing the straightness of the neck and bridge settings.
|
|
Strap button hardware has been mounted into the body. Just about ready to put some strings on!.
|
Left: This photo shows the recesses strap lock piece mounted in the back of the body. Another one installed on the front of the upper horn. Right: Strings are on at least for testing purposes. This will give me a chance to test the preamp amd electronics, plus set up bridge and nut string heights and intonation settings. |
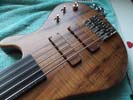
Bass is looking really nice. Going to do some testing for sound and setup.
|
|
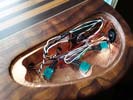
Did a lot of soldering today and now the preamp is completely connected to pickups and output socket. Just have to permanently attach the output jack.
|
Left: All the wired related to the preamp and electronics and grounding have been soldered and shielded and all I have to do now in this area is tidy up the wiring with zip ties to make it all look good! Right: The stacked knobs are typically a little taller than needed especially when using recessed knobs so I am trimming the shafts at the tops. |
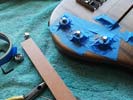
Shortening the upper posts makes the stacked knobs fit into each other better and avoids having the knobs being too high off the surface of the instrument.
|
|
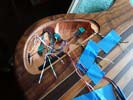
Preamp being set and installed into the control cavity.
|
Left: Getting the preamp in place and initially dealing with connecting pickups to the system first and getting those wires tidied up. Then I will connect the Neutrik output socket assembly. Right: Got the output plug assembly connected and the battery power. Now to attach the preamp module and get the controls secured. |
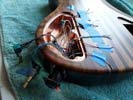
Half way through getting all the wires and hardware connected.
|
|
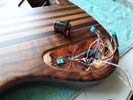
Working on the best way to make the preamp circuitry fit and then I will get this system installed.
|
Left: Back to the electronics. I have to slightly enlarge the three control knob holes for the best fit and I have one more grounding wire to attach to the copper shielding. Output plug will go in at the same time. Right: Battery connectors and grounding are now complete and the battery cavity cover is fitted in place! |
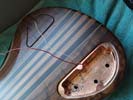
I have the battery terminals connected to wiring through to the control cavity. Ready to install and hook up the preamp.
|
|
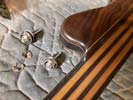
I am installing the locking strap buttons in the body of the bass.
|
Left: I'm installing the locking strap buttons in the front and back of the body. I will be able to test this bass through an amp soon and get it set up and ready for shipping! Right: Truss rod cover and the two back covers are now fitted with neo magnets to hold them into their respective recesses. Now have to copper shield ctrl cav lid. |

I am installing the locking strap buttons in the body of the bass.
|
|
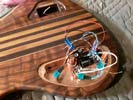
I am installing the 4-band Audere system into the control cavity. This involves hooking up battery power, jack socket wiring and pickup connections.
|
Left: Pickups set in body - nut has been completed and I am now getting the control cavity ready for the install of the preamp/electronics package. Also installing strap buttons. Right: I am putting magnets in both the cavity recesses on the back of the bass and also into the backs of each of the cavity covers to complete those areas. |
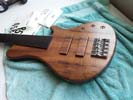
This is a photo of the bass just before I put strings on and started work fitting the electronics package into the cavity.
|
|
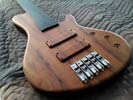
Pickups being fitted into the bass and electronics going in also.
|
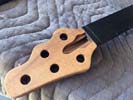
Left: Pickups are now going in to the instrument and I am getting the electronics package prepped for going into the cavity. I want to get this bass ready to ship in the coming few days! Right: I am drilling and inserting neo magnets in the headstock area to retain the truss rod cover. Goal is to hkeep the headstock area looking nice and clean! |
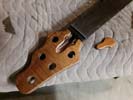
Magnets installed for the truss rod cover.
|
|
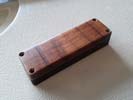
GCounterbored screw holes have been drilled into the pickup covers.
|
Left: I got the pickup adjustment screw holes and counterbores establsihed in the pickup covers which means I can now get them installed in the body of the bass. Right: I created and installed a nut into the slot in the end of the fingerboard and I will establish the nut slots when I string the bass up with a new set of stings |
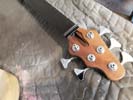
I will be shaping this nut and establishing nut slots.
|
|
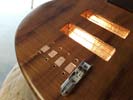
I now have grounding to the cavity from all five of the bridge units.
|
Left: All five bridge units needed to be individually connected to the common ground - drilling the required holes was a bit tricky but got that part done! Right: The bass now has the bridge units premanently attached on their grounding connections. Now will be moving on to getting the pieckups installed and creating nut. |
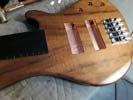
Got the five bridge units permanently on the bass body.
|
|
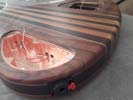
TFitting the output socket assembly into the back of the body.
|
Left: I'm fitting and installing the Neutric locking socket and will also be opening out the control holes to accommoate the pots from the Audere preamp. Right: Working on fitting the pickup bobbins into the pickup covers so that I can get these assemblies installed into the body of the bass. Also have the preamp ready to go in control cavity! |
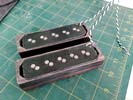
Pickup assemblies almost complete and ready to go into the instrument.
|
|
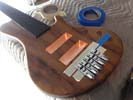
Working on getting these bridge units individually grounded to the control cavity
|
Left: I got all the bridge units finally attached but I still have to drill a few small holes to create the common ground wiring between each of these units and the cavity shielding. Right: I got the tuners fitted to the headstock holes and I will go ahead now and lock them in place. Also working on creating a nut at the end of fingerboard. |
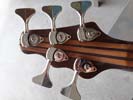
Tuners going onto the headstock.
|
|
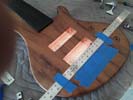
Taking scale length, intonation, spacing and taper into account when I am positioning the bridge units.
|
Left: I'm plotting accurate points for the retaining screws that will hole down the bridge units. Safest to do the two outside ones first and then position the three center ones relative to those. Right: Working on the installation of the five bridge units. This also involves some creative wiring for the grounding of each of the bridge units. |
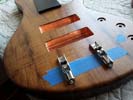
The outer two bridge units have been drilled and attached on front only. I need to set spacing at front for the remaining three and after that I have to set the back spacing slightly wider to account for the overall neck taper..
|
|
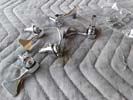
I am working on getting these Hipshot tuners assembled onto the headstock of the bass.
|
Left: These are my Hipshot tuners which I am now working with to add to the headstock assembly of the bass. Lots of work in dofferent areas going on at the same time but we will end up witha beautiful instrument! Right: Just wanted to see what it looked like with the knobs on while I am working on the bridge units. Chrome looks good. |
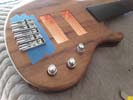
Three stacked knobs for the 4-band Audere preamp.
|
|
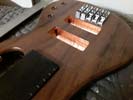
I am establishing lcations for the bridge units so that I can run individual grounding wires and then het them installed.
|
Left: I am now plotting exact positions for the bridge units so that I can get grounding holes and retaining screw positions established on the top of the body. Right: I didn't want to complete the pickup bobbins till I got the covers back from finishing. Bbobbins will be finished and fitted and secured into their respective covers. |
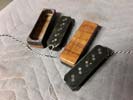
I made the pickups a little while back when the bass was in the finisher's shop. They are just a tiny bit tight in the covers so I am trimming them a little for the perfect fit.
|
|
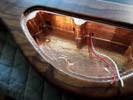
Grounding from the pickup cavity shielding has been established. Also ran power wires from Battery cavity through to control cavity.
|
Left: I have now soldered grounding wires from the pickup cavities to the control cavity and also run wires for the battery power through from the battery cavity to the control cavity. Right: These are the two battery connectors for the 18v supply that will feed power to the Audere 4 band EQ system. |
Neo magnets installed and control cavity has been fully lined with copper shielding.
|
|
All magnet holes drilled to diameter and depth that accepts the magnets. I will glue them in first thing in the morning so that I can complete the copper shielding.
|
Left: Holes now drilled for the five neodymium magnets I will be using to hold the covers in place. I'll glue them in and make sure they are level and then I can finish the copper shielding! Right: Got the neo magnets glued in and the last of the copper shielding completed in the control cavity. Will now run some internal grounding wires. |
Neo magnets installed and control cavity has been fully lined with copper shielding.
|
|
JKeeping things moving here - once the shielding is in I can get some of the internal wiring started.
|
Left: Got the two pickup cavities shielded with copper and now I need to move to the control cavity to apply the copper to those surfaces too. Then I will attach some grounding wires. Right: I'm installing the copper shielding into the back cavity now. Did the bottom and sides and now I have to drill magnet holes before finishing. |
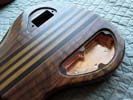
Will finish the top of the copper shielding after I drill holes and install the neo magnets.
|
|
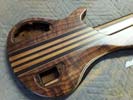
Very happy with the look and finish on this bass. Need to get some copper shielding inside the cavities and start assembling everything!
|
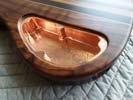
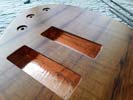
Left: The woods on this bass came out looking awesome! I'm working inside the two cavities to take care of any overspray issues, Next I will fit the continuous grain covers! Right: I have removed a good amout of the rough overspray in the pickup cavities and I think they are now ready for the application of copper shielding. |
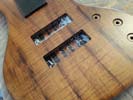
Just finishing up with control cavity and pickup recess cleanup so that I can start on copper shielding.
|
|
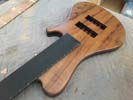
I heard from my finisher that this bass was complete so I drove up there and collected it. It came out really nice as you will see from photos to follow.
|
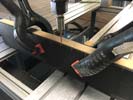
Left: Finally got this bass back from the finisher in the midst of a Covid-19 pandemic! Now I can get the remainder of the work done to get this beautiful instrument finished. More images to follow! Right: First task is to clean up the fingerboard (unfinished) and its transition to the finished areas. Breaking sharp edges and prepping surface. |
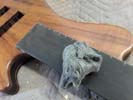
I used steel wool and some other abrasives to work on the fingerboard surface and the edge conditons around the unfinished fingerboard wood and the finished areas..
|
|
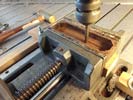
Doing a very quick couple of operations to prepare the pickups for the bobbins that will be added after finishing is done.
|
Left: I almost forgot that I had not machined the insides of the pickups before finishing. Getting them machined out so that they can go with the rest of the package. Right: The bass is in the capable hands of my finisher and we are applying a Clear Satin Poly-Resin finish to the instrument which will feel great and make the wood look great! |
As soon as my finisher is done I will drive back there and pick the bass up.
|
|
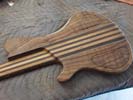
Back looks awesome with the covers in place.
|
Left: Lots of sanding going on right now to get the instrument in a condition where it can be sent to the finisher. Every surface has to be almost perfect!. Right: The bass is now almost ready to head out to the finisher to have its polyester resin coating applied. I am looking forward to seeing it when it comes back! |
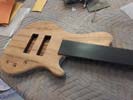
Double checking all surfaces before the bass goes to finishing.
|
|
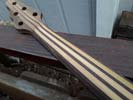
Sanding on the back of the instrument.
|
Left: Final cleanup on the back of the neck and I will be happy with the neck thickness and profile. Lots of sanding going on to get to at least 200 grit or better. Right: The two covers needed a little relief on each to give me a little access for easily removing them once they are attached with the neodymium magnets. |
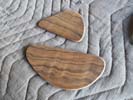
Covers ready to be finished.
|
|
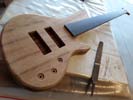
Last stages of sanding.
|
Left: I'm now working around the front and back of the body filing and sanding and making sure the edge radii are all consistent and sanded smooth. Going to finishing very soon. Right: Working on the internal radii which are some of the hardest parts on a guitar to shape and sand smooth. Almost there though and this will be a beautiful bass! |
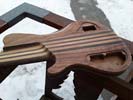
Sanding the inside radii all over the body.
|
|
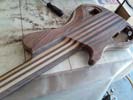
Will have this bass ready for finishing pretty soon.
|
Left: A good amount of the finishing bodywork is in the area where the neck and body meet. It's not so easy to shape and sand as the other parts. Fortunately almost done here! Right: I have the neck pretty much where I want it in terms of thickness and profile. Now getting the rest of the sanding finished up all over the instrument! |
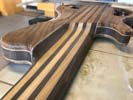
Most of that tricky carving is now done. - moving on to fine sanding.
|
|
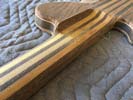
Back o fthe neck always involves a lot of careful work. It have to be the right thickness in a controlled taper and also have the right curve for comfort.
|
Left: I have been sanding the neck mostly to get it down to its final working thickness. Once it's there I can resolve the cross section and get it all sandd ready for finishing. Right: Current task is thinning down the neck to the right size and by doing so it will match its sister bass. Almost done with the sanding - should be at finishing soon. |
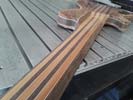
Working hard at the sanding but I am getting there. Looking good.
|
|
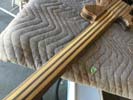
Doing a little work on the neck area as time permits.
|
Left: Working on the neck and cleaning up the profile plus reducing thickness a little bit at the same time. All these laminates have decortaive veneers too - lot of extra work in this one! Right: I machined the two covers down to the finished thickness and got them installed into the back of the body. Added some shellac to check out the grain! |
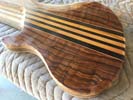
The two covers are now ready for sinal sanding and look awesome in the back of the instrument.
|
|
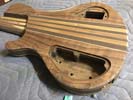
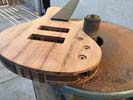
Perimeter is done so I'm getting started on the radii running around front and back of the body.
|
Left: Refined the belly cut on the back of the bass and also started the edge break work around the front and back of the body. Also need to slim down the neck thickness slightly. Right: This photo shows the back of the bass with the twi continuous grain covers in place. They need to be sanded down to finish thickness but already look good! |
All that Koa looks really impressive - wait till it has a finish applied!!!.
|
|
I'm working on this bass to get it prepped for finishing. Mostly a lot of small jobs and then a lot of final sanding!
|
Left: Next job on this bass is to clean out the truss rod recess so that I can fit the little continuous grain cover into the space! Right: Before doing the egde break around the body and other shaping I wanted to sand around the perimeter to make sure the surface is even and ready for some of the upcoming sanding work. |
Doing some edge cleanup around the final perimeter of the body.
|
|
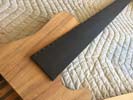
Fingerboard is really beautiful. I got these woods years ago and they are now very hard to find. Quite a rare combination..
|
Left: This bass has a beautiful Gabon Ebony fingerboard with partial fret line markers It's going to look awesome with its finish applied! Right: The recessed holes for the three stacked preamp knobs have been drilled in the top of the instrument. I'm going to keep the sanding and shaping process moving forward. |
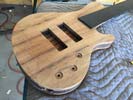
I'm keeping the development of this bass moving forward so that I can get it closer to the actual finishing process.
|
|
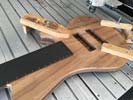
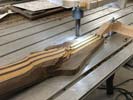
I have the instrument set up on the CNC so that I can cut three recessed holes for the preamp controls.
|
Left: Plotting out the locations of the three stacked knobs and I will get these machined into the top now that the CNC machine is available. Right: Starting on cutting the basics of the belly cut which really makes the bass feel much more comfortable to play. This is just initially a rough cut to remove material - more to come. |
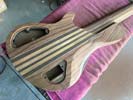
Getting started on carving a belly cut on the back of the bass.
|
|
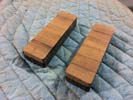
Continuous wood pickup covers rady for final machining.
|
Left: There are the two continuous wood pickup covers that will look great on the finished instrument. They will house custom Nordstrand pickups. Right: I wanted tro highlight the color and depth of the grain on the wood on the front of this bass. I am pretty sure it's going to end up looking awesome! Stay tuned! |
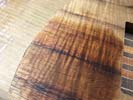
Some really nice Koa on this bass - front and back, also on headstock, pickup covers and cavity lids.
|
|
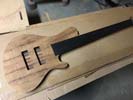
The koa on both sides of this bass will end up looking really nice after finishing..
|
Left: This is a photo of the front of the instrument as it is right now. I'm currently working on back of neck and body to finish those areas up. Right: This photo shows the back of the body. I will be further shaping the back of the neck qand also creating a nice comfortable belly cut on the back. Also finishing up neck/body transition. |
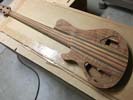
Next operations will be finishing most of the geometry on the back of the bass.
|
|
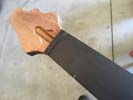
I sanded the perimeter of the headstyock down to profile size amd I'm now getting ready to drill the five tuner holes.
|
Left: I have now rough and finish sanded the profile of the headstock. My next task will be to mark out and drill the holes in the headstock for the tuners. Right: I have now marked out and drilled the holes for the tuners on the headstock. I'm also doing some glue removal to optimize the truss cover fit. |
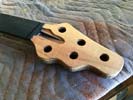
One more task done and moving on now to more body work.
|
|
Headstock decorative plate being glued onto to the headstock.
|
Left: I'm gluing the Koa headplate onto the headstock of the bass. Once that's set I can spindle-sand the headstock to its finished shape. Right: The Koa piece is now attached to the headstock. I cleaned up the edges a bit but I have to get hold of my headstock template to finalize the shape of the perimeter. |
Headstock plate is now attached to the headstock. The material came from the same Koa raw material I used for the top.
|
|
Thicknessing the headstock area.
|
Left: Back on the task of shaping the back of the neck and headstock and body transition areas. The closer to final size you gat the more cautious you have to be! Right: Truss rod cover cut out of headstock plate so I can get the headstock completed. It's still oversize but will clean up after attachment. |
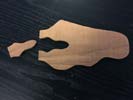
Got the TR cover cut out of the headplate - now to get the headplate glued onto the headstock.
|
|
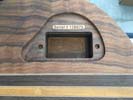
Serial number installed on the back of the bass.
|
Left: I was able to get on the laser and cut the serial number insert for the bass and fit it into its recess in the battery compartment. It now has a formal identity! Right: Getting the Koa headstock cover plate prepped for machining of the truss rod cover so that I can then attach it to the headstock of the instrument. |
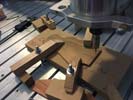
Set up on CNC to cut the truss rod cover out of the headplaste.
|
|
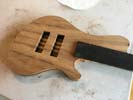
Spend some time on the body today working on getting the perimeter down to the template profile.
|
Left: Sanding and shaping around the body perimeter is complete. Some final filing and sanding needed but we are done with shaping the body profile. Right: Checking pickup bobbin size and geometry so that I can get the remainder of the work done to the continuous grain pickup covers which have to finished w the bass. |
Revieweing pickup geometry as I will be machining the interior of the wood covers.
|
|
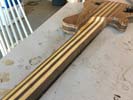
Getting started on removing excess material along the back of the neck and also refining the geometry on back of headstock and neck and body transition area.
|
Left: Working on the shaping of the profile on the back of the neck which also involved the fairly complex geometry of the neck/body blend. Right: I have the template for the original single cut which I am using to refine the perimeter of the body. I'm now going to spindle sand to the final body shape. |
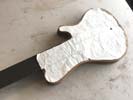
Establishing final body contour from template.
|
|
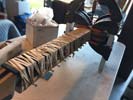
In the process of gluing the fingerboard onto the neck.
|
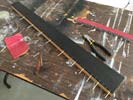
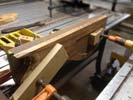
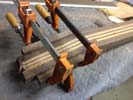
Left: Fingerboard attachment underway. It's a big setup but the rubber bands do an excellent job of holding the fingerboard tightly and evenly onto the neck surface! Right: Fingerboard attached and I have cleaned off the excess adhesive. Feels good and I'm now going to carve more at the back of the neck! |
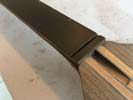
Fingwerboard is now part of the instrument!.
|
|
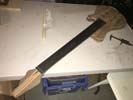
Fingerboard koint area has been carefully cleaned up and I am just about ready to set up to glue the fingerboard onto the neck of the bass.
|
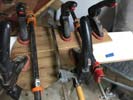
Left: Picture not great - it was taken at night - but the fingerboard has been prepped and is now ready to be attached to the neck! Right: All the components are set up for the fingerboard gluing. Truss rod is installed, surfaces are shaped, leveled and prepped for gluing and the components of the fixture are at hand. |
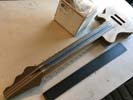
Quite a big setup for fingerboard gluing but it's ready to go.
|
|
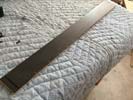
The fingerboard needs final cleanup on side dots and on joint face - then I can attach it to the neck.
|
Left: Fingerboard after having been removed from its support substrate and now ready for cleanup prior to assembly. Right: I took the opportunity to use the CNC today to thickness the headstock area from the back. I machined it down to the correct thickness allowing for the Koa veneer plate attached to front. |
Thicknessing the headstock area.
|
|
Getting the side dot holes drilled into fingerboard.
|
Left: I'm now busy getting the side dot holes drilled in the upper edge of the fingerboard. They have to be very accurately positioned. Right: Got the little pieces for the side dots glued into the holes I drilled. They are a very nice antique amber which matches very well with the instrument wood colors. |
Side dots being installed. Once glue is set I will clip off and carefully sand flush.
|
|
Cavities completed, I will now get the serial number installed.
|
Left: This is the back view wirth the two cavities cut, and battery compartment holes and serial number slot also machined in place.Right: In this photo you can see that I have set up the instrument on the CNC and machined out the two pickup cavities to their required depths. On to the next task to get this bass finished! |
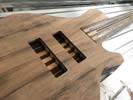
Pickup recesses have been machined.
|
|
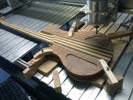
All set up to machine out the two cavities from the back of the bass.
|
Left: The bass is now back up on the CNC so that I can machine out both the battery cavity and the control cavity. Right: I now have the battery compartment machined to depth and I also will be adding magnet retainer holes and the slot for the serial number plate. Now on to cutting the control cavity! |
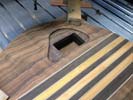
Battery recess done - now I'm going to establish two retaining magnet holes and a slot for the serial number insert.
|
|
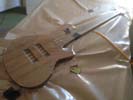
Great to get this bass in the vacuum press so that the top can be glued on!
|
Left: cleaned up all the joint areas and now have the top and body being glued together in the vacuum press. I will get fingerboard ready to go on! Right: This is the bass with the top plate attached. We now have a more whole looking instrument. Next I need to cut out the pickup recesses and back cavities. |
Top plate now firmly attached to the rest of the bass.
|
|
Partial fret lines installed in the fingerboard.
|
Left: I now have the bass body set up on CNC to cut the wiring slots between pickups, battery recess and bridge! Right: The wiring slots have been machined into the top surface of the instrument and I have prepped the body for the application of the top plate which will be the next operation. Moving along! |
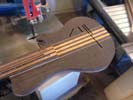
Wiring slots have been machined into top of body surface. Now to get the top plate glued on!.
|
|
Glung harvested cover tops onto pickup bodies.
|
Left: These are the two pickup cover tops being glued onto wenge bases so that I can complete the continuous wood covers for the bass. Right: These are the two pickup covers having been trimmed down to close to their final dimensions. Once their outsides have been finished I will machine out the insides. |

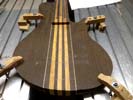
Partial fret lines installed in the fingerboard.
|
|
Partial fret lines installed in the fingerboard.
|
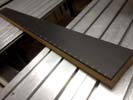
This is the fingerboard of our bass. It is solid black Gabon Ebony and I recently spent some time inserting little Koa pieces into the partial slots along the upper edge. They were carefully glued in, and when they had set I cut off the excess and sanded everything flush. Looks really nice even at this stage! I now have to set things up to cut the recess holes for the side dots and thereafer I will insert a contrasting dot material and sand flush. |
|
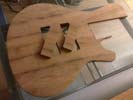
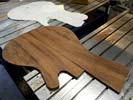
Pickup harvest complete (Phew!).
|
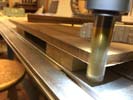
I machined the top of the top plate as deep as I could with the end mill (just less than 1/4") and then made a special fixture which allowed me to locate the same cutting paths from the back side of the top plate. I then carefully repeated the cutting cycle and was able to remove the two pickup pieces quite neatly and successfully! They will now move on to have some wenge attached to them and become pickup covers. |
|
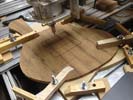
First cut in removing continuous grain covers.
|
I'm in the middle of getting the two pickup covers cut out of the top plate. It's actually a lengthy process because I can't cut all the way through with such a tiny end mill so I have to create a fixture so that I can accurately position the top plate upside down and them machine the remaining material out from the bottom of the top plate. Slightly laboriopus but it always yields a very neat and tidy end result! |
|
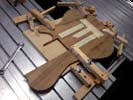
On CNC machine for removal of pickup tops.
|
I'm setting things up on my machine to get the two pickup cover pieces harvested out fron the top plate. It's a tricky operation because I have to do it with a very small end mill and I also have to cut from both sides so it requires a couple of intricate setups. Worth it in the end though, because I always love the look of having the pickups be a continuous part of the woodgrain of the top of the bass. More on this very soon. |
|
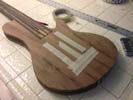
Plotting out pickup locations on the instrument top.
|
In this photo I am marking out the scale length, bridge location, nut placement and from these measurements plotting the locations of the two pickups so that I can run a program on the CNC to harvest them out so that they will become the top material for continuous grain pickup covers. As soon as I have verified this I will get the top plate onto the machine and cut out the two cover pieces from the top plate. |
|
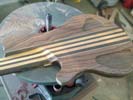
cleaning up body edges with top temporarily attached.
|
I have been removing material from around the perimeter of the body with the top plate temporarily attached so that I can get both pieces aligned and cut to the same shape in preparation for attaching the top to the body. In the process I have been removing more material from the back of the neck and the neck/body intersection to bring those features closer to finished sizes. I will finish that off once the top and fingerboard are on. |
|
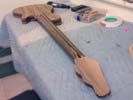
Working on a matching headplate.
|
This is the headplate piece having been sanded to its optimum thickness and rough cut to shape. I'm going to square off the end so that it fits tightly with the end of the upcoming fingerboard and then attach decorative veneer to the bottom surface to match that of the top plate on the body. Once that is done and cleaned up, the headplate will go on the CNC so that I can cut out the small truss rod access cover. |
|
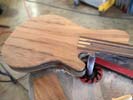
Top plate and neck are now a very snug fit together!.
|
have a very accurate and tight fit between the end of the neck and the top plate. Since the perimeters of both the body and the top plate are still oversize I can now spend a little time getting the edges trimmed to a common profile based on my original template for the body shape. That will no doubt be my next task on the instrument. I'm also working on a headplate. |
|
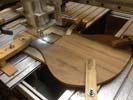
Top plate having the section milled out for fitting onto the neck.
|
The top plate is on the CNC machine so that I can machine out the section that fits over the end of the neck. I have to do it my very careful measurement because I can't test the fit until the machining is complete and the top plate is taken off the machine! Fortunately it came off just a tiny bit snug which is preferable so that I can do the final fitting by hand. I am now able to plot pickup and bridge locations and also wiring channels. |
|
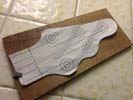
Making a headplate to match the body top.
|
While other parts of the bass were being worked on I was selecting suitable material from the offcuts of the Koa top plate from which to create a beautiful matching headplate. I had an offcut piece that will work perfectly. This will accurately match the grain and natural color of the top plate. I want to get this piece ready because once the fingerboard is attached to the neck, this headplate assembly will follow very soon afterward. |
|
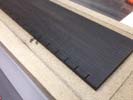
Partial fret lines have been cut.
|
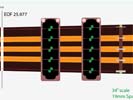
This is the fingerboard with its partial lines established in the upper edge. I was careful to emulate the length of the lines to match the instrument we are duplicating, should be a good match to that. I need to now get some sanding done on the top of the board to remove the machining marks. I will then set the fingerboard on its side so that I can cut the recesses for the material that will give us the side dots. Looking good so far. |
|
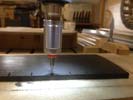
Cutting partial fret lines in the fingerboard.
|
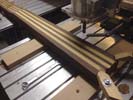
Got the fingerboard fret lines job set up on the CNC so I can get these lined cut into the top surface of the board. I have to go carefully since the cutter is only .023 in diameter but all is going well. Once this is done I need to establish all the side dot details along the upper edge of the fingerboard. That will be a separate setup on this machine. I have also been working on the body perimeter and parts of the neck to move things along. |
|
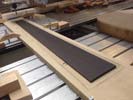
Fingerboard is well through the machining process.
|
The fingerboard has been attached to a supportive substrate for machining and was set up on the CNC machine. I then cut the perimeter of the fingerboard to its final dimensions and then ran a program that generated the compound radius on the top face of the board. With that complete I am going to cut the partial fret lines along the upper edge and finally will machine the slot for the nut. That will allow nme to remove it from the CNC table. |
|
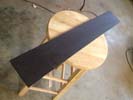
Fingerboard no wnice and flat and ready for machining.
|
Sanding is complete for the Gabon Ebony fingerboard we will be using on this bass. It is a very nice and consistently dark piece. I will be attaching this to a substrate material to keep it safely constrained during the upcoming machining processes. It will be cut to its finished profile, radiused along its length and cut to finished thickness, nut slot cut, and I will be machining partial fret lines along the upper edge of the board. |
|
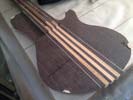
Neck joint machined and top of bass leveled for top plate assembly.
|
I have now machined the end of the neck section to its required location and also machined the entire top of the body to a consistent flatness to accommodate the top plate which I will soon be able to attach onto the instrument. Next task will be to machine the neck joint out of the top plate and remove the two pickup tops from the parent material, which I will then use to create continuous grain pickup covers. |
|
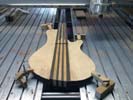
Setting the bass up so that I can machine the top surface and neck joint.
|
The bass is now set up on the CNC for two important jobs. Firstly I need to cut around the end of the fingerboard to establish the correct amount of height difference from the top plate to the bottom of the fingerboard. In the same process I need to machine the end of the neck section to just past the location of the 24th fret line. Once that's done I will surface the entire top to match so that we have a complete surface to glue the top onto. |
|
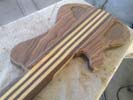
Working on the back of the instrument to trim it down closer to its real shape.
|
Since my last photo I have sanded the back of the instrument, worked on the headstock area, and I am now removing some of the excess material from the back of the neck and inside the neck/body transition. This is an area I will visit again after the top plate goes on but I wanted to get it trimmed down a bit closer to finished dimensions. Although there are several small operations in between, the next goar is to get the top attached. |
|
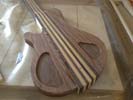
Bottom body half now glued on!
|
I just unclamped the assembly where the second body half was being glued onto the core of the instrument. THe operation appears to have gone well and we have a good solid joint now between both body halves and the core! It needs some scraping and sanding to clean up the back surface which I will be doing very soon. After that I will get the bass up on the cnc so that I can machine the end of the neck and the top surface. |
|
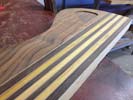
Top bout glued on - now to get the bottom piece attached.
|
This is the back of the bass after the first body half was attached. Things came out just as I wanted them to so now I'm cleaning everything up in preparation for the lower half to go on. I have to be careful on the 2nd half that it gets clamped in a position consistent with the outer profile of the template. Other than that, it's basically the same process as the first half except that the cor piece is that much bigger due to the upper bout addition! |
|
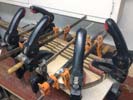
Gluing the upper body half onto the core section.
|
I got all my tooling together and got the upper bout of the body securely glued and clamped onto the core section of the bass. All being well the back face of the core and the outer surface of the body half should end up being nicely flush with each other and requiring only surface treatment to clean up. Once this is unclamped and cleaned up I can prep the surfaces to get the second (lower) half glued on and we can move on from there! |
|
First of the body halves prepped for gluing.
|
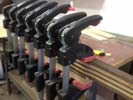
After a few more gluing operations we are now ready to start assembling the instrument body halves to the core of the bass. The first one to go on will be the upper bout. I also sawed off the extra material at the back end of the body - it helps when aligning everything as we do the final clamping. I will be clamping the two parts together but at the same time they will be clamped down on a glue resistant flat surface to guarantee alignment. |
|
Veneer being glued onto the core section.
|
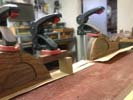
This is the core section having its second maple veneer attached. I'm getting closer to being able to get the body halves glued onto the body which is quite a big step towards completion for the instrument. This bass will certainly be as beautiful from the back as it will be from the front. These details I'm working on take time and effort but at least in my opinion the work is well worth it in the end! Should be a beautiful bass. |
|
Gluing decorative veneer ontop the body halves.
|
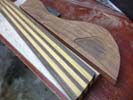
I am now gluing decorative veneer onto the joint faces of each of the body halves. I will also be putting veneer on the other joint surfaces (of the core section too) so that we keep the pinstriping consistent throughout the instrument. Once the veneers are all on I will attach the body halves one at a time to the core section based on linear locations defined by the scale length. Once the sides are on I can machine to prepare for the top. |
|
Machining a very clean and accurate joint face on each of the two body halves.
|
The core of the bass is now up on the CNC and I am machining both sides to remove extra material and to bring those sides exactly in line with the tapered perimeter of the neck and core. This requires a little p[atience and a lit of shimming to get the surface I am machining to perfectly blend with the surface I previously machined when cutting the outer perimeter. I have now done both sides so we are in good shape. |
|
Machining a very clean and accurate joint face on each of the two body halves.
|
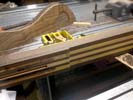
In this photo I have one of the back halves set in the machine so that I can create a flat joint face for attaching it to the core section of the instrument. I have to be careful that the cut is aligned on all angles so that everything will go together correctly. I had left about 1/8 of extra material so that I could clean up this feature on each body half. I can now add some decorative veneer to each of these surfaces to maintain consistency. |
|
Machining the back surface of the core section.
|
The core section requires two operations before the sides can be attached. This is the first of those where I have set the assembly up using the machined front face as a location surface in order to be able to machine a flat and co-planar surface which will become the back surface of the instrument. This operation also defines the resulting thickness of the instrument. The face has now been cleaned op and I'm ready for the next op. |
|
Fingerboard blank ready for sanding.
|
I have a really first class piece of Gabon Ebony ready to be sanded and machined into a beautiful fingerboard for this bass. I always like to use nice consistently dark ebony - but especially for a fretless it's really nice to have a quality piece because the fingerboard is such a prominent piece of the whole instrument. This board will have partial lines only extending under the B-string. I'm just ready to start sanding the front and back faces. |
|
Doing some pre-machining sanding to the top plate.
|
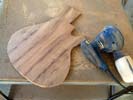
I need to get this top plate ready for a couple of operations before it will be ready to go on the instrument. Firstly I am sanding the top to remove any glue residue and witness marks from the drum sanding process. Now that the top is nice and smooth it is ready for me to machine the joint that will allow it to lock into the end of the neck, and thereafter, I will be able to harvest out the two pickup pieces that will end up on the wooden covers. |
|
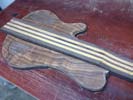
Body parts getting ready for upcoming assembly.
|
This is now the back of the bass before I start machining joint faces and fitting things together. I need to generate a nice clean and flat body-to-core face on each of the body halves and I also need to machine a corresponding joint surface on each side of the core section. I will then add a few matching decorative veneers and then glue the two body halves onto the core. At that point we will have something that looks like a real bass! |
|
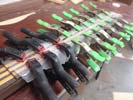
Gluing the two carbon fiber rods into the neck.
|
I took the opportunity today to find my carbon fiber rods and get the gluing, sanding and clamping work done to get them permanantly installed into the neck surface of the instrument core. I cut the rods to length and sand them a little until they are a snug fit for width and height. I then glue them in with a powerful epoxy and clamp the rods down so that I know they are seated securely at the bottom of their respectice machined slots. |
|
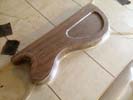
Gluing back plates onto body half centers.
|
Now that all the veneer is attached to the back of the Koa plates I can start assembling those to the wenge center pieces. Once they are glued these will be cleaned up and profiled to their template shapes and in turn will soon be ready to glue onto the core section of the bass. I could have clamped these pieces but the vacuum press was idle and it was actually quicker to do it this way. Some busy sanding and machining to follow! |
|
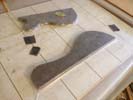
Adding a little more decorative veneer.
|
I am going to put some contrasting veneer against the wenge of the body core so I currently have the body half centers in the vacuum press to achieve that. I will veneer both sides of these components and will gave a dark veneer between the two - it will look awesome! I wll also then be able to get these pieces glued together. I am just about to start some machining on the core section also which will bring things together! |
|
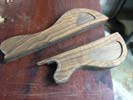
Ready to glue body components together.
|
I did some further work on the back plates to plug them with material that will provide seating for the two covers Now that I have that done and the two back plates are complete, I can start looking at getting the body halves assembled. I already have the wenge pieces rough cut and sanded on both sides. I will get these glued together and cleaned up very soon. They will require some machining prior to being glued onto the core. |
|
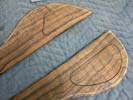
Both cavity lids have been cut out.
|
Both the cavity covers have now been harvested from the parent material of the back plate of the bass. I can now plug the backs and get the two body halves assembled. I wll save the two covers alsong with the two pickup pieces and use them towards the end of the production process. The instrument will look spectacular with the continuous grain on the front and the back. Can't wait to see the finished instrument! |
|
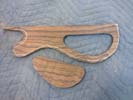
Cover plate removed from parent material.
|
I have machined this back plate from the top, created a locating fixture for the 2nd operation, machined the opposite side and we now have a surgically removed cover plate that will go back into this recess when the bass is complete. I now need to repeat this process with the battery compartment and its lid. The main goal is to get the body parts assembled but while that is being done I will be preparing the covers for thickness and finishing. |
|
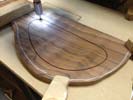
The cover plate has been cut.
|
I have now cut the cover profile deep enough that I can harvest it out safely. I will now go ahead and do the same thing on the other back panel for the battery cavity cover. The back of this bass will certainly look impressive with the continuous grain covers. It's a lot of additional work but well worth it in the end. The wenge center pieces are ready for assembly as soon as I get these covers cut and plugged. |
|
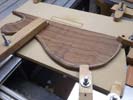
Control cavity work getting under way.
|
I'm now set up on the CNC machine for the first operation which is defining the harvested control cavity lid. I will cut it out using a small end mill and in a separate operation remove it from its parent material. I will also preform the same machining operation for the battery cover. Once the lids are harvested I can get the plates attached to the Wenge material and get the body halves completed and ready for assembly. |
|
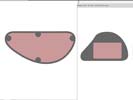
Programmng the two cavities so that they can be machined.
|
Both of the back plates have some machining to be done to them so that I can harvest out the parent material for the cavity covers. This is done in several stages. Firstly I carefully mark out the locations of the two respective cover plates. I then set up programming so that I can use a very small milling cutter to cut out the shape of each plate in the material. They then have to be flipped over for a very precise second operation. |
|
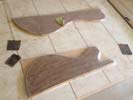
Back plates in the vacuum press getting veneer applied.
|
The two back plates are currently in the vacuum press where I am gluing maple veneer onto the back surfaces. This will create a matiching pinstripe to the maple I applied top the top plate which will look great also against the wenge center of the body halves. I will get these trimmed up when they are fully cured and get started on the harvesting out of the control cavity and battery cavity lids (since they will be continuous grain). |
|
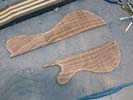
Two back plates have been rough cut and now ready for further operations.
|
I moved the pattern for the two back plates back about an inch to better capture the grain in the wood. The top and bottom plates have now been cut about 1/8" overside all round and I have marled the actual template perimeter on each. I need to use this marking to place the control and battery compartment geometries to that those cavities end up in the correct location. I have some sanding and veneering to do next. |
|
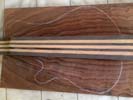
This will be the orientation of our Koa back panels. Nice material!
|
I have looked at the back material carefully as there are four different ways to align the bookmatched grain to the shape of the instrument body. I decided that the layout shown was the most complimentary to the instrument profile and allowed me to use the most figured prtions of the grain. I need to straighten up the inner edges a little then I will cut out the two panels and sand them in preparation for seme machining that needs to be done. |
|
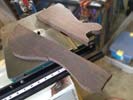
Wenge center sections of the upper and lower bouts have been cut out.
|
The Wenge for the top and bottom halves of the body have been rough cut from the stock material and I have sanded both sides flat. I will now spindle sand the edges and clean up the straight areas so that they are ready to be assembled to other pieces. I have to pre-assemble the upper and lower bouts before they go onto the center core. Next task will be to cut out the back plate shapes from out Koa material. |
|
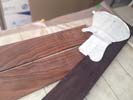
Getting ready to cut out component parts for the body.
|
I am now working on the body parts of the bass. We have wenge for the center section and the back plates will be a beautiful curly Koa which will look great on the finished instrument. I am using the template to mark out the respective shapes and then I will rough cut these and clean them up. They will firstly be drum sanded to ensure flatness and consistent thickness and then will have some decorative veneers attached. |
|
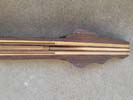
Rough shaped headstock, now ready to be thicknessed.
|
This is the headstock after I removed some of the extra material and rough sanded the shape. The headtock is designed to be as low of a mass as possible to avoid unwanted neck weight. I also use Ultralight tuners which really help in that regard also. Now that I have this rough shape established I will locate some Koa from the top plate material and use that to create a headstock top plate so that we have an elegant match. |
|
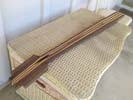
Core section trimmed down and it will soon be ready for body components.
|
This is the core of the bass after I removed all the excess wenge from the sides of the machined assembly. I will probably also go ahead now and rough cut the profile of the headstock just to further reduce the unwated material and get closer to some of the finished dimensions. The next machining operation will be to surface the two sides at the body end parallel to the tapered core so that I can glue on body parts. |
|
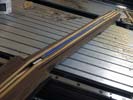
All the namachining has now been done to the core section.
|
The two slots for the carbon fiber re-inforcing rods have been machined into the top of the neck surface and I have also machined the geometry for the truss rod. I use very high quality truss rods - they are very strong and I have never seen one fail. The do require some detailed machining to get them to fit just right but it is certainly worth it to not have to worry about the intergrity of this hardware on the instrument. |
|
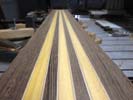
Getting the machining of the core under way.
|
This is the core section with some of the initial machining done. The upper surface has been machined to a continuous flat surface which will be our joint face for the fingerboard. The perimeter of the neck will now be machined to its final perimeter so that I have an accurate reference for size. I have also machined the top surface of the body so that it is at the correct relative angle to the fingerboard. The headstock angle has also been machined. |
|
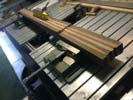
Set up for machining the features on the core section.
|
I now have the core section of the instrument set up on the CNC for several operations. firstly I will cut the top surface so that it is clean and flat. This will be the surface that the fingerboard will be glued onto. I will then machine the actual neck profile along the length of the piece. Next, I machine the body angle and headstock angle. I will probably finish up by cutting the truss rof and carbon fiber rod channels. |
|
Adding some material on the headstock area.
|
Before I get this assembly up on the CNC I want to add some extra material on each side of the headstock so that there's enough material to povide for the whole headstock shape. I'm adding some of the same Wenge material with a complimentary grain so it will look nice from the bac of the bass when it is done. As soon as this is set I will get it cleaned up and start the machining operations on the core section. |
|
The two top plate halves are being glued together.
|
Everything on the dry joint looked pretty good so I am going ahead and glue the two halves of the top plate together. It's important to combine the lateral pressure in the setup with some downward pressure to keep the panels on the same plane. I also try to do this type of work on a non stick surface! This will be a great looking to when the final finish is on it. I also have Curly Koa for the back plates and the headstock so that will look good too. |
|
Machining the two joint faces straight and square.
|
In this photo I am using the CNC to run a 4-flute end mill across the joint face of one of the top plates to ensure a straight and square edge. I will repeat this on the other top half and then clean everything up and test fit for gluing. If I am happy with the fit I will go ahead and glue the top together. It's a fairly critical joint so I want it to be as clean as possible. I also want to glue in such a way that the grain structure matches top to bottom. |
|
Just about to machine joint faces so that I can assemble the top plate into one piece.
|
I now have all the veneers on the backs of the two top plates. Next step is to carefully bookmatch them together to create a full top plate. I am setting them both up on my CNC so that I get the perfect cut for each joint face and will then set them up to glue them into one piece. I am also employing the template to mark out the body halves in the wenge and koa materials. Want to see this instrument as one piece asd soon as possible. |
|
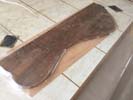
Upper half of the top plate getting some maple veneer added to it.
|
Perhaps not the most exciting photo I have ever posted but significant in the sense that I am anxious to get the top plate glued together and this is one of the most important steps leading up to that. I am adding veneer to the upper top plate and it will then be ready to assemble into one bookmatched top. That in turn will get other related machining processes under way. I am also building the body parts - pics to follow! |
|
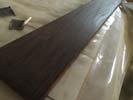
This is the Wenge that I will be using for the center section of the two body halves.
|
This is the very nice piece of wenge that will become part of the two body halves for this bass. I am ready to get these rough cut and sanded so that they are ready for further assembly. I will also be cutting the Koa back plates which I have to machine in order to harvest out the continuous woodgrain covers. That will also be happening very soon as well as the assembly of the top plate. Lots of exciting stuff. |
|
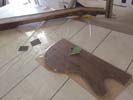
Gluing veneers onto the top plate halves in the vacuum press.
|
I am now busy gluing maple veneer to the backs of the two top plates. When this is done I will trim up the plates and decide whether to add additional veneers to the joint surface since I will be gluing dark woods together. Once both top plate halves are done they can be bookmatched together to create a complete top. I will also be cutting out the wenge and the Koa for the back plates very soon so I can get body halves assembled. |
|
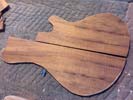
Top plates have now been rough sawn and ready for futher operations.
|
The two halves of the top plate have been cut out. The material is nice and flat thanks to earlier sanding work but now I have to apply a couple of veneers to the underside of each. Once they are on I can glue the two top halves together to create one really nice bookmatched top plate. I will also be cutting up the Koa for the back ofr the instrument and the wenge that will be the "meat" in the sandwich for the body halves. |
|
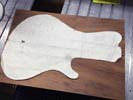
Drawing out the top plates so that I can rough saw them prior to assembly.
|
I'm now drawing the body shape (plus about 1/8 extra) around my single-cut template so that I can cut out the top plate of the bass and get it machined and prepped so that it can be bookmatched together. These are some of my very last pieces of curly Koa but they look awesome and will really enhance this bass when we see it with its finish on! Right now I want to get the body halves assembled and glued onto the core |
|
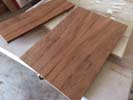
CTop material has been rough sawn from Koa block.
|
This the Koa material that I have just split very carefully on my bandsaw to create two top plates which will be bookmatched together. resawing is always a tricky job because you have to yield a very straight and accurate cut in order to minimize the amount of material you need to remove to create a smooth and flat surface. I will be getting these sanded and rough cut soon. I also have some sawing and machining to do to the back plates. |
|
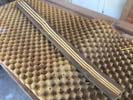
Core is now all glued up and complete.
|
The last two side pieces have now been glued onto the core and the whole assembly is now complete. I cleaned up the overlapping material and everything is now ready to be set up on the CNC machine where I will cut several features and prepare the core for assembly with its body halves. So far everything looks great and exactly as I had been planning. Nice to have all these separate laminates consolidated into one assembly! |
|
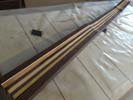
All laminates veneered - ready for assembly.
|
I have glued veneer onto all of the remaining laminates and the next step will be to attach the two outer pieces of Wenge. At that point I will have a complete core assembly and as soon as my CNC machine is available this will be set up to have all the critical surfaces machined. I also have parts for the body halves in production so that when the core piece is machined they will be ready to assemble. So far so good! |
|
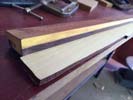
Gluing some of the first laminates together.
|
I have added veneer to all the laminates in this 7-piece neck and I am now gluing the first three laminates together to create part of the core of the bass. As you can see in the photo I have glued the center Osage Orange laminate to its neighboring Wenge laminate and I am just about to add the other wenge laminate to the other side. I will post another photo of the more complete core section as we move forward. |
|
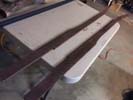
Wenge laminates rough cut and sanded - ready for machining.
|
I have rough-cut the two central laminate pieces from Wenge stock. Those blanks were then drum sanded and I then cut each one closer to its final thickness on the band saw. Doing this saves some machining time on my very busy CNC machine! Next task is to get these set up on the cnc and machine the tapers. When that's done I can veneer the two pieces and start assembling the core section from the center out. |
|
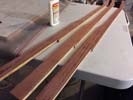
All Osage Orange lams have been veneered and are ready for assembly.
|
I have now machined all three Osage Orange laminates, cleaned them up and applied veneer to both sides of each piece. The veneer has been cleaned up around all respective edges and all surfaces have been scraped and surfaced ready for further assembly. My next challenge in this area is to get the center Wenge laminates machined and get those into the same condition. I have also been selecting wenge for the center of the body halves. |
|
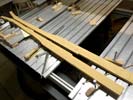
All of the core laminates are now cut.
|
These are the other two Osage Orange laminate blanks. They are ready to be set up on my mill so that I can cut them to the correct tapers. Right now they are quite a bit oversize but the goal here is to have the three Osage Orange laminates be matching tapered sizes. Once they are machined to size and cleaned up they will get a dark veneer applied to both sides. This will contrast nicely with the maple veneer on the Wenge. |
|
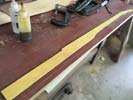
Center Osage orange laminate ready to have decorative veneers applied.
|
I realized after looking at my original build on this model of bass that the original had seven, not five neck laminates! Fortunately I had more Osage Orange on hand and I was able to create and extra laminate in that material. I will also need to cut another Wenge laminate too! Fortunately all is well and in this photo the center OO laminate has been machined to the correct taper and is now ready for the application of veneers. |
|
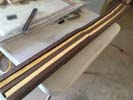
All of the core laminates are now cut.
|
All five of the core laminates have now been rough sawn and the next step will be to get them all drum sanded so that I have good flat surfaces for fixturing when the machining gets under way. Right now the three center laminates are oversize but will be cut to size as soon as they get on the CNC when the tapers will be milled. By the time I get them sanded I'm hoping my CNC will be free! More photos very soon. |
|
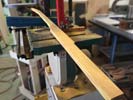
First Osage Orange Laminate sawn up.
|
The Osage Orange laminate I marked out and adjusted accordingly has now been rough sawn on the bandsaw. I will clean up and straighten some of the edges and use this as my master for the rest of the core laminates. They will all be safely oversize at this stage and will be refined closer to finished sizes as we move through the building process. Next step is to cut another of these and three matching laminates from my Wenge material. |
|
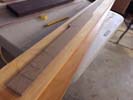
Osage Orange wood and my template getting ready to be cut.
|
I have ny template for this bass ready and have sanded the Osage Orange material so that I have good clean surfaces to work with. I use the template to mark out the profile of the instrument taking the best elements of the raw material into consideration. Typically I will create one laminate from the template, making whatever adjustments I need for that instrument, and will then use that laminate as a gauge for the other four. |
|
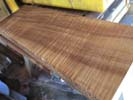
Curly Koa block which will yield out bookmatched top plate.
|
This is the curly koa that I will be using for the top of the bass. Hard to see in this photograph but it has a LOT of beautiful figure in the grain and will look awesome on the finished bass. I need to get this block sanded both sides and then resaw it to create the two top pieces that will ultimately be bookmatched together. Once sawn - they will need to be sanded again to the desired thickness and flatness. |
|
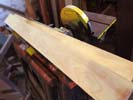
Osage Orange material ready to be rough cut.
|
I bought some Osage Orange which will be the inner tapered laminates on the core section of this bass. This stuff is surprisingly hard to find, especially in lengths as long as 48" (which I usually need for a neck-through bass). I was lucky enough to find some and I'm now ready to start cutting up blank pieces so that I can start assembling the core section of the instrument. Looking forward to seeing this one come alive! |
|
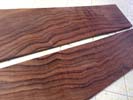
This is the Koa I will be using for the back of the instrument.
|
To get things started here - these pieces of Koa in the photo are cut from the very same board that gave me the back pieces for the bass (back in 2007) we are recreating today. I was lucky enough not to have a reason to use these pieces and i'm very happy I can now incorporate them in this bass to make it even more of an authentic rebuild. I just got hold of Wenge for the core pieces of the bass so more updates coming soon! |

