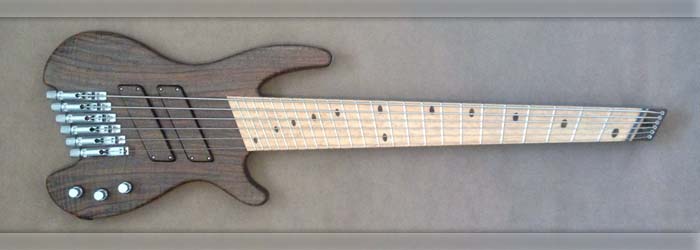
|
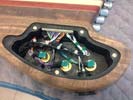
Had to re-do the pickup wired but all is well - sounde great.
|
Left: For reasons relating to the wire color coding I had a problem with the polarity of the pickups. I disconnected pickups and resolved that so all is good. Right: Bass is very close to being ready to ship - I'm working on adjustments to optimize playing and trying to get everything to settle in since it's all new. |

Leveling and polishing the frets.
|
|
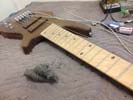
Leveling and polishing the frets.
|
Left: I'm now leveling and polishing the frets so that the bass will play nice and smoothly. All the frets have to be on a very even plane. Right: I added the remaining magnets into the battery cavity and then proceeded to get the magnets into the two covers. This is the back with continuous grain covers fitted. |
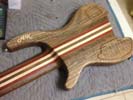
Back of the bass looks awesome too.
|
|
Strap buttons are on - looking nice!.
|
Left: Last few dtails. Got the strap buttons on and I'm adjusting truss rod etc. Hoing to add magnets to the covers next while I finish up the adjustments. Right: I did some more adjustments to the instrument and it's getting close to the comfort zone. Will do some final fret dressing too - want to get a nice action! |
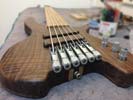
Bass is coming together nicely.
|
|
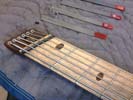
100 little adjustments to bring everything together.
|
I'm down to making numerous adjustments to the nut and truss rod and bridge saddles so that everything on the bass works well together. I always undersetimate how time-consiming this process is because you are assembling and dis-assembling repeatedly to test and adjust, file things etc. However with every cycle you get closer to the desired comfort setup zone! I want it to be stable for my customer so once I get it all set it'll sit for a few hours. |
|
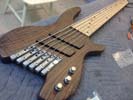
Nice Bass!!!.
|
I now have strings on the instrument and I am doing some of the expected adjustments to nut slots and bridge units to bring everything into line. I will then set the intonation for each string and I'll be in a good place to give it a test drive and see how things come together. There is always a pase of small adjustments as all the component parts settle in with each other. I also got the strap buttons fitted so things are looking good! |
|
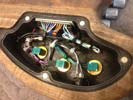
Wiring in the control cavity is now complete!.
|
I am happy to say that the control cavity is now completely wired up. That is to say - all the connections are connected to the right places. I now need to get strings on this thing and test what comes out the output socket! There Audere units are very consistent and predictable so I'm pretty confident everything will work as expected. I have magnets to put in the cavity covers which I think I will do next. |
|
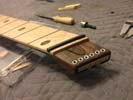
Headstock end has all its hardware now.
|
This is the headstock area of the bass with the truss rod end cover attached and the string retainer insert in place. All I have to do to this end of the instrument is cut the six slots for the strings into the nut. I will also have the pickups wired in very soon and strap buttons attached. I want to get it strung up so that I can test the sound and do the physical adjustments necessary to get it into good playing condition! |
|
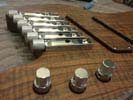
Added some chrome bling today.
|
Adding hardware to the bass right now - I put the stacked knobs in place and am just about to install the straplocks. I also got the nut fitted and shaped so it is ready for the string slots to be cut into it. Covers are also being worked on - I'm adding magnets to those and adding shielding to the inner surfaces. I have the two pickup wires to hook up inside the cavity but otherwise everything is complete in that area. More to come!!! |
|
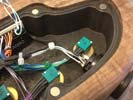
Magnets for holding on the covers have been installed.
|
I drilled and installed the magnets in the cavities which will hold the covers onto the back of the body in place. These have to be fairly accurately placed and then installed so that they are perfectly flush with the joint surface. It's also very important to make sure the polarity is consistent on all the magnets installed. I can now create trwo templates which will allow me to accurately locate the opposing magnets in the two covers. |
|
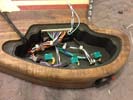
Preamp wired in and batteries and output jack connected.
|
Wiring a bass is a slightly laborious process since you have to be careful that connections are correct and have good integrity, that everything is done systematically so it dowsn't end up looking like a rat's nest, and that you have indeed thought of everything! The only things left to connect are the two pickups. I installed the output jack socket in its recess so things are a lot closer to being done now. Magnets and covers coming soon! |
|
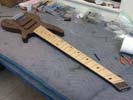
Got the string retainer sleeves installed plus a few other small jobs done!.
|
Getting any instrument finished involves and incredible amount of small detail work, which by the nature of a custom instrument is probably inevitable. Everything has to look good, fit and work together in harmony and it all has to be done in a reasonable timeframe. I just got the six string retainer sleeves permanently installed, nut is almost to size so it can be glued in, and I'll get the truss rod cover added too. So far so good! |
|
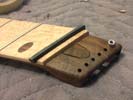
Working on finishing up the headstock area.
|
The nut in being added and will be shaped to fit and then slots will be stablished. I'm also working on the back of the little truss rod cover so that it can be snapped in place. Thirdly, I'm about to drill the top holes for the strings and insert these small metal bushings. Since this is the point on each string where it is tensioned the metal bushing will prevent any damage from localised string pressure to the wood or finish in that area. |
|
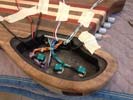
Almost through the electronic installation.
|
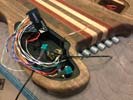
This is the control cavity with the potentiometers installed and some of the wires organized to maintain space and tidyness withing the control cavity. I'm in the process of connecting the wiring from the two AA batteries down to the power inputs on the preamp unit. I will then attach all the required wires to the output jack so that I can get that installed in its recess on the side of the body. Going well so far! |
|
Getting dug into the electronics.
|
All the six tuners are installed and individually grounded so it's time for me to get busy with the electronics and get everything hooked up. Firstly I have to ream out the control holes in the face of the instrument to suit the potentiometer thread diameters. Then I will temporarily install the pots so that I can organize the wiring and get that tidied up. Once that's done I'll fix in the pots and attach the preamp module and battery holder. |
|
Two out of six tuners are in their final resting places.
|
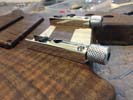
In this photo I have now located all six tures assemblies in their exact locations. I have had to remove them so that I can get the grounding wires properly attached and the holes drilled deep enough. I'm in the process of re-attaching everything and in the photo I have the two outer units permanently mounted. I now just have to add the remaining four in the middle and this job will be done! Electronics and fitting a nut are next. |
|
Getting the six tuner assemblies attached.
|
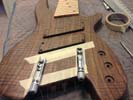
I am now drilling location holes for the tuner assemblies. I have mapped out their relative linear locations for scale length and now I have to get them attached so that they are evenly spaced across the cetnet distance between the strings. To do that I am attaching the two outer assemblies first and that way it will e easier to distribute the remainig four accurately between those points. Starting to look like a real bass!! |
|
Succeeded in getting the ground wires threaded through.
|
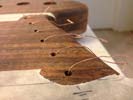
I ran the six copper grounding wires through the body and up onto the top of the instrument so that they will individually fround all six separate bridge/tuner units. It's not easy threading wire 4 or 5 inches through an internal channel but I have a system that helps make it go a little more successfully without the wire bunching up inside. I can now set the sic tuners up so that I can space them apart accurately and attach them to the body. |
|
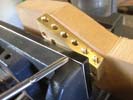
Tapping the string retainer holes for the set screws.
|
In the process of assembling this bass I need to get the string retainer tapped. 2 holes tapped so far. There aren't really any options on the marketplace for custom string retainers for headless basses so I have been able to manufacture my own to fit the headstocks I build. They work really well and I have never had any problems with them. They are discrete and fit nicely into the end of the headstock. This one is about to be fitted. |
|
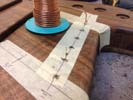
Grounding holes are now established and I can run the wirs and get the tuners attached!.
|
I was able to successfully plot the location of the grounding wire channel inside the bass and drill holes for the grounding wires that will connect each tuner to a common ground in the control cavity. Having done this I will now be able to run the wirres and secure them and then install all of the six tuner/bridge assemblies permanently. Looking forward to seeing the bass with those attached - we're getting there! |
|
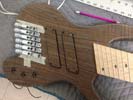
Pickups are in and I'm working on grounding wire holes for the 6 tuner assemblies.
|
Pickups have been centered, drilled and installed insto the cavities. I'm using temporary screws until such time as the assembly is more complete and will swap these out for matching screws when I do final adjustment. I also have the six tuners out because I am just about to drill the ground wire holes and I don't want to get any of those in the wrong location - there's not much latitude so I'm measuring and marking them all out first. |
|
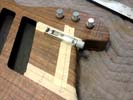
Getting the details done before installing the six bridge/tuner assemblies.
|
In this photo I am working on the installation of the six bridge/tuner assemblies. The scale length at each string pretty much defines the position of the units but I have to also account for the grounding wires which have to connect to each bridge unit but not show on the top. I have already established a ground wire channel inside the instrument, I now have to locate that accurately from the top so that I can drop a ground wire through for each. |
|
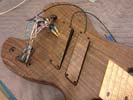
I'm now getting into the tesks of pickup and electronics installation.
|
I'm now busy getting the pickups fitted into the instrument iteself. This requires some work with heat shrink tubing, spacers, medical tubing, some foam, and a hot glue gun. Once I get them installed and adjusted correctly I will moe on to working with the Audere electronics package and get that set up inside the control cavity. There are countless small tasks at this stage of an instrument's assembly but my goal is to make sure it is all solid. |
|
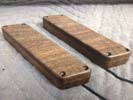
The two pickups and their respective covers have been pre-assembled.
|
Here are the two continuous grain pickup covers with their final surface finish applied. I have also fitted the pickups themselves into the respective covers so these two units are now ready to be installed into the body of the bass and become part of the overall assembly. When that's done I will probably fit the string retainer and the nut and then the tuner units so that I can get strings on this thing, test it out and get it adjusted. |
|
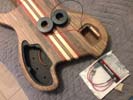
Starting on the internal wiring - battery power through to control cavity.
|
I'm getting the ball rolling on the internal wiring of the bass. We will have two batteries in the compartment on the left so I have to connect them between their physical terminal connections and the control cavity. In the photo I am running red and black power cables through the slot I machined before the top went on. This will get the battery power through to the preamp. I will leave extra until I complete the power connections. |
|
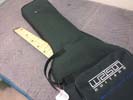
Packaging up the bass and all its parts to got to the finisher.
|
The bass is heading out to the finisher and the timing is pretty good since I have to visit family so the bass will be getting some TLC from my trusted finisher while I am out and I will start the assembly process as soon as I am back in my shop. I will post some glamor shots of the bass whenI get it back to show it off a little bit. I know my customer is anxious to get it and go play some gigs so looking forward to getting this wrapped up!! |
|
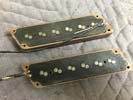
Pickups fitted into pickup covers.
|
I'm busy fitting the pickup bobbins into the continuous grain pickup covers. I wanted to make sure these parts fit together well before we do the final pass on the instrument finish coat. I hate working on a finished instrument because of the risk of surface damage so I try to do all the necessary shaping or carving work before the finish coats go on! I was able to make the pickups and the covers fit nice and snugly together! |
|
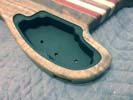
Control Cavity Shielding.
|
This is the bass showing the electronic shielding in the control cavity. I'm disciussing with my finisher the possibility of adding a poly-resin finish to the bass which will create a very even surface all over and still retain the nice surface feel that we are looking for and protect the maple fingerboard from surface dirt. |
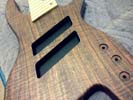
Pickup recess shielding.
|
|
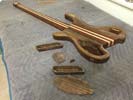
Collecting all of the various parts that will need final surface finishing.
|
This photo shows all the various components of the instrument laid out prior to final finishing. All the parts have been sanded and grain filled and finished to the point that they are now ready for the final coats. Before that happens I am going to apply some electronic shielding to the cavities. I also have to check the pickup holes and the fit between the covers and pickups and their respective locations in the body. |
|
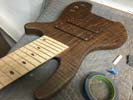
Nice photo of the top of the bass with the pickup covers in place.
|
While I was working on the adjustment holes in the pickups I thought I'd pop up a photo that showed the pickups inserted into the top to show off the continuous grain of the top. Furthermore - the control cavity and battery cavity covers are also continuous grain so that back of the instrument looks really nice that way too. It's more work to build that way but it really does make the difference on the finished instrument! |
|
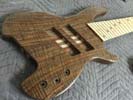
Starting on the final clear coat - wood looks really nice.
|
This is a look at the top of the bass right before I start to apply the final clear coat. Tee wood grain looks really nice and it will be a beautiful looking bass. As soon as the clear coat ois completed I will start on the electronic shielding and get the pickups installed in their continuous wood covers and thereafter installed into the body of the bass. I'll be setting up some ground wiring for the bridge units and getting those installed. |
|
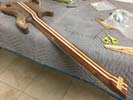
Finishing process continues - colors look great!.
|
I am now applying further grain filling compound as a base-coat on the instrument. That will be completed very soon and when I am satisfied with the overall surface I will start applying the final clear-coat. As they say in all finishing scenarios, it's all in the preparation! The grain filler gives the wood a nice even color and surface and highlights any surface areai I need to give more attention to. Looking really nice so far! |
|
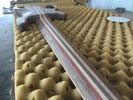
Rubbing down the finish between application coats.
|
I'm busy rubbing this bass down between coats so that I can get the final clearcoat on there. It'sslightly detailed work because you can't miss anything and have to work in good light (outside is best). Bass is looking and feeling great though, one finish is on I'll add electronic shielding in cavities and get the hardware started. Should be a beautiful instrument. I also double checked and it does fit nice and snug in the guitar case! |
|
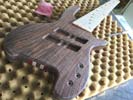
Got the first couple of coats of sealer on the body - starting to look really cool!.
|
The first couple of coats of sealer have been applied to the bass. I have to rub everything down between coats but this process should not take too long. I want to get nice even base finish before I go ahead and add the clearcoar to finish it off. The grain and color of the wood looks really nice! I will add a couple more coats on the body, repeat the process on the cavity covers and pickups and then apply the final finish to everything! |
|
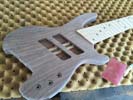
Taking care of the last of the sanding so that I can get the grain fillers and sealers onto this instrument.
|
I'm down to the smooth 400 grit paper so that means I am pretty much ready for finishing. I want to get the first few coats on to show off the beauty of this wood. As soon as I have done that I will be putting electronic shielding into the pickup cavities and the control cavity. As soon as the finish is applied, dried and leveled I will start on the assembly of the hardware and electronics. I don't anticipate too many problems. |
|
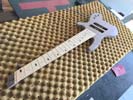
Doing the final super smooth sanding.
|
The bass is on the padded bench for some final sanding from bumper to bumper. I have the grain filler waiting but I want to make sure the entire instrument is nice and smooth and clean so that the finish really brings out all the beauty of the wood. I like to do this in daylight so that I can see in detail the results of the sanding process. It's looking and feeling good already - nice and light too! Can't wait to see it with the coatings on it. |
|
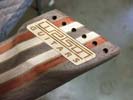
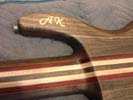
Logo insert on back of headstock.
|
I am cutting a recess on the back of the headstock area where I am embedding the logo. There's never enough real estate on the front of a headless bass since you don't have a traditional headstock and in some basses I'd rather not interrupt the continuity of the front of the bass putting a logo somewhere on the body. Doing this will give the bass a very custom look and should work out really well. Everything else is ready for finishing. |
|
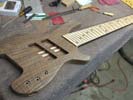
General sanding getting readu for the grain filler!.
|
Right now I am busy filing and sanding to get everything ready for finishing. I got the headstock area all tidied up, drilled sanded and radiused and that looks pretty good now. In the process of working on that, I refined the neck curve a little - especially at the headstock end, so that it feels nice and comfortable when playing the lower frets. I'm now sanding everything smooth and also working on the two cavity covers. |
|
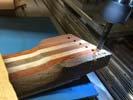
Some cleanup machining at the back of the headstock.
|
I felt that I had too much material under the headstock area so I set the bass up on the CNC and machine off about 1/4 inch of un-necessary stock to yield a more aesthetically balanced neck to headstock transition. I will get that sanded to a nice smooth finish to match the rest of the instrument because I am very anxious to get the grain filler and final finish on the bass. I will post photos as soon as that process is under way!! |
|
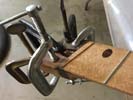
Adding the headstock veneer.
|
I am now gluing the little headplate onto the top surface of the headstock area. This will allow me to finish shgape and sand the back ofr the headstock and complete all the shaping for the instrument. I'll double check sanded surfaces all over the instrument and if it all looks ok the finish starts going on. I can't wait because that's when you really see the beaty of the wood come out and the instrument really changes! |
|
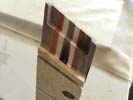
Headstock area has now been machined.
|
This is the net result of the recent machining operations on the headstock. I created space for the string retainer block and I am now able to add the little headstock veneer on the top surface to finish off the facing of the instrument. I will also do some carving on the back to blend into these newly machined features and that should take care of this area. I have been sanding the body and the pickup covers to prep for finishing. |
|
Setting up to machine string retainer recess.
|
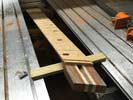
I am now setting up the bass so that I can machine out a pocket in which the string retainer will sit. It's a difficult setup because of all the compound angles I have to compensate for due to the multiscale geometry of the instrument. When I get the little face at the top square on both planes I will go ahead and machine the cavity and the end surface of the headstock. This will then allow me to get the little headplate attached. |
|
Cutting the truss rod access cover out of the headplate.
|
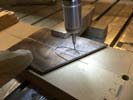
I want to get the plate for the headtock machined so that when all the sanding is complete I can start machining the recess for the string retainer which should be the last machining operation on this instrument. When the little truss rod cover is cut out I can go ahead and glue this vereer on the headstock after which I will cut the recess for the string retainer from the back side. I shoudl then be able to get the finishing process under way. |
|
Curly Maple inlay for the letters has been cut and this part will be done.
|
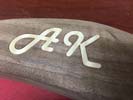
I chose some nice curly maple for the inlay because I have already used some of the same type of maple on the back of the instrument, so hopefully this inlay will match nicely with that. It hasn't been glued in yet but i will get that done and have it leveled off very soon so that we can finish things up. It will look really nice against the walnut when it has finish applied. Now working on the string retainer and cavity covers. |
|
Setting up to cut a couple of letters on the back of the upper horn.
|
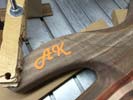
My customer wanted a little personalization somewhere on the bass and after some discussion we decided to apply initials on the back of the upper horn using a font that appealed to him. I scaled the letters to fit as well as possible in that location and in preparation for making an actual cut on the instrument I first cut the letters out to the same size on the laser. This made it a little easier to position the artwork in the best location. |
|
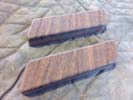
Working on the radius and sanding of the two pickups.
|
I have made sure the pickup bobbins fit nicely into the continuous wood covers and sanded them down and radiused the edges and corners. Last thing I now have to do to these before final finishing is to drill and countersink for the adjustment screws that will hold the pickups in place. I am also working on a string retainer for the headstock and will have that complete very soon. This bass is going to look nice! |
|
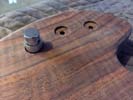
The control positions have all been machined - on to the next task.
|
The recesses for the knobs have been cut and I have tested the fit and depth with the preamp hardware and all is good. These controls will give us Volume & balance, hi-mid & lo-mid and bass & treble - a lot of tone control. I like to recess the knobs because it hides the retaining nut and looks more elegant than mounting the knobs on a flat surface. I'm going to get the pickup covers sanded and establish some counterbored holes in those. |
|
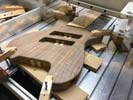
Setting up to cut the holes and counterbores for control knobs.
|
The bass is now up on teh CNC for the machining of the holes and counterbores for the control knobs. I will arrange them above the cavity in such a way that they are nicely aligned with the countour of the lower body bout. This is one of the last machining processes on the instrument (except for some headstock area work) so it's nice to see this bass in the final stages. I'm really looking forward to seeing the wood with the finish applied! |
|
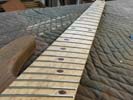
All the frets have been filed and dresses ready for action.
|
Got all the frets trimmed neatly to the fingerboard, chamfered and dressed on the ends. Neck feels nice and this bass should play really nicely. I will probably put another protective caot on while I am applying the finish to the rest of the bass just to make sure everything is sealed and wear-resistant. I have almost all of the body sanded down now - obe of the next steps is going to be a setup on the CNC for holes & counterbores for control knobs. |
|
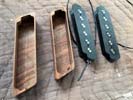
Pickup and pickup covers getting the final treatment
|
These are the two continuous wood covers that will blend perfectly with the top wood. Also shown are the pickups themselve which have just been potted and are ready for use. I will be doing some final shaping and seanding on teh covers and then carefully fitting the pickups into their resoective covers. They wont be permanently installed until after finishing is applied but I want to be sure they fit nicely before that happens. |
|
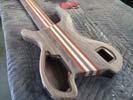
Almost all final sanding done - getting the parts together before starting the finishing.
|
This is the bass with all its surfaces sanded down just about to the point where grain filler can go on. I want to get the cavity covers fitted also and at that point I can consider all the external surfaces complete short of the super-fine sanding they all get right before the finishing compounds do on. I also have pickups ready and will do some final sanding to the covers so that we have a complete package. Bass feels good - can't wait! |
|
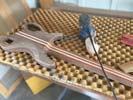
Some more neck profiling and final sanding.
|
One of the most critical areas of the body shaping, especially on a 6-string bass, is achieving the perfect curve and geometry on the back of the neck for the most comfortable feel and ease of playing. To this end I spend a lot of time carefully removing material until it feels right. I wanted to be very sure we were achieving that on this bass. Feels pretty good right now so I am happy with the outcome. Want to get finish on this beauty! |
|
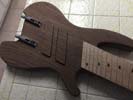
Pickup covers and the outer two tuner units.
|
This is the bass body with the harvested contunuous grain pickup covers shown in place. I also placed two of the tuner assemblies on the body to show how the hardware will be distributed. The immediate work I'll be doing to the bass is sanding and shaping to finish up the surfaces all over. Also I will be finalizing the contour and width of the neck. There are only a few small machining operations left and a lot of manual labor! |
|
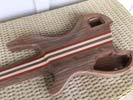
More sanding and shaping on the body and neck.
|
The bass has been getting some shaping and rough sanding on the body and especially on the neck area. It is currently quite close to getting cleaned up for surface finishing. I have pickups ready to be test fitted in their respective covers and a string retainer in the works which should be ready for fitting quite soon. Electronics and tuners are on the bench so it should not be long before this bass is ready for sale! |
|
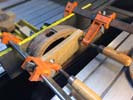
Machining the recess for the jack socket.
|
In this photo I am machining the lower bout of the body to create a recess for the jack socket assembly. I use Neutrik locking sockets as they are more stable and robust than most of the commercial guitar sockets. I'm also bust sanding the instrument whenever I have a spare moment and need to put some time into the finishing of the headstock area. Nevertheless the instrument in coming along well and feels good! |
|
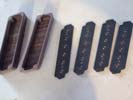
Flatwork for the two pickups have been cut - now to assemble bobbins.
|
The four items on the right of the photo are the flatwork for the pickups that will go inside the wood covers. These have been carefully cut to fit snugly inside their resoective covers. I will now assemble these plates with magnets to create the bobbins onto which we will be winding the copper wire. I'm planning to make these pickups nice and punchy, plus they will be fed throughan Audere 4-band active circuitry! |
|
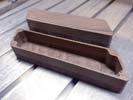
ICutting out the insides of the solid wood pickup covers - got one done and moving on to the 2nd one.
|
Today's task was to get the two pickup covers machined so that I can fit the pickup flatwork inside them. In the photo you can see that I have already machined one of the pickup cavities. I leave a fairly thin layer of wood between the inside and outside of the pickup as I don't want ti distance the poles too far from the strings. normally my pickups are pretty hot so this is never an issue! Good to get these done. |
|
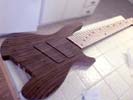
In the final carving and rough sanding process - the end is in sight!.
|
The bass has been carved and shaped to the point where I need to sand the surfaces to get them ready for final finishing. I have hardware ready to go on and apart from some final sanding and blending, I am ready to start work on the surface of the instrument. The walnut is going to have a great grain and warmth to the finished wood and the maple fingerboard will be a beautiful contrast. More pictures coming! |
|
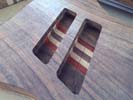
Both pickup cavities machined to their finished depth.
|
The two pickup cavities have now been successfully machined to their full depth. This takes care of most of the remaining machining on the instrument. Next step for me is tp do more body carving so that we have a more finished complete instrument and to work on the two pickup covers to get them ready for assembly. I'm very pleased with the whole instrument so far. Next task is to finish shape neck and headstock. |
|
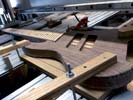
Setting up to machine the rest of the depth on the two pickup cavities.
|
The instrument is now set up on the CNC again - this time to cut out the remainder of the pickup cavities. I will run each one individually so that I have more control of the finished sizes. Once this is done I can test fit my continuous grain pickup covers and machine then to accept the pickup bobbin assemblies. This is one of the last machining processes on the body and I will be able to continue to finish shape and sand this area. |
|
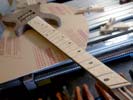
Working on the shaping of the back of the neck and the belly-cut
|
I just finished fitting and gluing the fingerboard to the neck of the instrument. Feels much more complete now. I need to do some basic cleanup removing a little glue but everything looks and feels great so far. I can now do the final shaping of the headstock area and get the neck profile finished off. I am looking forward to seeing this instrument in its complete state. Should be a really nice one! |
|
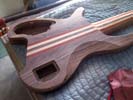
Working on the shaping of the back of the neck and the belly-cut
|
I'm working on the back of the bass right now - carving the back of the neck and also getting a start on the carving of the belly-cut. The back of the neck has been roughed out and is now closer to a finished size and shape. I still have a little more to remove but it's a lot closer. The belly cut will probably a little bigger and deeper into the body. With features like these i work gradually and check the fit of the instrument as I go. |
|
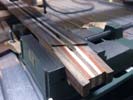
Headstock area has been machined.
|
The instrument went back up on the CNC again today, this time to have the "headstock" angle machined. This area needs to have a suitable break angle and also match the end of the fingerboard accurately. I cut it a little deeper because I will have a matching Walnut veneer on the top surface once we have finished the project. Now that this has been machined out I will be able to get the fingerboard glued onto the instrument! |
|
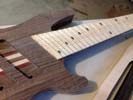
Fingerboard now ready to go on the instrument!
|
Frets have been dressed flush with the fingerboard, side dots installed, and I have removed the fingerboard from the support material so it is now ready to be glued onto the neck itself. I'll probably do a little fret dressing before the final glue-up but it will be great to have this last piece assembled onto the whole instrument. This will allow me to finish up the headstock area, do some final shaping and sanding and get the finish on!! |
|
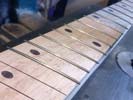
Installing the frets - looking really nice!
|
I am in the process of installing the 24 frets. I am most of the way through but thought I would take a picture anyway just to document the process. Everything is going smoothly and the frets are saeting very nicely. Sometimes hard to tell with Maple as it is a little softer than most other fingerboard woods. However this one is going really well. As soon as they are all in I will check them all and if ok, trinm ends flush with sides. |
|
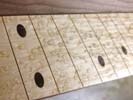
All 24 frets have been cut and are ready to be installed.
|
Before the frets go into the maple I wanted to give the fingerboard a couple of protective coats of shellac just to save me doing this later they go in (which is more work!). It als seals and protects the wood while I am working on the fret installation. Typically for maple I will do this two or three times rubbing down with fine sandpaper between each application. There will be more surface treatment after the frets are installed. |
|
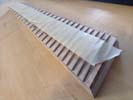
All 24 frets have been cut and are ready to be installed.
|
Time to get things moving on the fret department. I have pre-bent the fretwire and then cut all 24 frets just a little oversize in length so that they can be trimmed back to size after installation. I'm using standard jumbo fretwire which is a pretty universally acceptable size for a bass like this. Right now I have all the frets ready to go in and taped together so they don't get misplaced! Should have time to install pretty soon! |
|
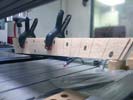
Machining side dots into the edge of the fingerboard.
|
The fingerboard is set up on the CNC and I am cutting little holes in the upper edge of the board for the side dots which will be installed soon. In this particular case I will be using black side dots to achieve a good contrast with the Birdseye Maple. A little care is requires in this operation as every dot has to be exactly positioned between the fret ends and also centered on the edge of the fingerboard. I was very happy with the results. |
|
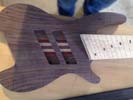
Checking the fingerboard against the body.
|
I'm getting the fingerboard ready to attach to the neck. I will do this after the frets go in but I wanted to make sure the geometry worked out on the actual instrument first. Looks like everything will fit together just fine. The birds eye maple should be a very impressive contrast to the slightly darker woods on the rest of the instrument. I may introduce some more of it on the instrument before we are done! |
|
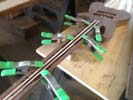
Gluing the two Carbon Fiber rods into the neck.
|
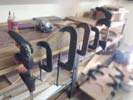
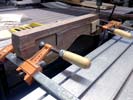
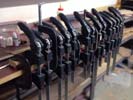
I am gluing the two carbon fiber rods into their respective slots in the neck. I use a high quality aerospace grade epoxy for this process which gives me a very reliable bond between the wood and the carbon fiber material. The spring clamps guarantee that while the glue is curing the rods are securely seated down in the slots. Once everything is set I have to sand the surface flat so that it is ready for the fingerboard. |
|
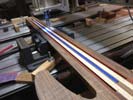
Machining two slots which will accommodate the carbon fiber rods.
|
In this photo I am machining two slots either side of the slot for the truss rod. These are carefully positioned to hold the two carbon fiber re-inforcing rods that will run the entire length of the neck. Their purpose is to add rigidity and stability to the neck so that it not only performs better but is more resistant to humidity changes that can affect the wood. A multi-laminate neck is very stable anyway - but always good to be safe. |
|
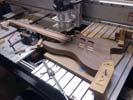
Cutting the slot pattern in the neck for the truss rod.
|
Next operation is to machine out the slot for the truss rod and also two slots for the carbon fiber rods that will become part of the neck. I use top quality truss rods and they require three separate operations to cut the correct geometry for the rod. It takes a few careful passes on each to make sure I have a perfect fit in the neck and everything is flush and where it should be. All went well and we can keep moving forward. |
|
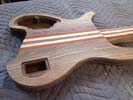
Cavities on back of bass have been completed.
|
This is the back of the instrument with the two cavities established. I have two continuous grain covers which I harvested from the parent wood earlier on and I can now get those ready. As you can see, I have not yet carved out the belly-cut section but that will be happening soon. We're getting there, and this bass is working out to be a nice lightweight instrument that promises to look and sound great! |
|
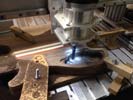
MStarting to machine the control cavity.
|
The bass is now set up on the CNC machine so that I can machine out the control cavity. It's a messy job because it creates a lit of small wood chips and dust but I will be glad to have this part of the machining done. I machine the cavity deep enough so that I have about 1/4" of parent material left through which I will eventually drill the holes for the EQ controls. Bass will be a little lighter with the wood removed! |
|
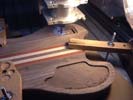
Machining the battery cavity.
|
Time to get the cavities machined on the back of the bass. In this photo you can see I have started machining the battery cavity. This will accommodate two 9v batteries for our Audere 18v active EQ system. When the material is removed it will expose the battery wiring channel that I machined into the top of the guitar body. I will probably also add the channel for the serial number insert at the top of the compartment. |
|
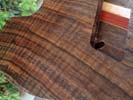
I 'wetted' the Curly Walnut to show how nice the top will be!
|
While I was working on other parts of the bass body I thought it would be nice to wet the wood with denatured alcohol and give ourselves a glimpse of what the top wood will actuall look like with the finish applied. I think the combination of this and the birdseye maple will be very nice. I have continuous grain pickup covers to add to the effect. I have a few more machining operations to get done then I can attach the FB. |
|
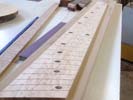
Fingerboard complete - ready for side dots.
|
Fingerboard complete. I cut a series of scaled dots along a parabola that extended across the fingerboard. Each of these fret markers is an inlaid piece of curly walnut. I like the layout for this fingerboard because there is so much detail in teh birds eye maple that it would be a shame to put rectangular block markers in there. These dots are large enough to look proprtionate to a 6-string neck but dont steal the glory from the maple! |
|
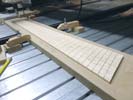
FFingerboard has been profiled to size and fret slots have been cut.
|
I have been able to get the frets slots cut on the fingerboard. I needed to do a few very careful calculations to make sure all the geometry was correct before I committed to cutting the slots, but fortunately everything came out looking great. Now my next challenge is coming up with an inlay design that will be complimentary to the guitar itself. I want to drop in soem walnut but not sure on the geometry of the inlay yet. |
|
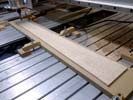
Getting a fingerboard ready to machine for this bass.
|
Next challenge is getting a fingerboard ready for the instrument. I was lucky enough to pick up some really impressive birds-eye maple. This stuff is hard to get in such good quality and even harder to get at the dimensions required for a 6-string bass so I'm excited to get this piece done and assembled onto the instrument! It will be the first maple board I have put on a multi-scale 6 string and it should look awesome! |
|
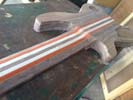
Sanding and shaping some of the features on the back of the bass.
|
I've been pushing to get this instrument ready for a couple of prospective buyers so I'm currently doing some carving and shaping work on the body and the back of the neck. The intersection between the neck and the body is always a critical area and needs careful shaping to make sure all the geometry comes together just right. It feeld good to take off some "mass" from the instrument because it now feels a lot lighter! |
|
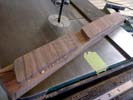
Gluing pickup tops onto material that will become the lower parts of the pickup covers.
|
These are the two harvested pickup cover pieces that I cut from the top plate. I now need to make them into real pickup covers so the first step is to glue more material on to create mass for the lower body of each cover. I will then rough saw thematerial closer to the finished size and finally sand all four sides of each till they are flush with the top pieces. I'll saw off the excess depth and they'll be ready for machining. |
|
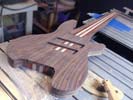
We have a complete body now that the top is glued on. Fingerboard will be soon!.
|
I have done some cleanup and work on the back of the bass roughing the intersection of the neck and body and the neck profile a little closer to finished shape and dimensions. I still have to clean up around the body edges to blent the rest of the top with the body profile. next task is probably going to be cutting the pickup recesses and then flipping the bass over and cutting the control cavity and the battery cavity. |
|
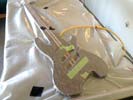
Using the vacuum press to glue the top plate onto the body of the bass.
|
Wiring channels have been machined into the top surface of the bass to accommodate baterry, grounding and pickup wires once the top is on. In this picture I am using the vacuum press to attach the top plate onto the body of the bass. This provides me with a very even clamping pressure over a surface that is hard to reach with clamps. Plus - all my clamps are usually busy with other projects. Nice to have everything in one piece! |
|
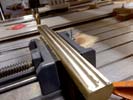
Machining brass bar for the string retainer.
|
The brass bar in the picture is a section I cut to create the string retainer at the end of the neck. I cut enough of this material to provide string retainers for three instruments since I have the setup on my machine. I have to machine this round brass bar to a much smaller rectangular section so there is quite a lot of time invested in just machining the blank to the sizes I need. I will cut this machined bar into into the three pieces I need. |
|
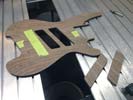
Continuous grain pickup covers have been harvested from the top plate.
|
This is the top of the instrument after the two pickup covers were cut out. Because of the thickness of the material and the necessity to cut with the smallert end mill possible, I do this in two operations. I cut as deep as I can on the top side, then I mirror image the program, re-fixture the top upside down and cut the remaining material from the underside. Net result is a clean cut and I can now move ahead to wiring channels. |
|
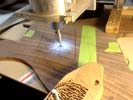
Cutting out the two pickup cover tops from the top plate of the body.
|
I spent some time working on the pickup geometry and placement and now that I have that established I can use that vector data to write a program to allow me to harvest out the continuous grain tops of the two pickups. I have to be very careful that the two pickups are cut at just the right location on the body, so having a 100% size drawing of the instrument in my computer is very helpful for double checking! |
|
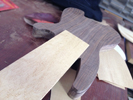
Going to add a really beautiful Birdseye Maple fingerboard!.
|
I decided to add a really unusually nice piece of birdseye maple for the fingerboard of this bass. This material is getting very hard to find in such good quality but I thought it would be nice to put a visually inpressive fingerboard on it rather than a more standard plain one. I may use birdseye maple in other areas also. I may put walnut fret markes in the maple - just want to make it a really inpressive instrument! |
|
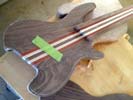
Body profile has been refined close to finished size and shape.
|
While I am busy with other parts of this instrument I have been machining and sanding the outer perimeter down closer to its finished profile. The headless 6 has a relatively small body which makes it feel very comfortable for the player. Once I am happy with the profile on the body, I will trim the top plate to a matching profile. At that point I can get the pickup covers cut out and get the top glued on! |
|
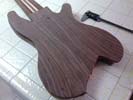
Top plate has been glued together - can't even see the join!!.
|
This is the bookmatched Curly Walnut to which has been glued together and looks great. In a dry state you can't really see the color and figure in the wood but when this one gets its final finish it will really look beautiful. I want to get the top fitted to the body so that I can harvest out the pickup covers so that will be happening soon. First I need to get on the CNC and cut out the recess that the end of the neck fits into. |
|
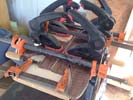
Gluing the two halves of the top plate together.
|
I machined both joint faces and made sure each edge was a close to perfect as possible. The two bookmatched pieces are then clamped onto a surface that is resistant to the glue and at the same time I apply lateral pressure across the assembly to tightly force the joint faces together. Typically I will leave something like this to fully cure overnight. Hopefully everything works well and we will have a perfect joint! |
|
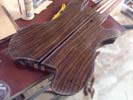
Walnut top plates being prepared for assembly.
|
I have a beautiful curly Walnut top I will use to get this bass completed. It has a very deep and colorful figure and will look awesome with its continuous grain pickups. Right now I am preparing the wood for assembly after having glued a couple of layers of decorative veneer onto the back of each plate. I will then carefully machine the joint faces flat and square on the CNC so that we get a very straight and accurate joint! |
|
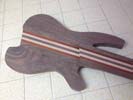
Top surface machined and ready for the top plate.
|
This is the result of the recent machining. After cutting the profile for the end of the neck and fingerboard area I also machined the top surface of the body to exactly the same depth so that I had a clean and flat top surface. This will now be the surface that I glue the top plate onto so it has to be a very flat and smooth surface. I will clean up more of the body and move on to cutting the top plates and also the fingerboard. |
|
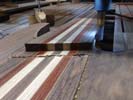
Cutting the corrct angle for the end of the necj section.
|
Machine set up and I wrote a program so that I could have complete control over the geometry of the end of the neck. I have to cut this step at an angle consistent with the 24th fret and in such a location as to fall in just the right place when the fingerboard is assembled. It pays in such situations to have the 100% scale vector drawing to refer to! This the end of the neck being finished off using a 1/2 inch end mill. |
|
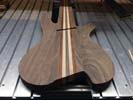
Setting up for machining the top face of the bass.
|
I have carved the back of the instrument, shaped the neck to body geometry and refined the outer perimeter closer to the template of the body. Now it's time to clean up the top face of the body and machine the profile for the end of the neck so that I can get a nice top fitted on this instrument. I also have a fingerboard being prepared for this bass so I will also post some photos of that soon. |
|

Both body halves have been attached.
|
This is the bass with both of the body halves glued on.They are both currently a little oversize but I will be refining the shape in the near future. You can tell a lot about an instrument when it gets to this stage. It will be relatively light - and it feels quite resonant so we should be in good shape sustain and tone-wise! I'm going to trim it closer to the template and see if I can find a nice top plate for the instrument. |
|
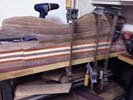
Upper body half glued onto core section.
|
This is just another photo, this time of the back of the bass while I am finishing up the gluing process of attaching one of the back bouts. The Walnut in the core and on the back body halves looks great right now - but will be awesome when the final finish is applied. This is going to be a lightweight tone-monster bass! I will get the second body half glued on as soon as time permits and keep this project rolling! |
|
Another photo of tyhe first body half being attached to the core
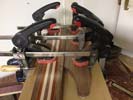
Gluing one of the body halves onto the core section of the bass.
|
I am now able to start gluing the side pieces onto the core of the instrument. In this photo I am gluing the top half of the two back plates of the body onto the core section. I will move ahead to gluing the lower bout on as soon as this joint is secured. Once the two back bouts are on I can refine the body contour and move things further ahead. I will machine the top surface of the body to get ready for top plate assembly. |
|
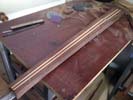
Core of instrument has been machined and extra material removed.
|
I have now machined the top face, body angle surfaces front and back, and also cut the finished perimeter of the core/nack dimensions. Next I nband-sawed off the extra material and I now have a core section cut to its finished dimensions. Next step will be to clean up the two joint faces that will allow me to glue the body halves onto the core. Hoping to get that done soon so I can admire a more complete bass! |
|
Back surface of center core has been machined.
|
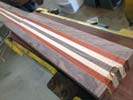
The back of the body has now been machined parallel to the body angle surface we generated on the CNC. This is pretty much a finished surface which I will now be able to use to align the back body halves of the bass. Next task will be to machine the outer perimeter of the core section to its finished dimensions. I should be able to get that done fairly soon, I am anxious to get the body halves and top assembled onto this bass! |
|
body and neck angle established.
|
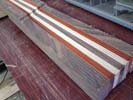
The body top surface relative to the angle of the neck has been machined. This is a datum surface I will now use to flip the core section over and machine a finished surface which will end up being the back of the bass. This surface will allow me to accurately align the two body halves so that I can attach them with minimum material removal. I will probably pop this back up on the CNC soon to establish neck and core widths. |
|
Top surface on neck has been cut. Boving on to body section.
|
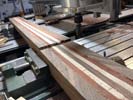
Here I have cut the top surface of the neck which is also the surface the fingerboard will be glued onto. This is the datum surface for most of the other features on the instrument. Next step will be to machine the neck-to-body angle on the body end of the core. Those will be reference surfaces for further work I will be doing to the instrument once the sides have been attached. Sides are ready to be put on. |
|
Core section up for machining.
|
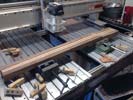
The core section of the bass is being set up now for machining of the fingerboard joint, truss rod and carbon fiber slots, body and head angles. All these features will be machined while the core is in this setup. I will be making the string spacing 18mm which is a good solid standard for a 6-string bass. That will allow me to also machine the perimeter of the neck to its finished sizes. Once this is all done I can assemble the body parts. |
|
Adding 3 veneers to the body joint faces!.
|
In order to prep these body halves for assembly onto the core of the instrument I need to apply a triple decorative veneer. This will produce a subtle but impressive highlight for the areas where the body halves meet the core material. I use two layers of Lavoa and pne layer of walnut in between. Should look awesome on the finished instrument. All these details really bring the whole instrument together when you see the finished product! |
|
GMachining joint faces on the two body halves.
|
The joint edges of the body halves have to be machined to the correct size and at the same time it guarantees me a flat and square surface for the joint area between these body halves and the core of the instrument. I will apply the same decorative veneer to these joint faces before the body halves are attached. At that point I will start the fingerboard and the top plate work so that we can get this instrument assembled! |
|
Gluing back plates onto the body halves.
|
Each of the back plates now have their three veneers glued on and I am now able to take these completed plates and attach them onto the walnut core. These two pieces together will create the back upper and lower body halves. Once the glue has set I will clean up the edges and machine joint faces onto each. This will prepare them for the application of decorative veneers and then assembly onto the body core. |
|

Plugs in the cavity recesses and 1st veneer on the backs.
|
I machined walnut inserts for both the cobntrol cavity and battery cavity holes. These were cut very accurately so I could press fit and glue them into the back plates. Then the plugs were machined flush with the back plate surface. This yields a step just the right depth for the continuous wood cover I recently removed. I then glued the first of three decorative veneers onto the back of each plate. |
|
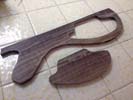
The battery cavity lid and the control cavity lid (shown) have both been cut out.
|
The control cavity is on the lower bout of the instrument and the battery cavity is on the upper bout. The inage on the left shows the control cavity lid now separated from the wood that we are using for the back plates. I will fill the resulting hole with some more material and whan the body parts are assembled I will machine out the actual cavities for both the control cavity and the battery cavity. Will save the lids until later. |
|
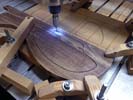
Harvesting the cover for the control cavity.
|
I now have to take both back plates and cut out the respective cavity covers from the parent material. This will allow me to have continuous grain covers cavity which I believe is the most artistic and aesthetic way to do this, even if it is a bit more work to achieve! It will be worth it on the finished product. I will do the same thing on the upper plate in order to harvest out a continuous grain cover for the battery compartment. |
|
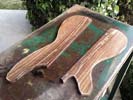
Back pieces are cut out and ready for assembly.
|
The material has now been sawn from the plank and carefully resawn vertically to create two bookmatched pieces. They were then drum-sanded so that the were both the same thickness and perfectly flat, which prepares them for further operations. Each piece is still safely oversize so that I can add features and trim to size when the body is more complete. These will look awesome on the back of the bass. |
|
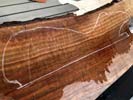
Beautiful Curly Walnut for the back.
|
The back of this bass is supposed to be walnut, a good wood for the tone we are shooting fop. I am using one of my nicest pieces of stock walnut to make the back of this instrument look amazing. This piece has a lot of beautiful figure in it. We are looking at the possibility of using Curly Maple on the front face rather than Curly Walnut. Either way this material will be a complement to whatever we wind up using! |
|
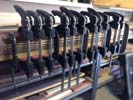
Last of the neck laminates being assembled.
|
This is now the last of the neck pieces being glued together. I can already tell from the characteristics of the assembled neck in its free state that this is going to be a good core from a tonal point of view. When the last piece has been assembled I will clean it all up and get it ready for machining some of the datum faces. Looks really nice so far. I will also be looking at the materials for the back plates of the body, have some nice wood for that! |
|
Getting started on assembling the laminates.
|
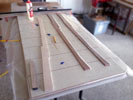
Now that we have veneer on some of the laminate pieces we can start gluing the components of the neck together. I start with the center pieces and work my way out to the outer laminates gluing one at a time to ensure a perfect joint each time. This yields a very strong and stable neck assembly which will retain a great deal of the energy of the vibrating strings and give is a lot of natural sustain. More pics soon. |
|
Adding decorative veneer to the laminates.
|
The laminates that will combine to create the neck are getting decorative veneer added to the sides. This adds a lot of the visual impact of the finished instrument. Double, and in some places triple pinstriping between the laminates which will be very visually impressive. Because the construction is neck through we'll also be able to sculpt the back of the neck at the heel area to give total access to the upper frets plus it will show off the pinstriping! |
|
Top plate split and sanded and ready for further machining.
|
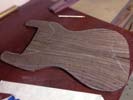
We have a plan for the top plate of this bass being a really nice curly piece of walnut. This material was brought up not only because it will finish beautifully but also that it will play a small part in the formula we have been discussing on tone. We may still swap this out for a maple top but at the moment it is an attractive contender. This is my last piece of curly walnut and I think it will make a spectacular top! |
|
Ready to machine maple laminates.
|
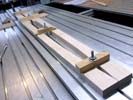
Time to get more tapered laminates cut. Here I am getting ready to machine a pair of maple laminates. Little bit more material to machine off these but it wasn't worth cutting on the bandsaw. I will machine these to size and then start adding veneer for the decorative pinstriping which always makes these neck look so good. After that I can get them glued together and we'll start seeing an instrument take shape! |
|
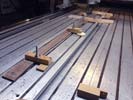
Cutting the first of 5 center laminates.
|
Since the raw material for the center laminate was airly thick, I started by sawing off a good amount of the excess material. I then secured the blank datum side down on a fixture which is set to yield exactly the right taper for the laminates. I then removed the remaining material on the machine until I ended up with the correct thickness at both ends. A quick adjustment to remove the material I was clamping on and the first taper is done! |
|
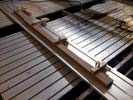
Preparing the center laminate for machining.
|
Now that all the laminate pieces have been rough cut and sanded flat, I can get ready to cut them all to a carefully calculated taper so that when they are all assembled together, the combined tapered pieces match the natural taper of the neck. I cases like these I always start with the center laminate and work my way outward. I calculate the correct tapers by drawing the laminates at 100% scale on a vector drawing program. |
|
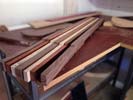
Laminates for core section ready for machining.
|
We are going to assemble a really strong and rigid 7-piece neck for this bass. I have 3 laminates of beautiful curly walnut to match the top of the instrument, and also tow pieces of curly maple and two of padouk. These are all well established woods for excellent tone qualities. I believe the combination of the maple and walnut will result in a tome profile quite close to my customer's expectations. The neck will also be very stable! |
|
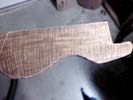
Top plates will come from this beautiful slice of curly walnut.
|
The blank for the walnut nookmatched top has been rough cut from our raw material. When these pieces are bookmatched together they are going to look awesome and yield a spectacular top for this bass! My next task is to carefully band saw down the center of this blank to yield two pieces that I can then sand flat to become the top plate. I hope to get this done in the coming few days. Looking goo so far. |
|
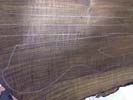
Walnut is marked out for rough sawing.
|
I kept this very impressive piece of Curly Walnut aside for this project. It's going to have some really beautiful color and figure when it's done. The plan here is to create something cisually amazing and at the same time yield the right tonal qualities for the customer. We now have a recipe for the woods we are going to use so I will be cutting all the necessary pieces as soon as possible so that machining can get under way. |
|
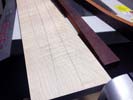
Ready to cut Maple core components.
|
Just picked up some curly maple for use in part of the neck/core of this bass. I have used a template to mark out the cross-section of the instrument profile on the maple and I am now ready to cut that material. I'll probably end up with a 7-piece neck and will decide shortly whether the center (7th) laminate will be Walnut or Maple. Either way this part of the instrument will look beautiful when it is complete! |
|
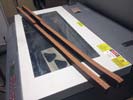
Padouk pieces have been sawn as part of the core of the instrument.
|
Getting under way on the construction of the core section of this bass. The neck will be a 5 or maybe 7 piece assembly consisting of Walnut, Padauk and Curly Maple. Here I have rough sawn the two Padauk pieces and I'll move ahead and but the maple and walnut components very soon. All the pieces will need to be sanded and machined and veneered before I glue them together. Should be a very nice looking combination! |
|
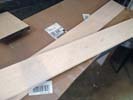
I bought some curly maple to complete the formula for the core of the bass.
|
I was able to establish the right formula for wood combinations on this bass with my customer. We are looking for a specific time on this bass and have to formulate our wood combinations carefully. I already had Walnut and Padouk in the rscipe, but the mission piece was Curly Maple which will complete the package we are looking for in terms of tone, rigidity, and "looks"! I want all of my instruments to be visually stunning. No exception here. |
|
We have some Alder which we are using for the back of the body.
We'll be building part of the core of this bass using African Paduk.
|
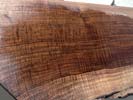
We have been exploring wood options with our customer and decided that curly walnut will work very well for this project. I'll cut the top of the instrument from this piece of Walnut - the photo does not do it justice. There is a lot of figure and color in this wood and will definitely result in a beautiful instrument. Next step is to come up with a formula for the core section. More news sooN! |

