|
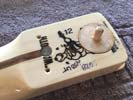
plugging some holes in a neck so that it can fit properly on its new body pocket.
|
(1/23/18) Left: This is a repair job on a strat. Neck swap required that the hole and recess at the back of the neck needed plugged and leveled off. Just glued in a couple of inserts to do that. (1/22/18) Right: Text and picture coming. |
|
|
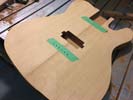
These six holes under the bridge allow for the strings to be run through the body of the instrument from the back of the guitar.
|
(12/21/17) Left: Based on the extended lines I plotted from the neck edges and the 25.5 inch scale length I located the bridge and machined in the six string through holes. (1/22/18) Right: On this tele I had to remove material from the control cavity to fit the eclectronics and also remove overspray so that bridge could fit. |
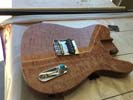
bridge and control panel fitted.
|
|
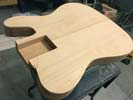
Cutting the recess also exposes the internal wiring slots.
|
(12/16/17) Left: In order to get the neck attached in the correct place I am measuring and marking out scale length on body based on the bridge we will be using. (12/20/17) Right: I set the body up on the CNC and calculated the location of the pickup and then machined out the recess for the humbucker to fit into. |
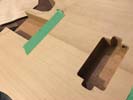
Pickup recess has now been machined into the body at the bridge position.
|
|
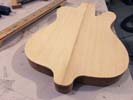
Top now glued ontop body - next is sanding to clean up then more machining.
|
(12/13/17) Left: I trimmed back the sides and spindle sanded the profile of the body to clean up the condition of the sides. I also sanded the top wood to get it nice and smooth. (12/14/17) Right: Up on the CNC and I'm machining a full control cavity and a recess for a matching mahogany lid on the back of the guitar. |
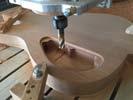
Cutting the recess also exposes the internal wiring slots.
|
|
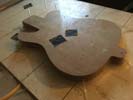
Tele body and top being glued together in vacuum press.
|
(12/12/17) Left: After preparing both parts I was able to get them glued together and placed in the vacuum press so that the top can be securely sealed onto the body. (12/13/17) Right: This is the body with the top now glued on as it came out of the vacuum press. I now need to clean up the edges and sand surfaces. |
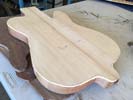
Top now glued ontop body - next is sanding to clean up then more machining.
|
|
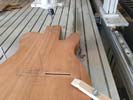
This tele is getting some wore holes established internally.
|
(12/10/17) Left: Machining some wiring holes into a tele body. As soon as they are done I will be gluing a top plate onto thius guitar. (12/11/17) Right: Both slots cut (ground from bridge and pickup. I'm taking a measurement so I will know where they are when the top has been glued on. Also cleaned up all the esdes on both pieces. |
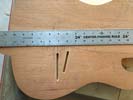
Slots for internal wires on top of Tele body.
|
|
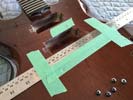
Got a lot of small jobs done on the SG so that it's ready for final assembly.
|
(11/29/17) Left: I had to drill a connecting hole between the two pickup recesses - tricky and required a lot of care but succeeded. also fitted bridge and cavity cover. (11/29/17) Right: Holes drilled from pickups to cavity, cavity cover fitted and sealed and shaped to facilitate opening. Magnet holes drilled for the cover retainers. |
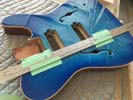
Holed drilled and covers fitted, numerous small jobs to prep it for assembly.
|
|
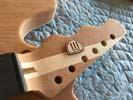
Serial number burned into headstock.
|
(9/19/17) Left: I cut a couple of logo pieces for this Tele so that the whole instrument is complete. I believe it goes in after finishing but good to have it! (9/19/17) Right: I re-configured the size of the the cavity cover to make it slightly bigger. To that end I also redesigned the inserts and cut four of them on the laser for existing work. |
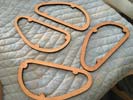
I cut out these rings on the laser and cleaned them up - they will be attached to the inside of the bodies before the top goes on.
|
|
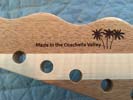
Laser engraving on the back of the headstock.
|
(9/19/17) Left: Set things up on the laser to engrave a logo feature on the back of the headstock of this Tele. Had to keep it clear of the tuners! (9/19/17) Right: I also got the serial number for the instrument engraved into another area of the back of the headstock. I believe this neck is now ready to go to the finisher. |
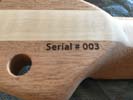
Serial number burned into headstock.
|
|
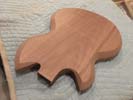
Gretch body sanded nice and flat both sides.
|
(9/15/17) Left: Gretch body sanded on both sides to clean up the two main surfaces. I will now move on to the other angles etc. (9/19/17) Right: Got the six tuner holes marked out and drilled through the headstock in an efforet to get this ready for finishing. I now have some work on the laser to do to complete everything. |
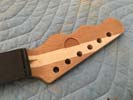
Tele headstock with tuner holed drilled through headstock.
|
|
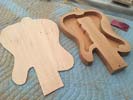
Second Tele has been through the chambering process.
|
(9/11/17) Left: This is the second of the three Teles that need chambering. They will then need control cover access on the back. (9/14/17) Right: I took the opportunity today to start early and get this third chambered telecaster machined. I now have all three done which is a big burden off the machine and the schedule! |
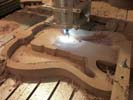
3rd tele now has the chabering completed.
|
|
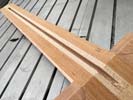
Truess rod slot established in neck.
|
(9/7/17) Left: I machined the truss rod slot into this neck blank so that I can now move on to headstock geometry and shaping. (9/8/17) Right: I got the first of three tele chambers cut. These are pretty work-intensive and take a while but the result is that the instrument weighs less than half of what it would otherwis weigh! |
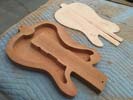
One of the three Telecasters has been fully chambered on the CNC.
|
|
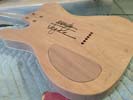
Machined, fitted and thicknessed control cavity cover.
|
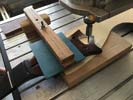
(9/5/17) Left: I the back of this tele required a cavity cover which I programmed and cut on the cnc. Some drum sanding to achieve the right fit then sanding for thickness. (9/6/17) Right: Cut a recess in the headstock of this finished guitar for a 11 logo insert. I also created the logo insert on the laser so it could be fotted in place. |
Gluing veneer onto the guitar body.
|
|

Gluing veneer onto the guitar body.
|
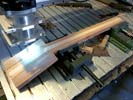
(8/25/17) Left: I created this script for the heart shaped plaque and then burned it onto the mahogany in the laser. Looked good - forgot to take a pic! (8/25/17) Right: Gretch neck up on CNC - Top surface machined and I also machined the headstock angle so that it is in exact relation to the plane of the neck. |
Gluing veneer onto the guitar body.
|
|
Gluing veneer onto the guitar body.
|
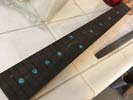
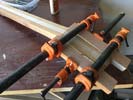
(8/24/17) Left: This photo shows the neck with the dots inserted into their recesses. Nothing has been glued in yet but they look good.! (8/24/17) Right: I got the two sides of the gretch guitar headstock glued and clamped onto the center csection. It has a larger headstock but this should give us plenty of material to play with. |
Gluing veneer onto the guitar body.
|
|
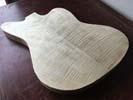
Gluing veneer onto the guitar body.
|
(8/24/17) Left: This the guitar body that was in the vacuum press. It came out looking pretty good and no apparent issues with the integrity of the glue joint. Surface came out quite flat! (8/24/17) Right: Im now set up and working on cutting out the turquoise fingerboard dots for one of the telecaster necks. |
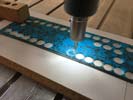
Gluing veneer onto the guitar body.
|
|
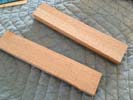
Gluing veneer onto the guitar body.
|
(8/24/17) Left: I sawed and drum sanded both sides of each of these pieces of mahogany for the Gretch headstock material. (8/24/17) Right: In order to get the cleanest possible square joint I cut the two joint faces of the headstock material on the CNC. The neck they are going on also needed some sanding to prep faces. |
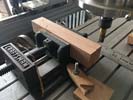
Gluing veneer onto the guitar body.
|
|
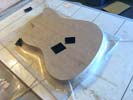
Gluing veneer onto the guitar body.
|
(8/23/17) Left: I have done a lot of careful preparation on this effort to glue a very uneven piece of veneer onto the flat surface of the top of this guitar body. It's hard to predict how the end result will be - I have done everything I could to guarantee a flat and level glue joint bu using a piece of acrylic on the vacuum press and also wax paper between the veneer and the flat surface. If it is going to work it will be dur to these precautions! |
|
Gluing body cracks back together.
|
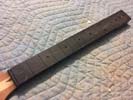
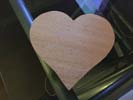
(8/21/17) Left: Holes for the inlay on one of the teles have been established on the top of the fingerboard. Next up for this one will be turquoise inlay pieces. (8/22/17) Right: This heart made of mahogany has artwork engraved in it. I carefully sanded of the old art and will be designing a new and updated graphic which will be burned on. |
Gluing body cracks back together.
|
|
Gluing body cracks back together.
|
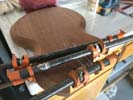
(8/19/17) The body of this instrument is made of some fairly old mahogany. I noticed that the wood was split along the grain at the front end in the form of two long cracks. This is definitely the first problem to fix. I soaked in glue throughout the cracked areas and clamped the body back together firmly. This should resolve any problems. This area needs to be physically strong as it will house the end of the neck when we're done. |
|
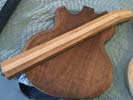
Cleaning up all the surfaces of the neck blank.
|
(8/18/17) I started work on this guitar by taking the rough glued neck blank and cleaning up all surfaces of that blank until all faces were more or less flat. By doing this I am able to see what amount of wood I really have to work with to create the neck blank. Fortunately there's a good healthy amount of spare material to work with even after my cleanup. I will now prep the side faces for the addition of more headstock material. |
|

