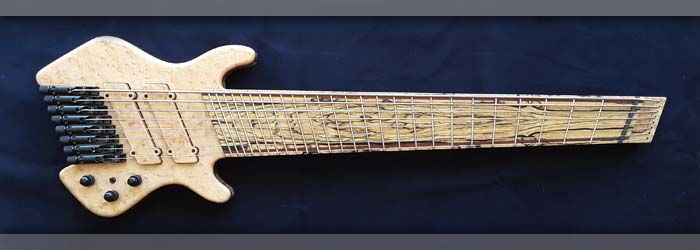
|
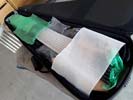
Protecting the instrument for its upcoming journey.
|
Left: Now the challenge is getting the instrument well protected to travel. I'm starting by adding protection inside the case around the bass and over the fingerboard. Right: Everything now packed in a strong box with extra padding around the case and fragile stickers on 4 sides. FedEx tyically takes very good care of these though. |

Box ready to go.
|
|
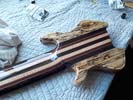
More work done on the frets and bridges plus I am now giving the whole instrument a polish to clean up the surface.
|
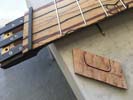
Left: Some of the setup and neck adjustments I did today need to sit overnight to let the tensions and wood settle. In the morning I should be able to get everything ready for shipping. Right: This photo shows a view of the back of the headstock where I added a very important dedication to personalize the instrument. |
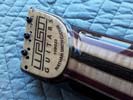
This bass was built for a very special customer.
|
|
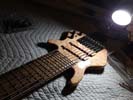
Putting every available moment into getting this instrument ready to ship. It's been a long day but I can see the light at the end of the tunnel.
|
Left: It's late at night but I'm still working on the final assembly and setup on the bass. I have a little work remaining on the fret leveling and nut slots so will update in the morning. Right: I have worked on the fingerboard and frets, fine tuned the nut and nut slots, and worked on bridge units. Now some filing on frets and a final test. |
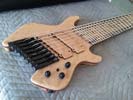
PI have has this instrument apart and back together so many times but I finally got all these 8 strings to work happily together. Actually turned out to be a nice laying instrument!.
|
|
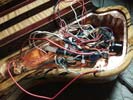
Successful test - have both pickups amplified through the preamp system. I can now disconnect and do a proper tidy wiring job!.
|
Left: I temporarily connected the wires to the preamp so that I could test for sound. The good news is that I got a powered signal from both pickups which was confirmation that everything works!! Right: I have re-connected all the sound wires in the cavity and now I'm busy with tidying everything up in these since there are a LOT of wires! |
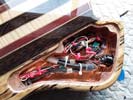
Got the wiring organized and tidied up inside the control cavity.
|
|
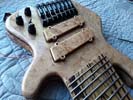
I got the reassembled pickup back in the instrument this morning. Next is to reconnect internal wiring.
|
Left: The re-assembled pickup is back in the body of the bass and now I will get the strings back on and verify signal to both pickups. After that - hook up to preamp again. Right: Strings back on and I tested both pickups for active signal. Both good so I am going ahead and re-wiring both pickups back through the Audere system. |
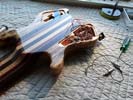
Back to the control cavity where I have to re-wire the pickupsd through the preamp again.
|
|
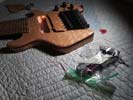
There were two small wires between the pickup coils that were slightly compromised. All good now.
|
Left: It was a 160 mile round trip but I made it back from my electronic guru's shop witha successfully repaired neck pickup. I will get this re-installed asap!!! Right: Now busy re-installing the pickup and re-establishing the wiring connections so that I can re-test! I will report back on here with the results once everything is done! |
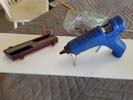
Relocating and fixing the wired bobbins back in the pickup cover. Will them re-install in the pickup cavity.
|
|
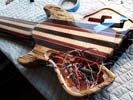
These pickups and electronics have to have everything just right - one ground not solidly connected can mess everything up. I'm checking the individual pickup signals and will remove the neck unit for a quick inspection.
|
Left: I added batteries and tested the instrument. Got signal from bridge pickup but not the neck one so I have to go in there and do some detective work to find out why. Right: I removed the pickup and separated the bobbins from the cover and discovered we have a very fine broken wire in there. Taking it to my pickup guy today!! |
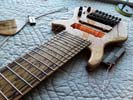
There were two very small wires dislodged in the neck pickup. Too delicate for me to re-attach so I'm taking them to Palm Desert today to have my electronics guy resolve.
|
|

Keeping the pressure on with the setting of the nut slots. If I am careful I will never have to do this agaiN !!! Almost there!!!.
|
Left: I got the nut slots all down to where things seem to be working ok. I also did a check again on the fret leveling and then back to the bridge units for individual adjustment. Right: I am now ready to run the power from the battery supplies to the preamp and the LEDs. All being well these will both work as expected and will be complete. |
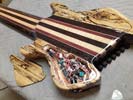
I'll be doing a powered test of both the preamp and the LED lighting. According to my diagrams all this should work!!!!.
|
|
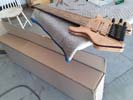
Doing a bunch of last minute detail work to get this bass playing nicely and ready for transport..
|
Left: Working on nut slots and I pulled the shipping carton from storage in which the bass and its Protec Case willo be shipping. I have to hook up LEDs to finish the detail work on this bass. Right: I'm dedicating most of my time right now to getting the nut slots finished. Remove string, file, replace string, play and repeat for each string!!! |
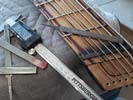
Keeping the pressure on with the setting of the nut slots. If I am careful I will never have to do this agaiN !!! Almost there!!!.
|
|
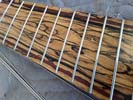
Added a couple of coats of fingerboard conditioner.
|
Left: This is a quick shot of the fingerboard with the conditioner applied. Really makes that beautiful grain pop out. This is a very impressive looking fingerboard! Right: I am now working on the eight string slots in the nut to get them all to finished depth. This is basically the final operation in getting the instrument playing nicely. |
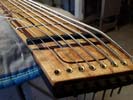
Filing down the string slots in the nut to finish up the action work.
|
|
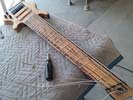
Trying to get everything finished on this instrument so that it can ship out.
|
Left: Re-adjusting truss rods to before I get all the strings back on and tuned up. I already played it and it feels pretty good but just needs some adjustment. Right: The goal right now is to ensure a straight neck under full string tension. I have two truss rods inside the neck which I am carefully adjusting. Once done it should be pretty sable. |
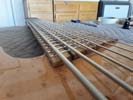
Working on a nice straight neck and getting the bridge units set to height.
|
|
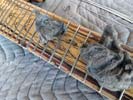
Cleaning up the fingerboard.
|
Left: I'm finishing up the frets and the surfaces between the frets with #0000 steel wool to make sure everything is clean. I will then apply a special fingerboard conditioner. Right: Now that frets have been dealt with I'm setting the bridge units and nut up for a good and comfortable playing action. Also setting the intonation on each bridge. |
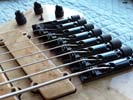
Working on the eight ABM bridge units to optimize playing action.
|
|
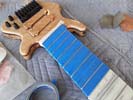
Glad to be wrapping up this fret work - it has taken quite a lot of my time but had to be done.
|
Left: Working on the last few frets so that I can finalize getting this bass to play the way I want it to. Strings go back on next and I will adjust everything. Right: Finally getting the protective taping off the fingerboard. I did all the frets and all I now have to do is clean a little finish off the fret bottoms, steel wool and treat. |
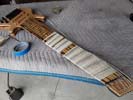
Getting the frets cleaned up was a much bigger job than I had anticipated - very happy this is all done.
|
|
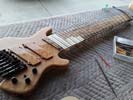
Quite a big job finishing all the frets but I can see the light at the end of the tunnel!.
|
Left: Since this is and 8-string with 26 frets there is a lot of final fret dressing, leveling, polishing etc especially since the fret material on ths bass is very hard! Anxious to get this done! Right: I'm up to the 12th fret with dressing and polishing. These are stainless frets so they needa LOT of work to get them in finished condition. |
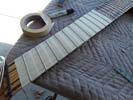
Making progress on the final fret dressing working up the fingerbard.
|
|
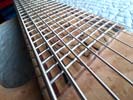
One of the last things I need to do is work on each string for optimum playability and adjust the bridges and intonation.
|
Left: Got the nut mostly where I want it and now adjusting truss rod tension to balance the string tension. Also making necessary adjustments to bridge heights. Should all work out fine! Right: This is the bass in its Protec Hybrid instrument case. I need to get a weight and size for the package for upcoming shipping. |
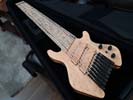
This is the bass in its case - just making sure everything fits.
|
|
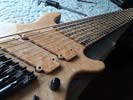
The bass looks great with the strings attached, now I have to adjust the neck, bridges, nut slots and make sure the frets are all nice and level..
|
Left: Strings have been added to the bass so my job right now is to get the nut slots finished up and work on the saddle adjustments on the bridges. Plus I need to work on the truss rods to tension the neck correctly. Right: The nut slots are a lot of work due to the size of each. Have to remove the string each time and replace to test! |

The bass looks great with the strings attached, now I have to adjust the neck, bridges, nut slots and make sure the frets are all nice and level..
|
|
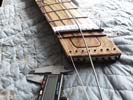
Getting the 8 nut slots cut and set for depth.
|
Left: Two things going on here - I'm adding strings and establishing slot positions and depths in the nut. Once both of these tasks are done I just have to do a setup to make it play nicely! Right: Adding strings as we go - the bottom one is a .163 so it's quite a big string! I'm moving ahead with care to get them all set up. |
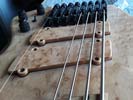
Adding a string at a time and working on the nut and string retainer as I proceed.
|
|
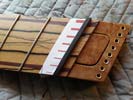
Setting up string slots, then adding strings so that I can refine the slots to theor optimum depths.
|
Left: I made a string spacing template so that I could accurately set the eight nut slots based on the spacing and diameter of the strings. Right: The strings are being added to the instrument and in the process of doing that, I am able to verify the string spacing of the nut slots so that everything is set up together. |
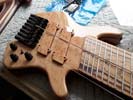
Outer strings are most important in setting nut slots - then I space the remaining six based on their relative thickness.
|
|
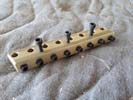
All set now for getting the string retainer permanently fitted and attaching the strings so thart I can do some actual setup on the instrument.
|
Left: I went to my hardware store to get hold of the right size and length of set screws to use in the string retainer. Now that I have these I can add strings! Right: I have carefully installed the string retainer into the headstock and I can now test the string clamping and hopefully get this instrument strung up to play music! |
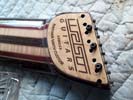
headstock/string retainer assembly complete. Was a lot of work!.
|
|
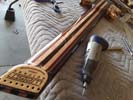
I am working on threading parts of the string retainer for final mounting!
|
Left: Time to install the string retainer. I am currently drilling holes that will be threaded to hold the retainer in place. I'll get that permanently mounted and then the strings can go on!!! Right: I was able to secure the string retainer in place so I can now get the strings attached and get the nut configured for string depth! |
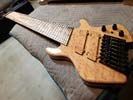
I'm getting the bass ready for the installation of the strings.
|
|
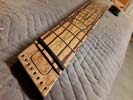
Glad this little cover is almost done. I tried three different ways to get it to work right!
|
Left: I'm finaly getting the truss rod cover to fit with its retaining magnets. I had a lot of trouble making this work because the magnets had to be out of the way of the allen key access to the ends of the truss rods. Right: Recessed Dunlop strap buttons have been installed on front and back of body. Really strong and great for this instrument. |
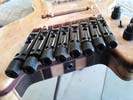
Strap locking system has been installed on back of body and upper horn!
|
|
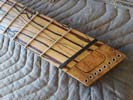
I have to make sure this area is strong enough to handle the tension of eight strings so I need to add three retaining screws on the back just to be sure!.
|
Left: Working on the headstock to get the string guides in and then install an bolt in the string retainer. I will also add a coupld of retaining magnets to the truss rod cover Right: I will now be drilling for the installation of the locking strap buttons. These Dunlop assemblies are about the best ones out there especially for this type of bass! |
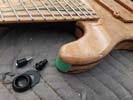
Instaling dunlop recessed strap locks on the instrument.
|
|
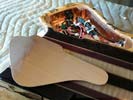
CThe last touch on the control cavity was to shield the inside surface of the cover.
|
Left: I got the back of the control cover shielded with copper. Now when the lid is on the electronics have 360 degree shielding. Next will be string retainer and strap buttons! Right: I have a complete 8 string set of Kalium strings for this bass. As soon as I get the string retainer end done I will put these on the bass! |
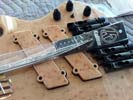
Strings can go on when I get the ferrules and retainer screws set - trying th get that done asap!.
|
|
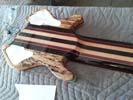
Almost done with the body. I need to add strap buttons and a couple of retaining screws to hold the string retainer, otherwise I'm close to being able to string this bass up!!!!!
|
Left: I am using paper templates to position the magnets I need to install in the underside of the two cavity covers. With that done I can copper shield the inside of the control cavity cover. Right: I got the backs of the two cover plates marked out and drilled and then I installed the neo magnets and now have covers as part of the bass. |
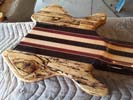
Control cavity and battery cavity now have covers that snap on magnetically. No ugly screws to deal with!!
|
|
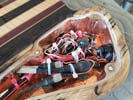
I installed the neo magnets for holding the cover in place. Now to finish up teh remaining copper shielding.
|
Left: I installed the neodymium magnets that will hold the cavity cover in place. Having inserted these I now have to finish op the copper shielding around the upper surface of the recess. Right: I just finished the final application of the remaining copper shielding in the control cavity. I can now get the lids finished and attached onto the body. |
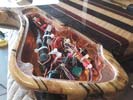
Copper shielding now complete in control cavity. Will now prep and attach lids..
|
|
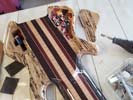
Cleaning up the joint surface of the lid recess so that I can get the lid permanently installed in the bass.
|
Left: Now that wiring is out of the way I am cleaning up the joint face of the recess for the cavity lid. Basically just removing some overspray. Then I will install retaining magnets for the lid. Right: This is what the back of the bass looks like with the two cavity lids positioned in place. It is a really nice piece of art as well as a bass! |
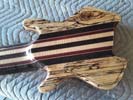
The continuous grain covers look really nice on the back of the instrument.
|
|
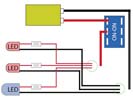
I initially wired the lights in series but because I was using three bulbe I was losing current to the second one in line. I re-wired in parallel and everything is now balanced.
|
Left: I changed the wiring configuration from Series to Parallel to take care of any LED issues. I'm now busy re-connecting everything to make it work! Once this is done I will tidy up all the internal wiring. Right: The wiring is complete both for the Preamp amd the LED system. I have also reinforced and cleaned up the internal wiring. |
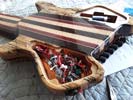
Got the led connections completed and spent some time seuring the wires to end up with a nice tidy looking control cavity.
|
|
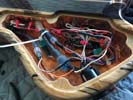
LEDs have been added and I can finish up the control cavity.
|
Left: It is a time-consuming job but LEDs and fiber optic cables have been connected. I am in the process of testing and tidying up all the internal wiring so that I can consider ths area complete. Right: I am checking resistor value as one of my LEDs is slightly less bright than the other - could also be the LED itself so I am swapping that out. |
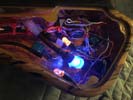
Checking the resistor value in the LED circuit.
|
|
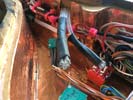
Preparing the ends of the groups of fiber optics ready for lights.
|
Left: Fiber optic cables have to be cut and ground to an even surface then polished flat before I add the LED lamps. Got most of that done - now I haveto do the physical assembly. Right: LEDs are almost all connected up - I'm hooking them all together with their wires and two of the three LEDs are already connected to their fiber optics. |
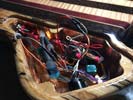
I decided to go with two amber 5mm LEDs and one blue 10mm LED.
|
|
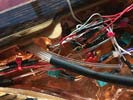
Grouping the fiber optic cables so that I can get then connected to LED lamps.
|
Left: Now working on the fiber optic cables in rder to cut and group them to fit onto their respective LED lamps. Have to be very careful handling these as they are fairly fragile. Right: I am now in the process of preparing fiber optic cables and attaching LEDs to them. Not an easy task. Side dots will be blue or white, 12 and 24 will be amber. |
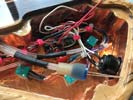
Working on the istallation of the LEDs.
|
|
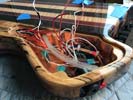
Output jack installed and I have connected the two pickups to the preamp. Almost done with electronics just need to hook up the LEDs.
|
Left: More work done in the control cavity to get the pickups, grounding, power supplies, output socket and preamp all connected together. Right: Almost done with the pickup, grounding, output and preamp connections. I now need to consider how I will configure the LEDs and their connections to fiber optic cables. |
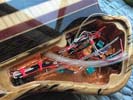
Moving along with the cavity wiring and will now be connecting the output jack.
|
|
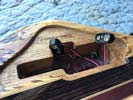
Attached battery terminals to the poewer cables running through the body to the control cavity.
|
Left: I attached battery terminals on the cabling for power to the preamp and also to the LEDs that will illuminate the side dots. After that I will do the LED lighting connections. Right: Wiring continues as I connect and tidy up portions of the preamp wiring. I also have to reinforce the integrity of the fiber optics close to the cavuty edges. |
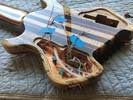
Moving along with the cavity wiring and will now be connecting the output jack.
|
|
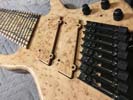
Quite a l;ot of work making sure all these oversize frets are leveled and dressed.
|
Left: I have been filing and sanding the frets on this oversize fingerboard to make sure they are all the same height and cleaned up ready for strings to go on the instrument. Right: Wiring up the two pickups and also the power supplies to both the preamp and the LED lighting. After that I can get the lid fitted in place. |
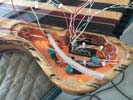
Finishing up the wiring requirements in the back of the bass..
|
|
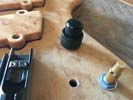
I bought stacked knobs to permit the use of the 4-band Audere preamp.
|
Left: Testing the stacked knob hardware which I am getting ready to mount onto the body. We're almost done with this project so moving things along asap!!! Right: Got the three stacked knobs set on the Audere control pots. Now I am going to add the selector switch that will control the lighting of the LEDs for the side dots. |
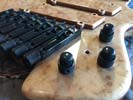
Knobs have been attached, now working on the LED power switching..
|
|
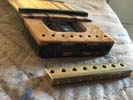
Adding the string retainer to the instrument so that I can get the strings on..
|
Left: Now that I have the strings I need to get the string retainer permanently attached into the headstock. I will remove some of the overspray in the recess and get this fixed in place. Right: I'm working with a dremel and small grinding tools to create the ideal fit for the string retainer inside the headstock. Will also fit cover plate. |
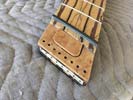
The string retainer has been fitted and I'm working on the fitting of the truss rod cover.
|
|
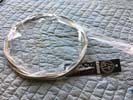
Custom set of bass strings for this multi-scale instrument from Kalium.
|
Left: These are the strings I am going to put on this bass. They are engineered for even tensions across the slightly unusual scale lengths of this bass. I special ordered them as they are longer than a typical set of bass strings. Right: Before I get the strings on the bass I need to level the frets and remove unwanted poly resin finish from frets. |
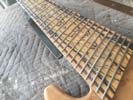
Doing a quick leveling of the frets. This also removes most of the poly resin protective finish that we added to the wood of the fingerboard off of the metal frets .
|
|
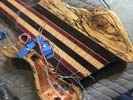
I wanted to get the battery compartment cover fitted so that I can concentrate on getting the control cavity completed. We will soon have sound from this bass!.
|
Left: Just finished working on the fitting of the battery compartment cover (right side of picture) - looks great. Also working on the installation of the pre-amp components. Right: More wiring installed and tidied up and I just also got the Neutrik output plug fitted and ready to be installed into the side of the body. |
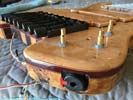
Fitting the putput socket assembly can be a laborious job due to the need to grind away overspray. Got this done so I can now complete the wiring process.
|
|
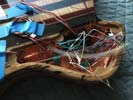
I'mworking on placing the components in the best locations and will sen secure everything in place. Holes have been enlarged to suit the potentiometers.
|
Left: Right now I am installing both the selector switch for the LEDs and the Audere 4 band preamp so that we can get some sound out of this impressive bass. Right: I now have the Audere preamp module installed and the three stacked potentiometers are in their locations. Also have the ground wiring from the bridge units grounded. |
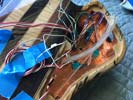
GMoving along with the electronics. Pream and bridge gtrounds are established and secured. I will be working on battery power supply next..
|
|
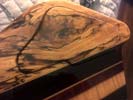
The wood grains on the back are as beautiful as those on the front. The covers were harvested out of the parent material so they are a perfect continuous grain match to the neighboring wood.
|
Left: This is the continuous grain matching cover for the battery compartment which I am working on fitting right now. I will be adding magnets to hold this cover into its recess in the body. Right: The bass will have three stacked controls for the Audere preamp system and the center hole will control the LEDs that light the side of the neck. |
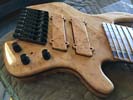
Getting the placement of the controls set up so that I can get the preamp installed.
|
|
I will be dealing with the internal wiring so that this bass can start making some sound!
|
Left: Now that pickups are in I can deal with the preamp and the internal wiring. I will be running power wires trhough from the battery compartment also. Right: Wiring for the batteries has now been threaded through the body from the battery compartment to the control cavity. I will attach battery connectors (for preamp and LEDs) |
Getting the wiring set up in this instrument. I will hook up the connectors and get the remainder of the copper shielding in place next.
|
|
Each pikup has four adjustment screws and I use surgcal tubing as a compression material to provide stability when the pickups are retained.
|
Left: I am in the process of installing the pickup assemblies into the bass using the four retaining screws on each plus surgical tubing to provide resistance to the screws. Right: I now have the two pickups installed and set up in the instrument body. Next step is now to run some wiring to establish grounding and power to LEDs and Preamp. |
Both pickups now mounted into the body.
|
|
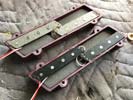
Having drilled out the recesses I can now seal them and get the insides of the pickups assembled!.
|
Left: Bobbins have now been installed inside the pickup covers and they can now be fitted and mounted into the recesses in the instrument body. Right: I'm setting the pickups into the body and establishing locations for the height adjustment screws. The pickups will very soon be part of the complete instrument. |
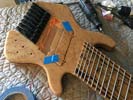
I'm masrking and drilling for the pickup screws and when that's done I can mount the pickups into the body permanently.
|
|
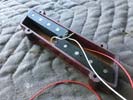
Our design and engineering paid off and I have two sets of these carefully created pickup sets for this bass.
|
Left: This is how the two pickup components fit into their respective covers. I will secure them in there for stability and then get them permanently installed into the instrument. Right: I carefully drilled out the conterbores on the pickup covers to match the heads of the retaining screws so that I can get everything installed. |
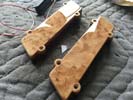
Having drilled out the recesses I can now seal them and get the insides of the pickups assembled!.
|
|

Copper shielding done and another of the tuners attached to the body.
|
Left: I'm so close to getting this impressive instrument complete and set up to leave my shop. I have some elctronics work to get done but not much beyond that. Right: The internal electronics (bobbins and winding) of the two pickups were a complicated task that forced me and my electronics expert to come up with creative ideas. |
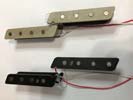
A lot of development went into the design of the pickups. We are using two independent bobbins in each pickup enclosure.
|
|
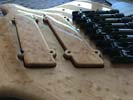
Setting up pickup cover installation - I'm marking the screw holes for installation into the material at the bottom of the recesses.
|
Left: Working on getting the pickup covers ready for installation. I will be using four adjustment screws on each cover so I'm making sure screws and holes fit together and I'm using those to mark thread locations. Right: Lots of varoius little tasks going on right now to get the instrument ready. Installing the string retainer. |
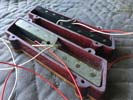
Copper shielding done and another of the tuners attached to the body.
|
|
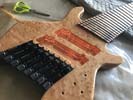
Bass looks great with all of its tuners attached- Wow.
|
Left: All eight of the tuner/bridge assemblies have been grounded and attached to the body of the bass. It's all coming together. Nect will be pickups and string retainer assembly. Right: Wrapping up some of the pickup details on this bass. They were a little complex because of the physical size so winding them in 2 separate pairs. |
Basically two pickup bobbins in each pickup. This will give us a good magnetic output and still be possible to get the copper windings done without the problems that would exist if they were both one piece.
|
|
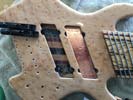
I am applyig copper shielding to both pickup recesses. These will ultimately be connected to the shielding in the control cavity
|
Left: Two tuners attached and I have started on the lining of the pickup recesses with copper shielding. I'll probably finish the shielding before the remainder of the tuners go on. Right: I have now completed all the coppes shielding installation in the pickup cavities and getting back to the tsk of installing the tuners. Just added #3 of 8. |
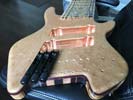
Copper shielding done and another of the tuners attached to the body.
|
|
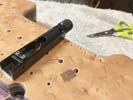
Working on one at a time to get all the tuners attached with their respective grounding wires.
|
Left: I will have 8 grounding wires running one from each brige/tuner unit to the control cavity. Each one has a copper contact area onto which the tuner itself will connect. Right: One tuner permanently but I decided to clean out the pickup cavities before wounting the rest as access is better without them on the instrument. |
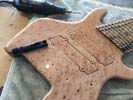
I needed to clean out the pickup cavities in preparation for copper shielding before I finished attaching the tuner units.
|
|
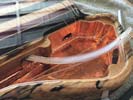
AThe cavity is a complex area and I have the fiber optics to work around but almost finished with copper shielding..
|
Left: I'm getting this chamber protected with copper shielding so that our electronics will be well protected from outside interference. Tricky work. Right: The copper shielding in the control cavity has been completed (except for top surface which I do after magnets) and I can now go ahead and attach all the 8 ABM tuners. |
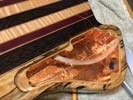
Got all the copper into the cavity area which allows me to get the tuners attached.
|
|
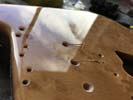
Once all the grounding wires are in place I can attach all the tuners.
|
Left: Becuse it's an 8-string the distance to pull these grounding wires through the body is quite a challenge. Started with the furthest out ones and working in from there. Right: I started installing the copper shielding as I would like to have that all done before I thread the rest of the various wiring through to the control cavity. |
Adding copper shielding so that I have a complete control cavity to work in.
|
|
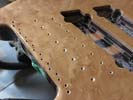
Lots of holes and the all have to be exactly in the right place!.
|
Left: I am now drilling the holes for the grounding wires and that in turn will allow me to get all the tuners permanently attached to the instrument. Right: Pretty impressive to see all eight ABM tuners placed on the back of the instrument. The outer two are fixed in place and I now have to space and fix the center six between those. |
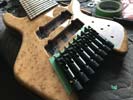
This is quite a setup - I have never put 8 ABMs on a bass before. They are super high quality and will do an excellent job.
|
|
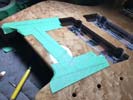
Lots of calculations and careful measurements to make sure everything will be located in the right place.
|
Left: I marked out the limits for the tuner bodies and also the centerline of the channel inside the body so that I can drill holes for the grounding wires for the 8 tuners. Right: I am now securing the outer two tuner assemblies in place so that I can use them to help place the remaining six in their correct locations. |
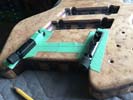
the best guarantee for correct spacing is to carefully locate the outer two tuners for length and string placement and then use their locations to place everything else. It's a little tricky but just needs care!.
|
|
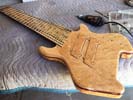
A very high quality finish on this bass which really brings out the beauty in all the woods.
|
Left: The finish on the bass is really nice and it will look even more impressive once the hardware is all attached. I will be working on cleaning out recesses so that I can get copper shielding added. Right: This is the control cavity where I am marking out the grounding channel so that I can drill holes for the grounding wires from the tuners. |
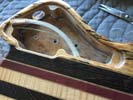
A little cleanout in the control cavity and then should be able to ge the copper shielding in.
|
|
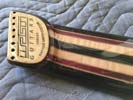
Back of the headstock - I will be installing the string retainer and adding bushings for the strings..
|
Left: This is the back of the headstock and the nameplate plaque that was created to honor my customer. All the woods look beautiful. I will be adding busings for the strings. Right: I'm spending a little time grinding out some of the overspray in the two pickup recesses to make sure each one has a nice comfortable fit. |
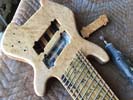
BOnce this is done I can get copper shirlding installed in the two recesses..
|
|
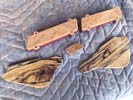
These are the cavity covers, truss rod cover and pickup covers back from the finisher!.
|
Left: I drove to my finisher's facility today and picked up the bass and all the cover pieces and pickups. The instrument looks great - more pics coming. Right: We definitely have a beautiful looking instrument here- the woods look awesome under the finish! Now I have to get the cavities cleaned up from overspray. |
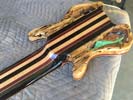
The finish on the instrument is a ply-resin gloss - the highest grade finish I can put on an instrument. It's expensive but it creates a beautiful strong coating and the instrument always looks beautiful!.
|
|
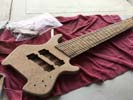
I decided to do th efret dressing pre-finishing - safer that way.
|
Left: I was wiorking on dressing all the fret ends as I didn't want to do them after the finishing went on the instrument. Got that completed and all the surfaces are ready for my finisher. Right: I'm now taking the bass, pickup covers and cavity lids to my trusted finisher apply a beautiful surface finish to this instrument! |
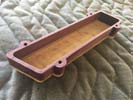
Both covers have now been machined.
|
|
BI have put a lot of time and xpense into getting this beautiful bass completed. No ready for it to go to a pretty expensive finishing process after which I will assembvle and test.
|
Left: I'm ready for finishing. Got all the surfaces smooth and flat - all voids filled and ready to take this creation to teh finisher and get it done! Right: Last few areas and the pickup covers have now been sanded. I'm working with my finisher to schedule the finishing work involved. We will be applying a really nice clear finish. |

Both covers have now been machined.
|
|
One of the covers is complete - took some time. Now working on the second one.
|
Left: Got the first pickup machined out. Took a couple of operations to make it happen but it all worked out well. Will be starting now on doing the same thing to the 2nd cover. Right: Finally got both pickup covers machined out and completed. After a quick sanding they too will be ready for the finishing process! |
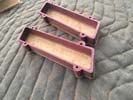
Both covers have now been machined.
|
|
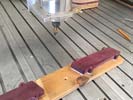
I will be cutting recesses in pickup covers for internal bobbins.
|
Left: In this photo I am setting up the cutting of the internal space in the two pickup covers so that they are also ready for the finishing process. Right: I'm getting started on what is a fairly demanding machining job. Have to maximize the internal recess while maintaining the pickup cover integrity. |
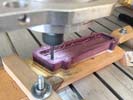
Got started on machining out the insides of the pickup covers.
|
|
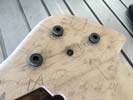
I am locating the best places for the holes.
|
Left: I planned out the best locations for the three stacked knobs and the lighting switch with consideration for the fiber optic cables that will also be part of the control cavioty. Right: The four required holes have now been drilled out and I will probably bring them to their final diameters after the finishing process. |
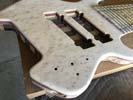
The holes for the controls through the control cavity.
|
|
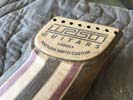
Working around the headstock area to get everything sanded and smooth.
|
Left: I'm starting the sanding and cleanup work around the headstock area. I have some glue to clean up and smooth everything out. Right: I'm ready to mark out the positions of the holes for the Audere preamp controls and switch that will control the LED lighting. I'm using stacked knobs so we would only rquire 3. |
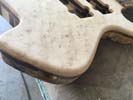
I need three countersunk holes and one hole for an LED control swich in this area of the bass.
|
|
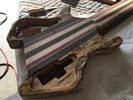
Working on the details of the body surface.
|
Left: Some areas of the spalted wood are softer than others so I have been sealing the surfaces and scraping and sanding to establish a nice pre-finish smooth surface all over the body areas. Right: This is the back of the body after a good amount of time filling, scraping and sanding the voids in the wood. |
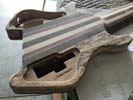
Got most of the surface issues taken care of through persistent filling, filing and sanding.
|
|
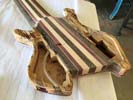
Doing a little bit more work on the surfaces.
|
Left: Getting ready for the finishing process. There were a few inclusions in the surface of the spalted material I wanted to fill so I did that and will sand and scrape smooth when set. Right: I'm going to round off the back edge under the tuners area and blend that with the rest of the back radii prior to finiahing. |
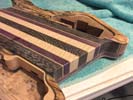
Continuous grain back covers have been fitted.
|
|
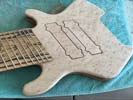
These covers had to be hand files to get them to fit - it was a good idea in terms of finding placement for sdjustment screws but hard work on the actual shaping of the very hard purpleheart wood!.
|
Left: After a LOT of sanding and filing I was able to make the geometry of the pickups and recesses work together to allow them to drop into the body of the instrument! . Right: Pickups have been drilled for their vertical adjustment screw holes. I need to sand these two pieces to get a nice smooth finish. |
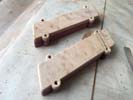
I drilled the fouyr adjustment screws in eack pickup cover.
|
|
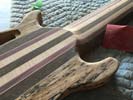
The spalted wood has hard areas and soft areas all through it so I am treating it with a sealer that soaks in and gardens so that I can get a better finish after sanding.
|
Left: Doing some of the sanding on the spalted wood that will get this bass prepped for finishing. Couple more coats of sealer and all should be good. Right: String retainer assembly is done and after finishing I will add special sleeves for the strings and magnets for holding on the cover. |
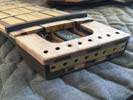
Pretty much done with headstock area - nut will be slotted after finishing and I'll add sleeves and magnets etc....
|
|

Continuous grain back covers have been fitted.
|
Left: I was able to create vector drawings of the bobbins for the pickups. I'm going to test cut on the laser and see if the theory works in real life! Right: In order to prepare the slightly softer spalted wood for the finishing process I am applying a couple of coats of sealer so that we get a nice consistent result. |
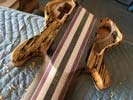
Working on the spalted grain so I can get it ready for the finishing process.
|
|
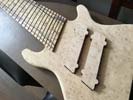
Carving the pickups by hand and fitting them into their respective cavities was a lot of work because oftheir unique shape!.
|
Left: Back working on the pickup covers - there are some tricky areas around the perimeter of each one and some of the shaping I have to do by hand. Right: The pickups on this bass are large and I decided that they would be best constructed as two nested 4-string pickup coils. Working on the drawings. |
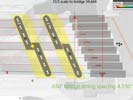
CThis arrangement will give us a good sound and make it possible to wind these unusual pickup bobbins.
|
|
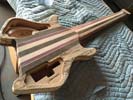
Continuous grain back covers have been fitted.
|
Left: Right now I am working on sanding the back of the neck and body trying to get the best possible transitions at headstock and body ends. Right: Some more careful filling and sanding around the body to provide a nice radiused edge break around the body perimeter on the front and the back. |
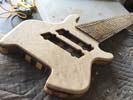
Doing lots of sanding on teh body right now.
|
|
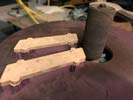
Finsihing up the outside surfaces of the pickup covers.
|
Left: Some final sanding work being done to the pickup covers. I can't send the bass to finishing until I machine out their insides!. Right: I am now fitting the pickups into their respective recesses in the body. I have to shave off a little around the bosses to help get everything fitted right but we are pretty close. |
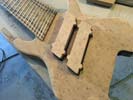
Fitting pickups into the body. Next step should be machining them inseid for the pickup bobbins.
|
|

Continuous grain back covers have been fitted.
|
Left: Working on some areas of the body where the spalted wood naturally have little voids. I'm carefully filling those in preparation of finishing. Right: Doing some refinements in the area where the tuner control knobs will exist to make sure the player's finger access to these is maximized. |

Continuous grain back covers have been fitted.
|
|
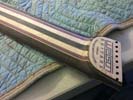
Getting the neck and headstock blended together.
|
Left: Sanding done around headstock and over entire neck of instrument. I'm now working on the last details of the body shape and surface so that it is prepared for the finshing process. Right: Body sanding and edge breaks almost complete now and the instrument is looking and feeling good! |
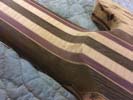
Lots of sanding to be done on this instrument but have most of the hard stuff done. Neck to body transition is always a lot of sanding work.
|
|
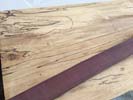
This will be my picture frame woods (plus a couple of others I located..
|
Left: I am assembling woods from this project to create a custom pcture frame which I hope to send when (or before) I ship the instrument! Right: Doing some sanding work around the neck-to-body joint area so that I'm closer to ready for the finishing work. I think this wood is going to look really nice finished! |
More sanding going on at the joint between the neck and body.
|
|
Headstock assembly completed - I need to now drill the 8 holes for the strings.
|
Left: I now have a completed headstock assembly which is a big step towards getting this instrument to my finisher! Right: I used the existing holes in the string retainer to establish the eight holes through to the top surface of the headstock assembly. Now to get it all sanded. |
Last step in headstock work completes - holes now drilled through and I can get things sanded.
|
|
Gluing the headplate piece onto the headstock assembly..
|
Left: In this photo I am using a special epoxy to secure the headplate onto the headstock. All this complex string retainer work is almost done. Right: Headstock assembly mow glued up and I am going to remove the excess material from the front face and get that area clean and finish sanded. |

Continuous grain back covers have been fitted.
|
|
Continuous grain back covers have been fitted.
|
Left: Nameplate has been attached and holes drilled through - I now need to clean up the general area. Right: I have just attached the three carbon fiber rods with screws and very strong adhesive. I am now securing a couple of other structural pieces so that the string retainer is as strong as possible. |
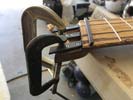
Just about finished creating the string retaining assembly.
|
|
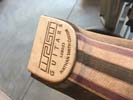
CThis will be the logo and identification plate on the back of the headstock. I'm dedicating the bass to the man who conceived it in the first place!.
|
Left: I am going to use the back of the headstock for a nameplate and I am honoring the man who conceived this bass project in the first place. Right: I filled the engraved parts of this nameplate with a dark brown filler so that it would match the rest of the instrument. Now need to get it attached. |
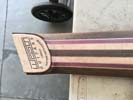
Nameplate filled and leveled and readu to be attached.
|
|
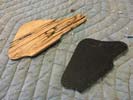
I added carbon fiber to the backs of the covers to give the spalted wood more strength.
|
Left: Cavity covers are made of the same spalted wood as the back. I'm adding carbon fiber on the insides to add rigidity to the material! Right: Taking a look at the frets to make sure they are dressed and I am doing a little fret leveling so that I know that is done before the bass goes off to finishing. |
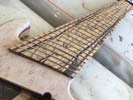
Awesome fingerboard - working on fret dressing.
|
|
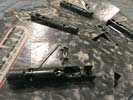
I bunch of ABM tuner assemblies which I will be fitting onto the bass after finishing.
|
Left: These are the ABM single string tuners I am using for both bridges and tuners at the heel end of the bass. They are expensive and I had to buy eight of them. Right: More work going on in the headstock area as I want to make sure it is mechanically sound given that we have eight strings under tension! |

Continuous grain back covers have been fitted.
|
|
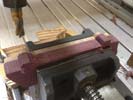
Continuous grain back covers have been fitted.
|
Left: I have the two pickup covers on one of my machines right now so that I can cut the excess material off the assembly and finish the fairly complicated shapes. Right: I'm now doing some sanding and shaping of the inner radii and the body edges to get this bass prepped for its finishing process. |

Sanding some of the harder to get to areas.
|
|
Has to do some aggressive hand sanding to this area in preparation for a mnameplate addition and then drilling holes through for strings.
|
Left: I'm doing some final sanding and shaping to the very end of the headstock so that I can add WG nameplate and drill string holes. Right: This photo shows the headstock veneer happily attached to the end of the neck. This allows me to complete shaping of the edges of the headstock! |

Continuous grain back covers have been fitted.
|
|
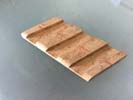
Headstock cover now has the slots cut out to match with teh CF rods.
|
Left: This is the headstock cover with the sections cut out for carbon fiber rods. My immediate goal now is to get this part glued onto the headstock area of the neck! Right: The cover has now had the access lid removed which allows me to go ahead and fit the remaining cover piece onto the headstock. |
I machined out the truss rod access cover from the head plate..
|
|
I decided that carbon fiber was the best strong and light material to add strength top the headstock assembly.
|
Left: I'm adding some carbon fiber in the headstock area to help distribute the upward tension of the eight strings. Right: I am modifying the headplate to create relief for these three reinforcing plates. When I am done they will all fit nicely together and the assembly will be very strong! |
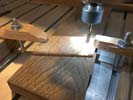
Doing some careful machining on the undr side of the headstock cover.
|
|
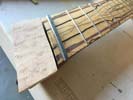
It's oversize and un-machined at the moment but it will nicely match the top wood when it's on.
|
Left: This is the headstock cover piece which I will be shaping and fitting onto the headstock to complete that area, Right: Headpiece material has been thicknessed and veneered. I now have to set up on the CNC and do some machining operations for truss rod access and clearance for carbon fiber support. |

Continuous grain back covers have been fitted.
|
|
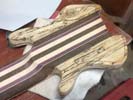
Continuous grain back covers have been fitted.
|
Left: I have both of the rear cavity covers fitted into their respective recesses. I will probably have to do a little grain fill and surface treatment on these too. Getting closer to final finishing!! Right: Body getting more sanding and shaping - almost ready to start sanding in preparation for going to finishing. |
Graph-Tech piezsos are awesome - will be using these in this bass.
|
|
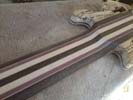
Contouring the back of the neck and body joint.
|
Left: Working on the back of the neck - for a 8-string its a balance between leaving enough material for strength but making it thin enough for playing access. I'm working on getting the best balance possible.!. Right: I'm back working on the headstock area of this bass, one of the last few jobs I need to do before we do the finishing process. |
Getting headstock ready for wooden cover plate.
|
|
Prepping covers for finishing.
|
Left: Working on cleaning up the two cavity covers so that they are prepped for finishing too. Want to make sure they are sanded down to the right thickness for a good fit with body.Right: I set up the bass on CNC so that I could machine out the recess for the jack socket. Its location allows room for the other internal hardware |
Machining the Neutrik recess.
|
|
Output recess and surrounding area after fitting socket.
|
Left: Jack socket successfully machined and cleaned up. I test fitted a typical frame into the recess to make sure I had the right depth plus a good fit. Typically the surface finish process will cause overspray to get into this area and I will have to manually clean it out later. Some of the area around the socket has now been sanded. |
|
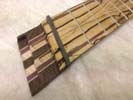
Nut has been completed and installed.
|
This is the headstock area with the custom nut installed. I will clean up the edges so that they are flush and do some preparatory shaping to the nut itself when the adhesive has set. I'm also getting ready to add a couple of structural features in the headstock assembly to take the tension of the 8 strings when the bass is strung up to pitch! I'm currently working on those components. After that I will attach the headplate! |
|
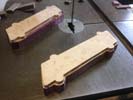
Covers are cut and sanded to thickness, now ready for trimming to size.
|
I'm continuing the work of cleaning up the perimeters of the two pickup covers. It's going to involve some manual work to get the radii formed properly but I'm working on this while I have other work in progress so it should be wrapped up soon. I am also configuring flatwork for these 8-string pickups which is also a technical challenge. When they are completed they will be little works of art themselves! More on this soon! |
|

Covers are cut and sanded to thickness, now ready for trimming to size.
|
This is the end of the neck with the nut fitted into the fingerboard. I am also doing some work on the area around the string retainer. I will rough in the string slots soon but will probably not finish them until I have strings attached and that will most likely happen after the finish on the instrument has been applied. I'll have some mechanical work to do to the headstock area and string retainer assembly in the immediate future. |
|
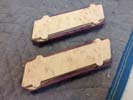
Covers are cut and sanded to thickness, now ready for trimming to size.
|
I machined the two pickup covers to just over the finished thickness and then brought them to the finished thickness on the drum sander. They will now be trimmed and finished around the perimeter to match the machined shape of the maple tops. My customer had a couple of artistic plans for these pickup covers so there will be a little work to do on the tops per his requirements. Lastly - I will be machining out the inner space for the pickups. |
|
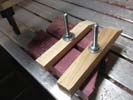
Working on getting the pickup covers closer to finished shape and ready for pickups.
|
It's time to get the two wood pickup covers prepared and right now they are oversize in thickness so I have quite a bit of purpleheart to machine off each one to get them to normal thickness. I'm using the CNC to rough them down but will use the drum sander to finish them to the final thickness. They will need to be shaped around the edges to their final profile and when all the external work is done I will machine the insides. |
|
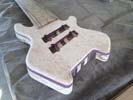
Body feels more complete after getting extra material removed from the area behind where the tuners will be installed.
|
I'm getting close to being done with the shaping and filing of the back end of the bass, and I have been starting on the sanding that will bring all these surfaces together. The bass looks and feels much more complete thanks to the recent shaping work and I will be moving on to other areas of the instrument that will allow me to get through the list of task I need to close out in order to get this bass ready for finishing. |
|
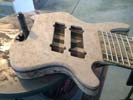
Refining the angle at the back of the body.
|
I have been working on the overall body shape and transitions between body, neck and headstock. In this photo, I am working on the relief at the back of the instrument for the tuners. I may also add a small undercut along the angled edge to facilitate room for fingers , especially at the outer edges. Because the body is so small there is less than normal room for all the normal features so we have to use the available space carefully! |
|
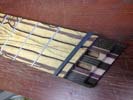
Successful installation of the custom nut.
|
This is the carbon fiber custom nut that has now been fitted into the nut slot in the fingerboard. I will trim the ends flush so that the fit across the width of the fingerboard is done and then I can get this nut permanently installed. I may rough in the string slots just to have the spacing established but will finalize that when strings go on. Now it's back to working on the body and getting a headplate manufactured. |
|
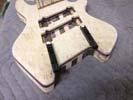
Working on some final shaping of the back end of the bass.
|
I am working on finishing the profile of the back of the instrument. This involves allowing for a little extra material removal to acommodate the tuners and some cleanup on the side surfaces to get them to a final size and geometry. This instrument is certainy starting to feel like a real bass despite its 8 strings and wide fingerboard! I am keeping the final appearance of the instrument in mind as I clean up these body dimensions. |
|
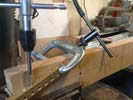
Getting the string retainer threads established.
|
I am catching up with some of the hardware work - in this case getting the holes in the string retainer tapped so that I can install the set screws. I have also been working on the headstock area to get it ready for the installation of the string retainer and its related assembly parts. The sooner those areas are complete the sooner I will be able to get this bass prepared for its tint and surface finish treatments. |
|
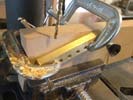
Drilling and tapping the custom string retainer.
|
I purchased the ABM tuners that I will be using on this instrument. They are expensive components, especially when you need eight of them! I will be using them to help me define the final geometry of the back of the bass where all the string tuning will be done. I'm doing some additional work around the body itself and that will probably include some material removal to maximize access to the eight tuner/bridges shown in the photo. |
|
Drilling and tapping the custom string retainer.
|
I need to get the string retainer completed so that I can do some more of the critical work on the headstock area. In this photo I am drilling and tapping the threaded holes for the custom string retainer. Once this is done I will be working on the installation of this component in the headstock area. My goal is to make the whole assembly strong enough for the 8 strings we will be attaching! Just hoping I don't break a tap!! |
|
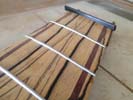
Fitting the carbon fiber compound nut at the end of the fingerboard.
|
This is the carbon fiber I located for the nut of this bass. This material is very hard and will do a great job supporting the strings. I'm in the process of shaping it and getting it ready to fit as a blank. I will establish the slots for the strings at a later point when we are setting up the string spacing. You can also see the very rare and beautiful Black and White ebony fingerboard in this photo. That material is now almost impossible to find. |
|
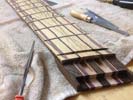
More work being done at the string retainer/headstock end.
|
Some more work now done to the headstock area - specifically getting the nut slot established so that I can install the nut. Since this is an 8-string instrument and nuts for such instruments are not commercially available I am making a Crabon Fiber nut which will more than adequately do the job. Once that is done I will add some re-inforcement to the string retainer area and filall get the matching wood to plate attached. Will look good! |
|
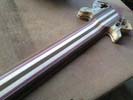
Lots of work on the back of the neck - it's just about there.
|
Some new developments on this bass. I did a good deal of shaping and sanding to the neck which is now very much closer to its finished dimensions. This also involves further shaping of the headstock area. I am also adding a special retaining system to strengthen the seating of the string retainer since we will have eight strings putting pressure on this area of the headstock. It will involve a few extra screws and a retaining plate at the back. |
|
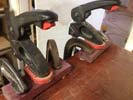
Gluing the pickup assemblies together.
|
The two pickup covers have had faced sanded perfectly flat and are now being glued together. Once the glue is set and I unclamp them I will have top do some trimming and shaping to bring the purpleheart portion to the exact same profile as the top pieces. I will probably do that on the cnc machine. They then need to be nmachined to final thickness and ultimately have the inside material machined out so that the pickup bobbins will fit. |
|
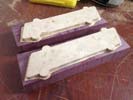
Assembling the parts for the pickup covers.
String retainer blank ready for further machining.
|
These are the two pickup covers I had harvested out of the top material. I need to get these glued onto a couple of pieces of purpleheart so that I can have full-depth wood pickup blanks. I'm in the process of creating the pickups and I will need the covers assembled, shaped and cut so that I know the pickup bobbins fit inside their respective continuous-woodgrain covers. This is a fairly work-intensive feature but well worth the results. |
|

String retainer blank ready for further machining.
|
In the absence of commercial nut material in the right width for a bass like this I decided to make my own using a very hard and stable carbon fiber compound. This will be very wear resistent and will do maintain string resonance and sustain very well. I have used this successfully in other instruments and it's ideal for a wide neck like this. I will wait until I string the bass up before establishing string spacing and slots. |
|
String retainer just about done and fitted into the instrument.
|
I wanted to add a photo of the near complete, custom string retainer for this 8-string monster. The angles at the ends have been machined so that the retainer fits inside its recess and I have drilled the eight string holes which in tirn will allow me to drill through the headstock and headplate. My next task is to add a headplate onto this area to complete it. I will use either the neck wood ot the top wood depending on which looks best. |
|
String retainer blank ready for further machining.
|
The brass for the string retainer has been cut to size and now need to be shaped to fit snugly inside the recess we cut. Once that is done I will need to drill the eight string holes in the retainer because those will be used to establish the matching set of holes on the upper and lower faces of the headstock. I will probablt spot and pre drill those on the CNC for positional accuracy and finish on the drill press. |
|
Second operation to cut recess is completed.
|
After some adjustment I was able to get the machining of the string retainer recess done. A little tricky because it used all the vertical space in my machine so the setup was a little complicated but the end result was fine and I can consider this task done. When it is complete, the brass string retainer unit will fit snugly in here and I will be creating and attaching a cover on the top surface so that the while unit is enclosed. |
|
Doing some machining to the headstock area.
|
As work continues on the headstock, this photos shows the end of the instrument after I have cut off the excess headstock material. I am now getting set up to machine a clean end surface to complete that stage. I will then flip the instrument over and continue the machining work from the opposite side. I need to establish a consistent thickness for the headstock, and untimately a recess for the string retainer to fit inside. |
|

The tapered purpleheart layer is starting to show as we refine the body contours.
|
I have etablished the shape and most of the holes in the string retainer component. This is a good step forward as it lets me finish up some of the headstock work in my effort to get the instrument into a condition where I can get it out for its surface finishing. I want to gave the inbstrument body, pickup covers and cavity covers ready for that process as soon as possible. The finishing process will transform this instrument! Can't wait! |
|
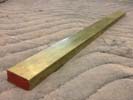
Got me brass bar for the string retainer assembly.
|
This is the raw material I will be using to create the fairly complex string retainer for this bass. It's a piece of 360 brass into which I will be drilling numerous holes, tapping threads in many of them, and shaping the outer perimeter to fit into th erecess at the headstock end of the neck. I've never done one this size before but it shouldn't present too many problems. I want to get this done so I can finish the headstock. |
|

The tapered purpleheart layer is starting to show as we refine the body contours.
|
This is the headstock of the bass with all the machining completed. I have successfully fitted the string retainer which in turn allowed me to establish the holes through the bottom face of the recess. I have a birds-eye maple headplate to attach to the top surface to complete everything but first I need to glue on a couple of decorative veneers to the bottom surface in the vacuum press. As soon as this is done I will glue the headplare on and file and sand everything flush and smooth. |
|
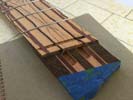
Preparing headstock area for machining.
|
I am now working on the headstock area of the bass. I have to machine the end of the neck to the correct angle and then set up the instrument on the CNC machine so that Ii can cut out a suitable recess to house the brass string retainer insert. Once the string retainer is fitted I can drill the bottom face of the headplate for the eight string holes. Finally I will add a top plate to match the body and drill the 8 holes through. |
|

The tapered purpleheart layer is starting to show as we refine the body contours.
|
The next set of tasks I will be doing to this bass will be focused on the headstock and string retainer area. I have been working on the actual string retainer block to get it ready for installation into the instrument and that component has now been machined and drilled so that I can use it as means for sizing the recess that it will be housed in. Still needs to be drilled and tapped but good to have it this far along. |
|
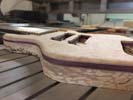
The tapered purpleheart layer is starting to show as we refine the body contours.
|
I wanted to show a picture of the side of the body - and specifically the tapered purpleheart laminate that we put under the maple top. My customer really wanted that contrasting layer to be thinner at the front and fatter at the back. Technically it was quite tricky to do but now that we are starting to refine the contours of the body we are starting to see the visual effect of this unique tapered pinstripe - looks good already! |
|
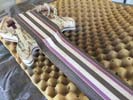
neck and heel carving with a goal to making the transition feel just right.
|
While I am working on some of the other features of this bass (pickup covers, string retainer etc) I wanted to keep the ball rolling on the carving and shaping of the back of the neck and especially the transition between the neck and the body. Because we have a lot of cabling inside the neck I want to maintain the integrity of the body mass in that area but at the same time make sure the higest frets are accessible to the player. |
|
Using the spindle sander to clean up the sides of the body.
|
I am now working on the profile of the body to bring it to the finished body shape. Most of this I do on the spindle sander. The purpleheart makes it quite laborious to do because it is so hard so it takes a little time! Getting the perimeter finished will help me in turn to get the edge breaks on the top plate and back completed. I'm also spending some time refining the shape of the back of the neck as there is material to be removed there. |
|
Working on the assembly of the two pickup covers.
|
Back at work with the custom pickup covers. I have purpleheart bodies to attach to the tops but first I have to add another decorative veneer to the bottom of each piece. Once this is done I can complete the pickup cover assemblies and start working on getting the pickups themselves designed and manufactured. I am also working on the cavity covers to get them ready - will post some info on that very soon! |
|
Starting work on the edge break around the perimeter of the body.
|
I am doing some work on the profile of the body right now. We built in a tapered layer of purpleheart under the birds-eye maple top and out plan was so highlight this layer on the finished instrument when the edge preparation was done. I am working on finding the best radius on the perimeter of the body to show off this extra feature. This will then be extended around the entire body and should look really nice! More photos coming. |
|
Working on the fabrication of the pickup covers.
|
I have a formula for the two pickup covers based on discussions with my customer and I am moving ahead as quickly as possible to make this a reality. These maple picese have been harvested from the top plate. I now need to add some decorative veneers then attach them to pieces of purpleheart and finally to wenge so that we have a matching layered construction to blend with the body. Also have some inlay on the tops - more to come! |
|
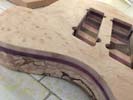
Doing the body contouring in preparation for rounding the top plate.
|
I am spindle-sanding around the perimeter of the entire body so that I have a finished profile shape. This in turn allows me to start some of the cosmatic work that will bring out some of the very unique features of this bass. Initially I will be shaping around the top plate to break the edge as i would normally do in this area. However, because we designed a special tapered layer of purpleheart under the top plate it will yield some unuaual results! |
|
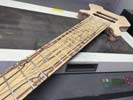
More body shaping done - moving on to pickups.
|
I have been working on the shaping and profile of the bass. Have also been getting the work done on the pickups since we have a plan now for their design. I have a little work to do to the wood covers which will have a design suggested by my customer. I will also now be getting started on the flatwork that will create the actual bobbin framework for the pickups themselves. As an 8-string multi-scale, the geometry will be a little complicated! |
|
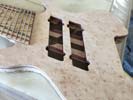
Both pickup cavities have now been successfully cut.
|
This is the successful outcome of the machining of the two pickup cavities based on the geometry we chose for the pickups. It was a slow and tricky job to align the machining programs with the hole geometry that already existed on the top plate but the luxury of having a CNC is that you can carefully and accurately dial in features like that if you have a good eye and are relatively patient! I'm also working on the back of the neck. |
|
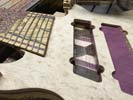
Establishing recess depth carefully as I do not want to interfere with internal cabling.
|
I decided to do the neck pickup recess first. This is the one that is closest to all the internal fiber optic clusters so I decided to do this one to get the most difficult work done first! Not only are we close to the internal wiring in terms of depth, but we're also fairly close in proximity to the end of the fingerboard. The photo shows the recess cut to the full depth and I did not run into any problems! |
|
Instrument is set up on CNC for machining of pickup recesses.
|
The bass is up on the CNC again - this time to have the pickup recesses machined out. I have set the bass up so that the centerline of the instrument is perfectly aligned with the x-axis of the machine. I'm planning to run 2 programs for each cavity, one to rough out most of the material and one to carefully profile the final shape of the recess so that it accurately matches and blends with the opening that is already cut. |
|
Working on the body shape and the neck profile.
|
I'm busy cleaning up the body around the sides and also removing more material from the neck area to get things closer to a finished profile. One of the cool features that is being exposed is the tapered purpleheart laminate under the curly maple top. We hope to expose that purpleheart layer when we profile the contour of the body so that it will show from the front as a thinner feature near the neck and a wider feature at the back of the body. |
|
Top has been successfully glued onto the body.
|
The top has been successfully glued onto the body and I have cleaned up some of the glue that was squeezed out during the compression process in the vacuum bag. Looks like everything survived the operation well and I now have to do a little more body shaping to bring the top and body profiles a little more together. Then I will have to re cut those pickup cavities to their full depth to make room for pickups. |
|
The gluing setup is now in the vaccuum press..
|
This is the body and top constrained inside the vacuum press. I typically give a glue setup l;ike this time to cure overnight and no exceptions here. It's hard to see the joint details when the instrument is surrounded in plastic but as far as I can tell everything is aligned and jopints appear to be good. I will remove this later today and will have to do some cleanup to see what we have, but it will be nice to have these parts together! |
|
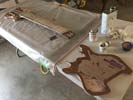
Glue mixed and on the parts - no going back now.
|
I needed to find a gap of about 3 hours in my schedule to get the gluing job done. It was a question of making sure everything was prepped on the mating parts, having everything I needed on hand, and no interruptions! I'm using epoxy on this operation because I need to fill gaps around the fiber optics. Tricky but going ok. |
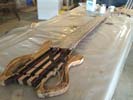
Body ready for top plate.
|
|
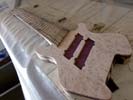
Test fit prior to gluing top is successful.
|
I tested the revised top plate on the body and it looks like everything is gong to fit together as is. My next decision is which adhesive to use. I may use a combination of epoxy (to fill voids surrounding the fiber optics) and wood glue which will require some careful planning and co-ordination. I'm going to dedicate an area to this operation and make sure I have everything I need at hand before starting. Should be interesting! |
|
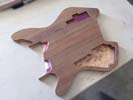
Second of two veneers now securely attached and trimmed and cleaned up.
|
I got all the excess dark veneer trimmed off but it was a LOT of work because I have to carefully trim around the pre-existing recess holes and clean all those details up. All went well and the top is officially ready for the body. I need to check whether the addition of the two new veneers will change the fit I achieved earlier between the top and the neck/cables. Even if it did it will not be a big adjustment. |
|
Gluing lavoa veneer onto the top plate.
|
This is the top plate now getting a contrasting Lavoa veneer applied to the bottom. The combination of these two veneers will make a nice dividing pinstripe combination along the perimeter where the top meets the body. Once I get this veneer trimmed up the top will go on the body. I will just have to be careful to not compromise the fiber optics and other wiring in the process of getting the top fitted and clamped down. |
|
Gluing maple veneer onto the top plate.
|
I realized that since we have a purpleheart base to this top it will need a couple of veneers on the joint surface so that it matches the other joints in the instrument. In this photo I am gluing some maple veneer onto the bottom surface and I will probably add a veneer of lavoa on that also. This will match the joint treatment I used when the birdseye maple went on the top of this assembly. |
|
Working on the continuous grain (and in this case - enhanced) pickup covers.
|
I have been gathering data and making plans for the top plates of the pickups for this bass. The base material will be the Birdseye maple which was harvested from the top plate, but we are going to add some interesting details to bring in some of the other woods and features of the bass. Right now I'm getting some veneers added to the bottoms of the cover pieces and will then add material for the body part. |
|
Wiring channels are now in place.
|
Thanks to a CNC machine breakdown this job was delayed a few days but I got parts and managed to get my machine running again and first priority was finishing this task. I now have a large slot at the back which will house grounding and other wires and a smaller channel in front of that whose purpose is to house the battery power cables running to the control cavity. Only way to establish these is before the top goes on! |
|
Machining channels for wiring.
|
In this photo I have the instrument secured to the CNC table so that I can cut a few wiring channels before the top goes on. Most importantly will be the grounding channel from bridge units and the channel that will contain the battery power from the battery cavity to the control cavity. Since the bridge units will have individual grounding there is also going to be a channel wide enough to contain the 8 wires from those too. |
|
Test fitting top prior to gluing.
|
I spent a little time checking the fit between the front of the top plate and the area under the fingerboard where all the fiber optics and wired exit the neck area. It is critical that I do not put pressure on any of these connections while gluing the top plate on so I have been checking for contact points and removing a little more material under the top plate just to be safe. That area will ultimately fill with adhesive. |
|
Filler plate machined and glued into top. Also sanded flush.
|
I fitted and glued the purpleheart plug tightly into the back of the top plate and sanded it flush with the rest of the joint surface. This will now allow me to create a really strong joint with the top pf the body. It also helps by giving me a little more parent material at the bottom of the bridge pickup where all the parts fit quite closely together. Next stage is to make sure the fit between the top and the body is good. |
|
Top plate machining complete - will get a filler plate in there so i can glue top to body.
|
This is the top plate aftter the machining was done. I took the area under the pickups and machined it down to one level. I'll use the same program geometry to cut a pefectly fitted piece of purpleheart which will fit very snugly inside this machined section. I will glue that in and that will provide me with a solid and sturdy top which i can then glue onto the body. Once that's done I will machine out the remaining material from the pickup recesses. |
|
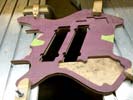
Top plate waiting for me to machine out a filler section.
|
I have to flip the top plate over so that I can machine out a section underneath. Normally I would not have to do his but I need to make sure I have some additional purpleheart in a couple of areas and to achieve this the best way is to drop in a purpeleheart plate underneath and then cut the remaining material out when I cut the pickup recesses to full depth. I got the top plate set up and squared and just have to get a program. |
|
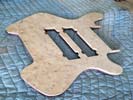
This is the top plate with the pickup material harvested out.
|
Finally got the pickup tops harvested out of the top plate. Had to add an extra operation or two because of the thickness of the top and the fact that that big slice of purpleheart is very hard. Now that I have this done I will add a couple if small inserts to the back and then get this thing glued onto the body of the instrument. I have flatowrk in the works for the pickups - they are going to be pretty big coils!! |
|
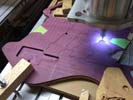
Machining the pickup pieces from the back side of the top plate.
|
I had to get special cutters for thsi purpleheart as my regular ones were too short to achieve the desired depth and were breaking. I am now cutting out the pickups from the back with different end mills and so far everything is moving along. I will need to take a few cuts to achieve this as chips and dust get caught up in teh slot. Nevertheless we are making progress and I will post a photo of the end result! |
|
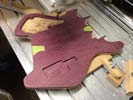
Getting the back of the plate machined so that I can remove the pickup covers.
|
I finally got an opportunity to get the fixture made so that I can machine out the back of the top plate. I also had to do some careful planning on the vector program to make sure that everything will be machined in the right place. I have the reversed profile of the pickups machined into the fixture location face and I'm using that to position the parts I can't see or measure. I'm pretty confident it will all work out! |
|
SCutting out (some of) the material for the pickup covers.
|
I established the best geometry and relative positions for the two pickups and created a program that I could use to harvest out the material from the top plate for use in creating the wooed pickup covers. The covers may be a combination of wood and inlay features but it's always good to try to use the continuous grain parent material if at all possible. I have to mill out the profile of the two pickups and then flip the top over and finish from the back. |
|
Setting up the top so that I can remove the wood i will use for the pickups.
|
I'm now setting the top plate of the bass up on the CNC machine to cut the profile of the pickup covers. I will remove the material from the areas that the two pickups will occupy and use those two pieces for base material for the custom pickup covers. Using the continuous grain of the birdseye maple will add continuity to the appearance of the bass. We will also be adding some other wood to reflect other features in the bass. |
|
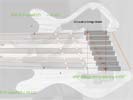
Working on the pickup shapes so that I can cut pickup pieces from the top!.
|
Before cutting into the top plate I am back into the vector program to make sure that the retaining screws for these somewhat oversize pickup bobbins do not risk interfering with the cables that are run through the inside of the body. I just wanted to make sure placement was established and that all the math added up. Those covers (shown in yellow) will in reality have slightly rounded corners. Now to transfer that to the top plate! |
|
Managed to get the top plate to fit arund all the internal wiring at the back end of the neck!.
|
After a few sessions of grinding away at the intersection of the neck and the top plate I was finally able to get a complete fit. I want to plot out where the two dual coil pickups are going to be located so that my retaining screws will be clear of any of the wiring etc. that lives inside the body. I'm pretty confident that will be fine. I'll probably harvest out the birdseye covers as we may want to use that material in pickup covers. |
|
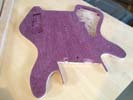
Doing some carving on the underside of the top plate!.
|
One of my goals today was to start the carving below the top plate that will provide clearance for the areas under the fingerboard end where all the wires exit the neck. It's basically a case of grinding away wood and trying the fit - noting where the interference is and grinding again. Repeat ad nauseum. End objective here is to have this top plate fit snugly under the end of the fingerboard against the back of the neck. |
|
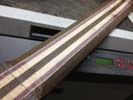
Getting started on carving the back of the neck!.
|
I am getting started on some mass and weight relief on the back of the neck section of this bass. I've been working on the internal stuff and didn't want top damage any of the exposed wires and fiber optics so I wanted to wait until that was all safely sealed up before getting back to using machine tools. Right now the goal is to get the neck section closer to a finished size than it was before. Quite a lot of carving to be done! |
|
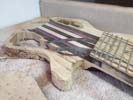
The recesses for cables and wires have been filled and sanded and scraped flush with the top surface!.
|
After some careful masking and preparation I mixed up a wood chip and epoxy mixture and carefully filled in all the gaps around the wenge blocks. It took several successive batches to get everything filled and then some time sanding and scraping to bring everything back down to a flat condition so that I can glue the top plate onto the body. All the internal cables are now constrained in a solid state condition inside the body! |
|
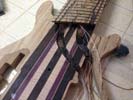
Filling the slots in the body after potting the fiber optics and other cables. Based on hardware availability we have also been looking at piezo for secondary sound signal source!
|
With the fiber optics enbedded inside the body I wanted to re-establish some of the parent material lost when cutting the channels so I cut pieces of wenge and glued them into the unused portions of the slots. I will fill the remainder with an epoxy and wood compound and sand everything flat so that I have a good surface onto which I will glue the birdseye maple top. We discussed switching to piezo as an alternate sound source. |
|
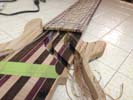
Working on getting the fiber optic cables constrained inside the channels in the body.
|
I had to do a couple of other calculations on the locations of the pickup screws before I proceeded with the rest of the potting of the cables. I will have four adjustment screws on each pickup and I needed to plot out where those needed to be so that they didn't interfere with the bundles of cabling buried in the body. I managed to get things distributed in such a way that I will not hit anything when I establish those holes! |
|
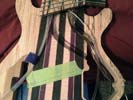
All the wiring has been contained inside one of the body channels. Now on to the fiber optic cables..
|
Very tricky work but hopefully you can see in this photo that all the internal wires have now been bundled and glued in place inside one of the channels in the body. This gets half of the cabling nicely out of the way. Now it's time to tackle the remaining cabling. Although much less easy to bend there are fewer of these cables so I should be able to get them under control pretty quickly. When the top is on we'll decide about hard wiring based on supplier. |
|
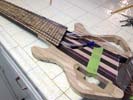
SGluing wires and fibers sytematically into the channels I routed.
|
I am in the middle of the task of consolidating cables and potting them into the channels that route them all into the control cavity. A little time consuming in that it is difficult to work with more than 2 or 3 items at a time because they have to fit tightly and neatly together. Nevertheless things are moving forward and so far everything is going to plan. I am anxious to get the top plate on the instrument! |
|
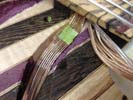
Starting to route 26 wires to the control cavity!.
|
I have numerous cables below the fingerboard which I now have to deal with. I am taking them in groups of 8 and in the photo you can see the first group aligned and glued to the body material of the bass. I will also glue these to the base of the slot I cut so that they can be routed to the control cavity in a veri organized way. I want to keep them as collectively compact as I can since space is an issue. The hard wiring may end up no being used. |
|
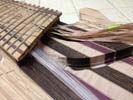
Getting started on routing the wires and cables through to the control cavity.
|
Now that the fingerboard is securely on, I have a large amount of cabling I have to deal with. They all have to end up in two separate groups in the control cavity. I'm starting with the fiber optic cables as they are more potentially fragile. My goal is to layer then deep enough in their channel so that I can add a wood filler on top of the bundled cables. This gives me a safety zone when I end up machining the pickup cavities! |
|
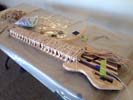
Fingerboard being glued onto the the neck section.
|
After a morning's preparation the fingerboard is being glued on. I had to make aboslutely sure the fiber optics were in the right place before everything else was secure. The rubber band system is brilliant in its simplicity. I have to use this system whenever I have fiber optics because the vaccuum bag would have a chance of damaging the fibers. This sysem only applies localised pressure seems to do a great job! |
|
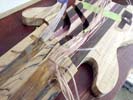
Getting the wiring organized before gluing.
|
Now that the slots are a little deeper my next task was to carve more material out for the transition area where all the internal cabling leave the neck. That done, I had to organize the wiring so that they stayed together during the upcoming gluing process since that is a task you can only do when the fingerboard is still off the instrument. Despite the possibility that the hard-wiring option may not be used I am running the wires anyway. |
|
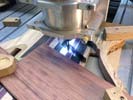
Decided to make the wiring slots a little deeper to be on the safe side!.
|
I decided today to run the two slots for internal cabling just a little deeper. I have plenty of parent material at the back of the bass and I wanted to nest the wiring a little deeper so that I could insert a substrate of hardwood on top of the potted wires. Just a safety precaution but you only get one chance to do something like this. Once this extra clearance has been established, housing them all will also be easier. |
|
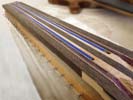
Fixture is ready - now we have to glue fingerboard onto body!.
|
Here we have the neck of the bass places on the fixture that I am going to use to apply even;y distributed pressure on the fingerboard when we glue it to the neck. With all the internal cabling and truss rods involved, this is truly a one-shot deal. However, having the fingerboard securely attached to the body is a true benefit as it protects all the wiring under the fingerboard. Stay tuned for more photos! |
|
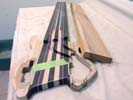
Making a fixture to allow clamping of fingerboard onto neck.
|
I have deemed the fingerboard ready to be attached to the neck section of the instrument. Due to the complexity of managing numerous wires and fiber optic cables, it will not be practical to use a vaccuum press or clamps to secure the fingerboard while the glue cures. Best option here is to make a fixture (see redwood blank in photo) and use that to apply rubber band tension as is done in acoustic building. Fixture now in progress. |
|
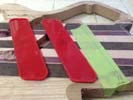
Doing a pickup mockup to check positions.
|
I needed to cut some replicas of the pickup shapes to see accurately where the pickups placemenrt should be and to make sure that in selecting the best pickup locations I will not be compromising anything else going on in the interior of the body. I decided to add a tiny bit more to the pickup blanks to give me more space for the placement of the adjusting screws. Otherwise everything was looking fine. |
|
Pickup geometry for the DC Monster Bass.
|
These are the anticipated pickups we will use on this bass. I need to keep the surface area under centain limits due to the lack of space but at the same time I want the pickups to be fairly hot and dynamic. Running two magnets staggered along the length of the bobbins will maximize space and the amout of copper we will be able to wind on the bobbins. I am almost ready to cut these bobbins on the laser so we can start winding! |
|
Looking at the placement of the pickups for best use of available space.
|
The pickups on this bass are just as cutting edge as the rest of the technology we are using. Right now the plan is to put a pair of 8-string dual coiled pickups in there. Space is tight and I have had to do some careful routing of the internal wiring to stay clear of pickup speace but with some care I think everything will fall into place together. These pickup drawings are for placement only - I am working on revised geometry - more later. |
|
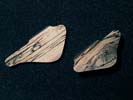
Two sturdy top quality truss rods going into this neck.
|
I can't remember if I photographed these before, they are the two cavity covers I harvested out of the back of the body. I pulled them so that I could add a veneer of cross grain wood to make sure they remain stable. They will make beautiful continuous grain covers for the back of the instrument. They will be attached using neodymium magnets. The extra veneer will make them very strong and prevent any warping. |
|
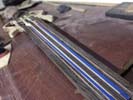
Two sturdy top quality truss rods going into this neck.
|
I am using my best truss rods on this oversize neck. They are very robust two-way rods that have very little play in them and work very well in multi-string instruments. They are a little wider than most other rods but I have never seen one fail! I wanted to make sure that they fit as expected and all the clearances were correct. They will be slightly staggered to match the fingerboard angle at the nut end. |
|
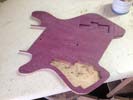
Have some work to do to prep the underside of the top plate!.
|
This is the underside of the top plate. You can see the recesses which correspond to the cavities machined into the body. I will be marking this component out for pickup harvesting and also some of the channeling that I will need to direct the wires and fiber optics throuigh the body to the control cavity. I will also probably add at least one decorative veneer onto this joint face since it will be sculpted to ve visible around the maple top plate! |
|
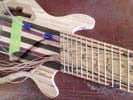
Got the fingerboard to fit neatly on the neck despite about 30 wires and cables!.
|
Good news to report! I was able to get all the internal wiring under control and I cut relief under the fingerboard to the point where all the cables are now nested in the neck and the fingerboard fits snugly onto the neck surface. This is significant because I can now plan to attach the fingerboard. I need to make sure that if I permanently glue on the fingerboard - that I can then position and attach the top after the wires are run. |
|
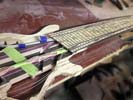
Working on fitting fingerboard to neck!.
|
I have to carefully coax the fingerboard (a large investment of my time) and all its various wires and cables onto the neck to make sure everything fits together. Good news is that we are very close - but I can feel a couple of small areas of interference so i will go back in and gring out some more material to make everything fit. I also have to make sure that there is sufficient space in the body area for all these wires to flow through! |
|
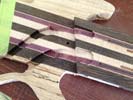
Hand carving the channels that will contain all the wiring from the neck.
|
In the ongoing quest to prepare for assembly of fingerboard and top plate I have to finish the work rrequires to create channels for all the wiring that exits internally and has to be channeled through the body to the control cavity. I already machined channels which will retain the cabling below the pickups but I am now carving out the transition areas. I'm still going to run all the cables to cavity area incaase they are needed later. |
|
Had to get inventive keeping the cables out of the way of tools I am using.
|
The frets which were recently installed are still a little oversize by necessity, and I have to grind them down closer to the edges of the fingerboard and blend them flush. In order to do so i have to keep all the internal wiring and fiber optics safely separate so I attached them to a dowel while I went ahead and did all the work to the fret ends. After some careful grinding and sanding we now have a full set of nicely finished frets. |
|
Wrapping up all the wires so I can get the frets dressed.
|
In the process of preparing this fingerboard for assembly i have to dress the ends of the frets to bring them down to the same level as the edges of the fingerboard. Unfortunately with all these wires and cables handling is a bit tricky so this is the board with most of the wires safely secured so that I can take care of the frets. Initially I take the ends down on a sander and then dress with files. Frets are stainless so they are HARD. |
|
Machining channels for the many cables inside the body of this bass. I'm keeping them in the bass although our circuitry source stopped producing the hardware we wanted. May switch to piezo as an alternate.
|
Today's challenge was to machine out a couple of channels in the instrument body. These have to be wide and deep enough to contain the numerous cables but they also cannot interfere with the pickup cavities. We have a relatively small body on this bass so I have to be careful about how I use the available space! We may have some changes to the signal processing part of this bass as our electronics provider no longer makes the special circuitry! |
|
Pickup placement versus cable channels - getting it all to work together.
|
I am busy marking out where all the components will co-exist inside and outside this bass. The pickups occupy a good amount of the internal space in the center of the body so I want to be sure I have enough remaining room to channel all the cabling from the fingerboard through to the control cavity. basically they have to run into a channel nelow the fingerboard at the end of the neck and then curve in an S-shape around to end up in the cavity. |
|
Laying out channels for the wiring inside the instrument.
|
I have the fingerboard aligned with the body to mark out where I need to cut channels to hold the groups of cables. I prefer to run them in separate channels so the task here is to make sure I have enough space between the end of the neck and the control cavity to be able to do that. I will mark out the optimum layout and program that so that I can cut the channels cleanly on the CNC. |
|
Doing conductivity testing.
|
All the frets are in and everything seems solid as I had hoped. Each wire is numbered according to its related location and function. While I am setting up to machine wiring channels I am also working on checking the integrity of the fretting (these are long frets and seating is important). The body on this bass is quite small and I am going to ghave to be extremely careful about establishing cabling channels through the body! |
|
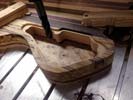
Control Cavity has been successfully machined.
|
I carefully machined out the interior of the control cavity. I had to be a little cautious at the area where the two parts (body and top) met. All went well although I run the operation fairly slowly just to be sure. We now have a full depth cavity which extends down into the top plate. I will now need to repeat this operation with the battery cavity. Once that is done I will trun the bass over and machine the channels for the wiring. |
|
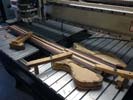
Setting up to machine the control and battery cavities.
|
Now that we have pinned the top to the body in its desired location I can set up to nmachine out both the battery cavity and the control cavity to their finished sizes and depths. Once that is done I can remove the top (which will have a portion of both cavities machined into it) and concentrate on getting the wires and fiber optics channeled through. That will in turn allow me to set up for gluing the top and the fingerboard onto the body! |
|
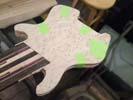
Getting ready to drill pin holes through the body and into (but not through)the top plate.
|
I have to now find a way to pin the top plate onto the body. My goal here it to create a secure and accurate locating system between these 2 pieces so that I can machine out the cavities BEFORE I glue the top on. This is necessary because I have so many wires and optics to route through to the cavities. I have to invent a way to create finished cavities before the top is glued on, so pinning them temporarily seems to be the only way! |
|
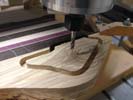
Cutting out material on the body to allow release the cavity cover for the battery compartment.
|
Next thing we have to do it machine out the material below the battery cover lid and plug that area with a stable wood which will ultimately allow us to cut the battery cavity. The insert will provide material into which I will cut the cavities once the top is glued on. I am happy to get this part completed! |
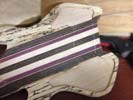
This is the back of the bass with the plug for the battery compartment glued in.
|
|
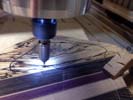
Cutting out the cover for the battery compartment.
|
In order to be prepared to assemble the fingerboard and all its attachments to the body I have to first get a battery compartment established and cut out from the body material. I will need three 9v batteries so the compartment has to accommodate that. At the same time I have to leave room for a useful belly cut to the bass and also room for the pickups. I made the battery cavity as large as the other requirements would permit. |
|
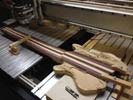
Setting up for machining of power supply cavity.
|
I have to plan for a significan power source for the electronic components of this bass. I have enough room on the upper bout to establish a cavity that can hold an 18v power supply (3x 9v batteries). I expect this will be sufficient for our active electronics, MIDI and LED demands. I am currently setting up the instrument so that I can remove the continuous grain cover material. After that I will create the cavity recess itself. |
|
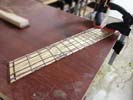
Happy moment - all of the 26 frets are in.
|
After some intense hours of setting up each fret we have all the frets now installed in the fingerboard. I am very happy to be moving past this point and now getting things ready to assemble the fingerboard onto the neck. The sooner I have it permanently fixed in place the better since it will balance out some of the stress that the frets put into the fingerboard when it becomes a rigid part of the instrument assembly. |
|
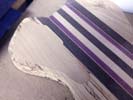
Top surface bening prepped for top plate.
|
In preparation for the top plate going on I leveled the cavity plug that was glued into the control cavity. I am planning to cutanother one on the upper bout which will provide space for batteries (we may need 3x 9v since we have active electronics, MIDI and fiber optics/LEDs all competing for power. Even although we have a small body, it should be no problem since there is room for that as long as I am careful |
|
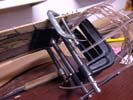
Individual fret install - the big 4
|
Clamping stainless steel frets to an 8-string fingerboard and navigating round dozens of wires and fiber optics is a challenging task. I have to get these 4 frets done individually because there is no room to apply adequate pressure to more than one at a time. Behind the frets there are numerous wires and optic cables coming off the back of the fingerboard which have to be avoided in the clamping process. It's working though! |
|
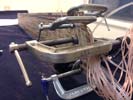
I have 4 frets that need special treatment!
|
In the process of installing the frets it is always necessary to have a good solid back surface upon which to support the pressure it takes to hammer the frets into the slots. There are some fret positions on this fingerboard where that is not possible due to the area that is occupied by the internal cables. It is therefore necessary to apply external pressure to get these 4 frets into their respective slots. Little tricky. |
|
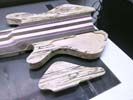
Continuous wood cover and cavity ready to be re-machined.
|
Here we see the results of two operations. Firstly the control cavity has been filled by a solid piece of hardwood that has been custom machined for a perfect fit and glued and pressed into place. This leaves a surface which the cover will rest upon. You can also see the cavity cover which was harvested from the parent material of the back. This will become the continuous grain cover after all this work has been done. |
|
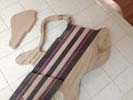
Working on the cavity after cover has been harvested.
|
First stage in this process is to cut out the material from th eupper side of the body to the point where the cut depth meets the cut that we previously made on the opposite side defining the cavity cover. When those two cuts meet - the cavity cover becomes a separate piece and can be safely removed for futher processing. I till the hole with the piece I subsequently cut - it is a perfect match and presses into the cavity. |
|
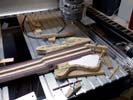
Cutting out the cavity cover.
|
I have to get the body of the bass ready for all the fiber optic and wires that will end up in the control cavity. The first step here is to establish the geometry of the cavity cover based on available space. Once that is done I set the instrument up on the machine and I will cut the profile of the cover using a 1mm end mill. The cut will be just deep enough that when I machine from the opposite side it will be released. |
|
The back of the fingerboard has now been potted and returns to a solid state.
|
The "potting" of the areas on the back of the fingerboard has been completed. It became necessary to do the filling of the gaps in stages so that I minimized the buildup of filler. If I let too much filler accumulate, it was very hard to remove because it sets to a glass-like consistency. My best approach was to apply the filler in several lighter coats and sand and scrape level as I went. End result is just what I was hoping for! |
|
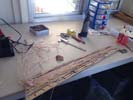
Getting the remaining fiber optics to fit into the fingerboard channels.
|
Work continues on the installation of fiber optic cabling under the fingerboard. Each one of the fiber optic cablles has to be threaded through the little hole in each of the side dots and secured with adhesive. I then, if necessary, bend the cables to fit them into the channel without too much resistance. When that feels right I glue the cables onto the fingerboard to hold them on the curved area and also to temprarily secure them fiurther down. |
|
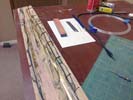
Fiber optics almost complete.
|
The installation of the fiber optics moves on. They are a little tricky and painstaking to install as care must be taken not to mechanically stress the optic cables, plus they have to be temporarily glued down so that they lie under the joint surface of the fingerboard, after which the gaps need to be filled with finishing epoxy so we end up with a solid-state assembly. Only a few more to go and we'll start getting the channels ready in the body. |
|
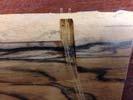
First two fiber optic cables installed.
|
This is a photo of the first two fiber optic cables to be threaded through the fingerboard. They are cut a little oversize in length for trimming at a later stage (after assembly). Each one will be carefully potted in to its respective channel so that the back of the board returns to a solid-state condition. When these are all installed and the back of the board is gap-filled again, I'll install the rest of the frets. |
|
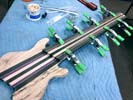
Installing Carbon Fiber reinforcing rods.
|
Based on the work being done to the back of the fingerboard I decided to install the carbon fiber reinforcing rods into the neck so that we are ready to attach the fingerboard onto the rest of the instrument soon. Since we will have a lot of wires and fibers to deal with the assembly will be quite a task. The body will have to be prepared with channels and cavities so that fingerboard and top plat go on at the same time! |
|
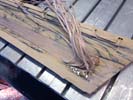
Cutting the fingerboard from the support material.
|
I have to remove the fingerboard from the support material which has to this point been very necessary while the various machining operations were being done. When the fingerboard is cleaned up I will start gluing in the fibers. Once that is done I will pot the remaining machined areas so that we are back to a solid structure. That in turn will provide a fingerboard with enough integrity to allow me to install the frets. |
|
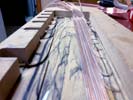
MIDI Wiring is in! Now on to fiber optics.
|
Over the last few days I have been patiently adding the wiring in the back of the fingerboard. The cables need to be threaded through the holes drilled in the fingerboards and then each one run carefully along the underside and glued in place. At the other end I have numbered each wire for future reference. Now that these are all installed I will pot this side with epoxy to make sure it's all "solid state" and get started on the remaining cables. |
|
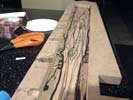
Addding the wiring for the MIDI system.
|
I was planning to install all 26 frets before putting in the wiring under the fingerboard but I discovered that it was impossible to install the frets when the integrity of the fingerboard was compromised by the channeling necessary for the MIDI wiring and the fiber optic cabling. Therefore - I have been forced to install all the cabling and fill the recesses in the back of the fingerboard before frets go in. |
|
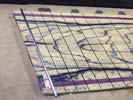
Installing fretwire and establishing an electrical connection from the fret to the control cavity.
|
After a couple of false starts I found the best way to install the copper wire in the back of the neck, seal it to the back of the fingerboard, set the copper core through the fret slot - bind it to copper tape and while that is all haging together, install a long stainless steel fret to complete the assembly. I checked this one for electrical continuity and it looks good so I will now proceed to do the same thing to the 25 remaining positions. |
|
Cutting Stainless fretwire.
|
Moving along here - next step is to cut all the Stainless Steel frets. Because they are so much harder than nickel frets I use a rotary abrasive cutter to cut this wire. I will have all 26 frets set up and ready for installation, I'm going to also prep all the wire and the copper tape so that everything is pre cut. As I install each fret weith its tape and wire, I will seal it with epoxy so that the union between the parts cannot be damaged from handling. |
|
Connecting fret to hard-wiring.
|
This is basically the plan for the wiring scenario. The frets are stainless steel so they do not respond well to soldering. Therefore my only other option is a carefully designed press-fit when the fret is installed. The wire is connected to copper tape and that tape will be constrained inside the fret slot when the fret is pressed in. I'll check continuity for each fret as I install and as they are eatablished I will epoxy them in to make it all solid-state. |
|
Cutting channels in the back of the fingerboard for the fiber optic cables.
|
Back on the CNC again and this time it's to cut a number of longditudinal recesses for the Fiber Optic cables that have to live inside the neck. Basically this results in a number of channels which combine in width blending into one as they move down the back of the fingerboard. Each one connects with its respective pre-drilled side dot and allows its fiber optic to run done to the body end of the neck. |
|
Dots are drilled for fiber optic cables.
|
The inserts have now been drillied so that I can locate the fiber optic cables into the centers of the side dots. These are actually drilled slightly undersize so that I can custom fit for the cables at the time I install them, but it was inportant during this setup to establish the cencentric hole positions before I removed the fingerboard from the machine table. I can now set up the fingerboard so that I cut the recess for the F/O cables. |
|
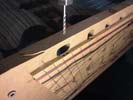
Working on the side dots along the fingerboard.
|
So far the setup I am using to establish the side/fiber-optic holes is working well. This afternoon I cut the 13 holes needed for side dots. each carefully located along the upper edge of the fingerboard. I also experimented with cutting filler material on the laser. My goal is to have white side dots (which will provide adequate contrast with the wood), and in the center of each of these dots drill a hole that will house the fiber optic cable. |
|
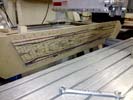
Setting up for side dots and F/O positioning.
|
I have to now hold this fingerboard in a special way in order to establish side dots that will also finction as retainers for the ends of the fiber optic cabling that we will be using. The board has been set up at right angles to the table so that I can carefully position the dots and cut the recess for for each one. I will probably insert material and then re-drill in each position to establish a hole suitable for the fiber optic diameter. |
|
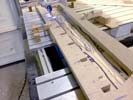
Modifying fixture to machine Fiber Optic cable channeling.
|
now that we have a recess on one side of the fingerboard fopr the 26 wires, we have to cut channels in the other side of the fingerboard to allow us to run the fiber optic cabling from the side dot positions down under the frets to the body end of the fingerboard. This not only requires a recess for the cables but each cable has to exit the fingerboard at the exact position for the fret dot on the edge of the fingerboard. Tricky but worth doing right! |
|
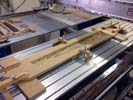
ready to machine wire and fiber slots in the fingerboard.
|
Left: Fixture is now attached to the CNC table and we are ready to write a program and start machining the wire recess. Right: The wire recess has been machined into the back of the fingerboard exposing the 26 holes drilled through the fret slots. The recess is just deep enough to accommodate the wire diameter. |
ready to machine wire and fiber slots in the fingerboard.
|
|
recess for 26 wires has been cut.
|
The photo on the left shows the fingerboard being glued onto a panel that will provide rigid support while the channels for the wiring and the fiber optic cabling are cut into the back side. It is necessary to support thr fingerboard around its perimeter while leaving about 90 percent of the back surface exposed for machining access. This will allow me to set the board up on the CNC and guarantee that it is level and won't move! |
|
Drilling wire holed through the fret slots.
|
The first step in setting up this fingerboard for MIDI sound is to drill a small hole through the board at each of the 26 fret slots. These holes will accommodate the connections which will run to the control cavity. When the 26 holes are completed the fingerboard will be prepped for milling. It is a lot of time consuming detail work at this stage of the game. I hope to get it all done cleanly so that the fingerboard can be attached successfully. |
|
Preparing to cut the neck joing in the top plate.
|
The top plate has been successfully machined and we have achieved a nice fit between the top plate and the end of the neck. We have more work to do on the top plate but this allows me to align all the mating pieces correctly so that I can do some finish work to the profile of the instrument body. The top plate will not go on until we have created channels for the MIDI wires and the fiber optics in the instrument body. |
|
Preparing to cut the neck joing in the top plate.
|
While the other work on the fingerboard is going on, it is now necessary to section out the exact shape of the end of the fanned fret neck into the top plate of the body. I have taken accurate measurements from the physical size of the end of the neck and transferred that to the top plate. I will then cut the profile in the CNC so that I can make whatever minute adjustments I need to achieve a perfect fit on this irregular geometry. |
|
fingerboard removed from MDF backing!
|
The next stage for this bass is to do some intricate work on the back of the fingerboard. According to our plan we have connections running from the fingerboard to the control cavity , and at the same time, 14 or so fiber optic cables for side dots. This is going to be a very busy area and some machining is now necessary to create channels for all the wiring without compromising the integrity of the fingerboard itself. |
|
Getting the fingerboard ready to put the frets in!
|
All the fret slots have been extended through the purpleheart inlay and we are now ready to get these stainless steel frets installed. Because of the width of the neck and the number of frets this bass requires over twice the normal amount of fretwire! I sanded the wood surface to a nice smooth finish so we can now start fretting! I also was careful to establish that the S/S frets had sufficient conductivity to work with our internal system! |
|
Fingerboard is ready for some intense work!
|
I am currently working on the fingerboard. Right now I am extending the fret slots through the purpleheart inlay (which was decided upon after the original fret slots were machined. As soon as that is done I will go ahead and install the fret wire. Normally I would do this later but we have some considerable work to do involving wiring and fiber optics and to that end I decided it would be better if the frets were in first! |
|
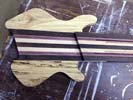
Top of instrument and end of neck machined
|
We have now established two critical machined surfaces. One is the top of the instrument onto which we will be gluing the top plate - the other is the geometry that defines the area at the body end of the fingerboard. I will be using this datum to establish where the fiber optic cables will step down from the fingerboard to the body - and also accurately place th etop plate on the body once the fibers are routed through to the control cavity. |
|
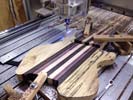
Machining the neck and top plate joint area
|
The next operation on this bass is to perform two tasks. One is to establish the actual geometry for the joint between the neck and the top plate. This is done with a cutter which generates the exact required angle at a pre-determined position and at a depth that suits the top plate thickness. Once that has been done I have to remove material to the same depth on the remainder of the top of the bass creating the actual joint face. |
|
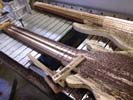
Removing excess material from the neck!
|
|
|
|
Left: I set the instrument up on the CNC and machined a lot of the excess wood off the back of the neck. This saves some work later on when the carving of the neck happens. Right: Having glued on the body halves I was able to remove excess material from the back of the instrument. Ready now to machine the top. |
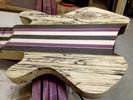
Starting to shape the back of the body!
|
|
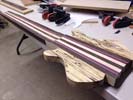
Both body halves have been attached.
|
|
|
|
(10/29/12) The gluing of the two body halves went well. The two pieces are a little oversize because I want to yield a nice clean match with the top plate when it goes on, so I will refine the body shape a little but save the final shaping until the top is on. This Spalted alder grain reflects the B&W Ebony fingerboard very well! |
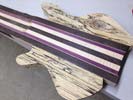
Ready for some body shaping!
|
|
Attaching first of two body halves to the core section.
|
|
|
|
We are now in the process of assembling the body halves for the bass onto the center core piece. Always safer to do these one at a time so that they are guaranteed to be in the correct location and squate and flush to their mating parts. This will give us abetter concept of what the finished instrument will look like! |
Second body half is being glued on.
|
|
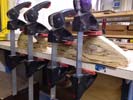
Gluing decorative veneer to the body joint faces.
|
I have done some stabilizing to the sirfaces of the Spalted Alder and machined the joint surfaces flat and square. I am now gluing decorative veneer to the joint surfaces so that we continue the pinstriping between these body halves and the center core of the bass. Once these have dried I'll trim everything up and get them ready to be assembled. Once that has been done we'll have a very recognizable instrument! |
|
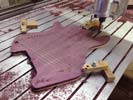
Machining the top plate to its final thickness.
|
Having glued the purpleheart panel onto the back of the tapered maple top - I now have to machine the purpleheart using the maple surface as my datum, so that the entire top ends up being a consistent thickness. When this is done - I'll have what we envisioned: a bookmatched top plate in two layers, separated by two contrasting veneers, and those layers will be accurately tapered from front to back! |
|
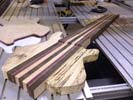
working on the body parts.
|
I'm working on the two body halves that will end up being the back pieces of the body. I just sawed them closer to size and I machined the joint faces of each piece so that they are perfectly square and flat and ready for assembly onto the center core of the instrument. I have a couple of small operations to do before that happens but we;ll soon have a body on this bass. The top plate is also glued together. |
|
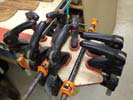
Clamping bookmatched top halves together.
|
Now that the two plates have been fully pre-assembled with their double veneers in between, I was able to carefully machine the joint faces so that we have the best possible joint prep for the completed top plate. The two halves are securely clamped to a glue resistant surface and then clamped laterally so that I apply adequate force to the joint surface. I leave this setup to cure overnight and we should have a very clean joint! |
|
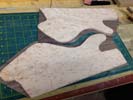
Top plates ready for veneer.
|
|
|
|
Left: I set the two maple halves of the top plate up in the CNC and machined them to a taper front-to-back. This is intended to facilitate an effect we are trying to achieve with a custom purpleheart border round the outside of the body. Right: I am gluing the first of two veneers onto the tapered plates in the vacuum press. |
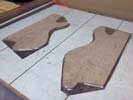
Top plates in the vacuum press.
|
|
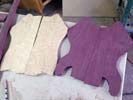
Components of a tricky tapered top configuration.
|
After some intensive research and consideration I have decided to approach the construction of the top body panel using two layers of material, one of purpleheart and one of birdseye maple. I will be assembling them in a carefully planned tapered configuration in order to get a special effect on the body which was requested by my customer. More to come on this in the deys to come. I think it will work out just fine. |
|
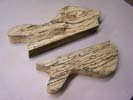
Spalted Alder body halves are rough cut.
|
Here are our two rear body halves. They were cut from the last pieces of Spalted Alder I had in the shop - but for this instrument I have a feeling they will add just the right amount of visual impact to the back of the bass. I'll have to harvest out the two cavity covers before we get too far along. Next I'll cut them closer to finished thickness and we'll prep them for assembly onto the center core of the instrument. |
|
Looking at Spalted Alder for the back wings - good match for the fingerboard.
|
Since we have committed to using a Pale Moon Ebont fingerboard, I discussed with my customer the option of using Spalted Alder for the back wings as a way to being the wood colors and grains together. The Spalted Alder is very similar in density to the Spruce we were originally considering. This wood will look spectacular on the finished product. I sanded it it smooth today in preparation for cutting out the body blanks. |
|
Gluing on pinstriping veneers.
|
We are getting ready to create the body of this instrument. In order to do so we have to add veneers to the joint surfaces so that the double-pinstriping effect is continued as a theme throughout the whole instrument. The body halves will also have veneers attached before they are glued to the neck/core. Pretty soon this "stick" will look much more like a real bass guitar! We will also have to plan to install our fiber optic cabling! |
|
The body top has been resawn for bookmatching, and sanded to clean up.
|
We split the piece of birds-eye maple in the saw and sanded the resulting halves flat. We now have the raw material for the larger part of the top of the bass. Our challenge is that we want to create a border around the top made from purpleheart. That border will be cut so that it is thicker at the back of the bocy and thinner at the neck joint. Also - between the two contrasting woods, we want to include veneer pinstriping. Working on that! |
|
Beautiful piece of birdseye maple for the top of the bass.
|
We are starting work on the top and body of the bass now that we have established the correct geometry. The top will be a combination of one of the nices birdseye maples I have seen, and a purpleheart border. These will have to be very carefully machined to achieve the result we are looking for. The birdseye sample in the picture will now ne resawn so that we can bookmatch two halves together. Should look awesome. |
|
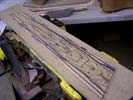
We added purpleheart stripes to the fingerboard
|
In order to bring the Pale Moon Ebony fingerboard into the rest of the instruments wood and color design we added two purpleheart strips as inlays down each edge of the fingerboard. It looks very unique and since we will be using purpleheart on other areas of the bass it will become part of the overall design. We'll go ahead now and install the frets and establish the routing for the fiber optic cabling under the fingerboard. |
|
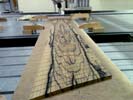
Fingerboard radiused and slotted
|
The fingerboard has been set up on the CNC and our first step was to machine the perimeter to exactly match the neck onto which it will be attached. Next we cut the compound radius on the top of the board to yield the best radius for this width of fingerboard. Finally we cut all 26 fret slots and nachined out the slot for the nut. We will move on to installing the large amount of fretwire very soon.
|
|
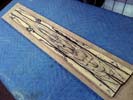
Fingerboard ready for machining
|
We have successfully glued the two halves of the fingerboard together and sanded the combined board back down to a level surface. Also - the board has been rough trimmed to a slightly oversize condition. The final sizes will be established on the CNC machine. I glued the fingerboard onto a piece of MDF so that it can be freely machined and will remain stable right through to the point where I install the frets. |
|
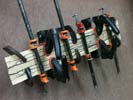
Gluing the fingerboard together!
|
Time to glue the fingerboard pieces together. I glued them together on a adhesive-resistant surface so that I could clamp down while also clamping the two pieces very firmly together. I am shooting for as clean a joint as possible, not just for looks but also for inherent strength. Once these pieces become one, I will start work on shaping the actual fingerboard. We have some fancy electronics to build into this part too. |
|
Doing a bookmatched fingerboard in black and white ebony!!
|
The rough sawn fingerboard pieces were run through my drum sander to clean up the faces and guarantee both halves are exactly the same thickness. Next I set the two pieces up on one of my machines and milled a very clean and square joint face onto the edge of each piece. I will now take these two bookmatched pieces and glue them together to create one solid blank. That will allow us to move ahead with the fingerboard work. |
|
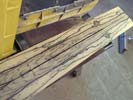
Doing a bookmatched fingerboard in black and white ebony!!
|
I just sawed a piece of Pale Moon Ebony in half which I am going to be using for the fingerboard of this bass. I'm going to bookmatch the two halves together to create a very unusual and visually stunning fingerboard for this relatively wide neck. The Pale Moon Ebony is very hard and will work well for a fingerboard. It is quite a rare wood and it is difficult to find pieces with a nice evenly balanced grain like this, |
|
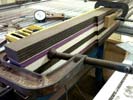
Cleaning up the joint faces for the body halves.
|
Now that we have machined all the top features into the core of the bass, we have to get it ready for assembly with the two body halves. First step is to machine both sides of the body flat and square so that we have a perfect joint surface. Once that is done we'll add some more decorative veneers in that area and then move on to getting the two body halves cut and ready for assembly. We're close to starting the fingerboard too. |
|
Core section is now being machined.
|
The core of the instrument is being machined on the CNC. First we establish the joint face on the top of the neck where the fingerboard will be attached. Then we machine the perimeter of the core section and the headstock and body angles. Next we cut the slots for the truss rods (in this case two) and finally we cut the slots for the carbon fiber rods. After that we do sme trimming on the bandsaw to remove excess material. |
|
Neck/core laminates are now glued up.
|
Core laminates of this bass are now all bonded together. The net result is somewhat larger than the finished core will be because I have left extra material for subsequent machining. This composite piece is now ready to spend some time on our CNC machine where we will clean up some of the dimensions and joint faces. We also need to start building the various parts of the body so that when the CNC work is done we can do more assembly. |
|
Gluing purpleheart to the neck.
|
The gluing continues. here we are gluing one of the purpleheart laminates to the neck assembly. Although Wenge and Purpleheart are both relatively dense woods they have great tonal properties and will contribute a great deal to the sound of this bass. Since this bass will be headless we have slightly less weight issues since we have no headstock or the combined weight of 8 tuners to worry about. |
|
First laminates are being glued together.
|
All of the various neck/body laminates have now been veneered and we can start gluing the components together. I glue one laminate at a time so that I can make sure the positioning of the pieces is carefully monitored and i leave each joint to fully cure overnight to ensure the best possible bond between the laminates. In the photo we are gluing one of the maple laminates to the center Wenge laminate. More to follow! |
|
Gluing maple veneer onto a purpleheart stringer in the vacuum press.
|
We are now in the process of applying pinstriping veneers to both sides of each neck laminate. In this particular neck assembly there will be 12 separate veneers involved. We apply light veneer to the dark woods and dark veneer to the light woods. When the neck is finally assembled this creates a very impressive effect. Takes time and a lot of cleanup work but the end result is worth it. Purpleheart stringer shown in the photo. |
|
Cutting the tapers on the ornamental mill.
|
The various laminate pieces that will combine to create the neck/core of the body have to be machined to their respective tapers. This is done on an ornamental mill where I can cut the pieces to create any angle. I start with the center laminate (Wenge in this case) and when that piece is machined I move on to the pairs of maple and purpleheart laminates. As soon as they are off this machine the are ready for the application of pinstriping veneers. |
|
All the neck laminates have been cut and sanded.
|
We have now cut all the various pieces which will be used in the construction of the core sect5ion of this bass. We will have a center strip of Wenge, with two strips of curly maple, two strips of purpleheart and on the outside edges, two more strips of Wenge. between wach laminate we'll also use decorative veneer pinstriping. This should result in a spectacular neck construction. The woods will also combine to provie a great tone. |
|
Some of the purpleheart we'll be using in the neck.
|
Our customer specifically requested that we use some purpleheart in the construction of the neck core of this instrument. Purpleheart is a very good tonewood for basses but is also a very dense wood so we have to be careful not to add too much weight to the instrument. We'll be splitting this piece of Purpleheart into two so that we can make two stringers from it. We will also be using purpleheart in some of the body construction. |
|
We have cut the wenge to the profile of the instrument
|
We spent some time working on the geometry of this instrument to make sure we can accommodate some of the new electronic technology into this bass. Because of its unique nature we had to be quite careful on the planning side so that we start off with the right profile. We cut these blanks based on our calculations and scale drawings and they should work out very well. These will be the outer sides of the core of the bass. |
|
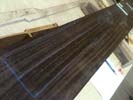
Ready to cut neck laminates.
|
Based on our scale drawings for this bass we have been able to create a cross-sectional template which we will be using to mark and cut out the various wood laminates for the center core of the instrument. We have already decided on the woods we will use for the laminated neck so the next step will be to rough cut all of these pieces on the bandsaw and drum sand them so that they are ready to be pinstriped with veneers. |
|
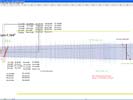
Modifying a previous multi-scale instrument drawing for this 8-string monster.
|
Time to make some calculations to see how our geometry works out on this bass. I am using a file for a previous fanned fret instrument to modify with the new dimensions of this 8-string instrument. My main goals here are to see how the two scale lengths interact assuming that the 7th fret will be square to the fingerboard (it doesn't have to be but handy for calulations). This will be a datum point from which other dimensions are distributed. |
|
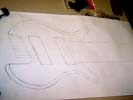
Body style has to provide for playing as a traditional and tapping instrument.
|
We have been working on the design of this instrument for some time. many consideratiopns have to be made as we are incorporating native MIDI technology into this bass. We want to make sure it is designed correctly from the player's perspective, but at the same time we need to make sure we are allowing for some of the mechanical and electronic goals we are planning. We are working on the last few design details. |
|
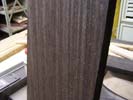
We also plan to use Wenge in this bass - it will help produce the tone we are looking for.
|
Part of this revolutionary instrument will be constructed of Wenge. This is a well-recognized wood that produces excellent bass-tone. Furthermore, this piece of wenge we recently found has a much tighter and straighter grain structure than is typical for this wood. It has great potential for a neck wood and I am looking forward to incorporating this material into the neck/core of this bass. Our focus is definitely on the tone!!! |
|
The top of this bass will have a large section of bookmatched Birdseye Maple.
|
We went wood-shopping yesterday and were able to find this very nice plank of birdseye maple. This caught our eye because the grain and birds-eye figure is quite a bit larger than you usually find in this type of wood. It should make a spectacular top for this upcoming instrument. Our customer has a custom design for thetop of the instrument so we need to get hold of some more wood in the near future to make this happen |

